A Quilt Along, Applique quilt projects, Dresden Plate Quilt, Halloween quilts, Mini Dresden Patterns, New quilt pattern

Candy Corn Sampler Quilt-Along Step 6, Dresden Pumpkin Blocks

Welcome to Step 6 of making your Candy Corn Sampler!

Thanks for sharing pics on our FB group, Sewing With Susan!

Step 6 is Dresden Pumpkin Blocks.

No need to make the flying geese blocks today,

but you’re going to need to make them sooner or later, lol.

I borrowed these blocks from my new-ish Dresden Pumpkins table runner pattern.

2 Tiny Dresden plates for today & tomorrow.

You’ll need these…

Refer to page 11, for the complete instructions.

A couple more leaves for this block.

If you remember the leaf making video I showed you, use the small bar w beveled end for the straight parts of the leaf then use the pointed end for the round parts.

If you don’t already have Apliquick Bars & Bohin glue you can find them & all the tools that I use for my appliqué on my website by clicking here.

More tiny blind hem stitch for the circle & leaf appliqué.

Can’t wait to see your pumpkins!

If you’re not already a member of my Sewing With Susan Facebook group, please join & share pics.

Find the group by clicking here to join.

Just Keep Sewing…

Susan

A Quilt Along, Applique quilt projects, Dresden Plate Quilt, Halloween quilts, Mini Dresden Patterns, New quilt pattern

Candy Corn Sampler Quilt-Along Step 3, HOOT Block

Welcome to Step 3 of making your Candy Corn Sampler!

Thanks for sharing pics on our FB group, Sewing With Susan!

Let’s start Step 3!

Tiny Dresden plates are the main topic for today.

Tip for today is to spray & iron all of your fabrics with Mary Ellen’s Best Press. Your plates will lie flatter when they’re complete.

I use the hand pump bottle when spraying yardage & the finger pump bottle when I’m spraying my finished plates or blocks. Its spray is really fine & won’t super saturate the small pieces & make them go wonky.

Refer to page 7, “HOOT Block” to get started.

Good news, Step 4 will be a lighter load, so if you’re feeling overwhelmed, sorry, but maybe you can use Thursday & Friday to get caught up.

I again chose to use freezer paper machine appliqué method for this block.

If, like I mentioned in Step 2, you cut multiple appliqué templates at once for the birds, you’re saving time! If not, you can still do so since there are more birds on this quilt.

Just stack up to 6 layers of freezer paper a bit larger than the shape to cut out & staple a template on top.

(Be sure the freezer paper is stacked up correctly. Notice some birds on the quilt face right & some face left, but you can cut them all at once. See notes on each block’s instructions)

Using serrated scissors helps to cut through lots of layers. I use a staple remover to remove the staple without tearing the paper layers.

You know I love this part of the quilt!

Having the right tools makes all the difference!

Use your favorite appliqué method!

Below I show how to manipulate a point with my favorite tools; Apliquick Bars. Use this short video to help with the birds.

Here I show how simple it is to manipulate a circle. Yes, simple! Just practice.

You’ll need them for the Tiny Dresden plates.

If you don’t already have Apliquick Bars & Bohin glue you can find them & all the tools that I use for my appliqué on my website by clicking here.

Be sure you have enough contrast between the background fabric and appliqué pieces then position all the appliqué on the background fabric then glue (or fuse) it in place.

“HOOT” is going to be a tight fit, just be sure you position the letters inside the 1/4″ seam allowance.

I do A LOT of fabric auditioning while designing a quilt. I originally designed this quilt with white birds so that’s where I went with them.

Choosing the right center circles is yet another decision…

My double guessing of myself just wastes time!

For some reason I thought the white birds were too stark so I made black birds.

Obviously they were too dark for me!

As you can see, my original idea of white birds was perfect! I think what makes it work is the pretty black designs in the light cream fabrics.

What I’ve learned over the years is that I like low contrast in fabrics across my quilts. You may think my quilts are too busy, if so, you probably like high or at least more contrast. Make your birds stark white, or maybe orange! lol

Good grief, grandma!!! Lol

I love of the tiny blind hem stitch* for plates & freezer paper appliqué. Done small enough it resembles hand stitching. If you don’t know what I mean, use the blind hem setting, but make the stitch length & width very small. *IF your machine won’t let you adjust the blind hem stitch, use a different one!

#1 rule, have fun oh, & ask questions!

If you’re not already a member of my Sewing With Susan Facebook group, please join & share pics.

Find the group by clicking here to join.

I can’t wait to see your HOOT blocks & your bird fabric choices!

If you have any appliqué questions you can ask them there too.

If you’re still undecided on your fabrics

you can order your Candy Corn Sampler kit today from Need’l Love by clicking here.

Just Keep Sewing…

Susan

A Quilt Along, Applique quilt projects, Dresden Plate Quilt, Halloween quilts, Mini Dresden Patterns, New quilt pattern

Candy Corn Sampler Quilt-Along Step 1, Candy Corn Blocks

Hello from Emma, my little pumpkin spice baby, & me!

Welcome long-time followers & all of my new followers

to Step 1 of making your Candy Corn Sampler!

I’m glad you’re taking this sewing journey with us to make my newest favorite quilt.

Hopefully you’ve made at least a few fabric decisions…

This Hootenanny fat 1/4 pack was a large part of my inspiration for this Candy Corn Sampler Quilt. It looks nice with this Grunge piece, don’t you think? I didn’t end up using it but Grunge goes with almost everything!

If you’re still undecided on your fabrics you can order your Candy Corn Sampler kit today from Need’l Love by clicking here.

Let’s start with Step 1!

My first step with any quilting these days is to spray & iron all of my fabrics with Mary Ellen’s Best Press. It doesn’t make the fabric stiff like starch does. It gives it more body & helps it press flatter which is really helpful especially when working with little pieces of fabric. I’ve also noticed that if I need to reposition something & press it again the first creases will press out unlike the results of using regular starch.

I use the hand pump bottle when spraying yardage & the finger pump bottle when I’m spraying my finished plates or blocks. Its spray is really fine & won’t super saturate the small pieces & make them go wonky.

The next task is to start cutting & making candy corns!

Refer to page 4, “Candy Corn Blocks” & “Cutting” to cut the strips then sew the strip sets together. Next, refer to the cutting diagram to cut the “trees”.

NOTE: Do not rotate the template to cut the candy corns or half of your candy corns will be upside down!

The in-between triangles will be discarded or if you’re like me, put away for another day…

Follow assembly instructions, page 4, to make the blocks. I sewed these blocks on my featherweight machine. That was fun!

In case you noticed, “real” candy corn has orange in the middle, but I prefer my fabric candy corn to have the orange on the outside.

Sew the left background onto the candy corn then press.

Sew the right background onto the candy corn then press again. Don’t forget to do the little bit of trimming. These blocks should measure 3 1/2” x 4 1/4”.

Make 48. Don’t worry, they go quickly & you have 2 days to make them (just 1 per hour lol) before we move on to Step 2!

Emma says they’re a snap!

If you’re using super cute fabric who cares how long they take?

I played with one of the super cute Hootenanny rick rack stripes to make a few trees too. I’m not sure where they’ll end up.

I love the ease & accuracy of this block’s construction. ❤️ I hope you do too!

If you’re not already a member of my Sewing With Susan Facebook group, please join & share pics.

Find it by clicking here to join.

I can’t wait to see your candy corn blocks.

Just Keep Sewing…

Susan

Mini Dresden Patterns, New quilt pattern, Tiny Dresden quilts

New Patterns Spring 2018, #5

New pattern #5 is

“Dresden Daisies”.

This is the only new pattern that uses both my Tiny Dresden and Mini Dresden templates.

I designed this quilt a while back.

I guess was waiting for just the right fabrics to put it together with.

The darker green fabric is from Jo Morton’s “New Hope” collection by Moda.

I’ve used plenty of half Dresden plates in my quilts, but for this one, since it’s going to be appliqued on top of the border and not sewn into it, I had to first press and glue the seam allowances under before adding the center.

To do this, I drew intersecting straight lines on my ironing board cover with an ultra fine Sharpie marker.

This allowed me to place the seam allowance on the vertical line, then press the seam allowances up to the horizontal line.

I’ve done this before with another quilt I was working on that had a lot of 6 1/2″ blocks. It’s a good way to quickly check accuracy before moving on.
Ironing board covers are not permanent.

For instance the one pictured is long gone!

Next I made the centers.

I only appliqued the full plates’ centers.

Since the edge of the half plates’ centers overhang the petals,

they would need to be appliqued down after they were on the border.

Before long, my daisy garden was complete!

Aren’t they sweet???

This is why I quilt.

I love the process!

Next step was to double check my green fabrics.

Then see if my piano key borders were working…

I noticed shadowing of the darker green fabric coming though my daisy petals, so I had to fix that by making a lining for each one.

That was easily done with my Olfa circle cutter and some plain white fabric.

(Instructions in the pattern)

Shadowing all gone!

Now to assemble the quilt.

Positioning, gluing & stitching the half Dresden plate daisies.

Adding the last border.

Putting it on the “to be quilted” pile I noticed how it lined up with the edge of “With All My Heart” and wondered if it needed another border…

“No!” I’m going small & less complicated!!!

But I liked that idea…

Meet Dresden Daisies.

Just 31 1/2″ x 31 1/2″!

Uncomplicated & cute…

They’re now available on my website.

Just Keep Sewing…

Susan

Dresden Plate Quilt, Mini Dresden Patterns, My Life, New Quilt pattern sample, New tiny Dresden plate quilts, Quilt Retreats

Retreating Again

It’s always fun to get away to sew (& eat)!

And sew I did, all weekend long…

suznquiltsnewdesigns1-25-17

I got a lot done on my new pattern sample.

I sewed the Tiny Dresden petals that I showed you last week.

suznquiltsnewdesigns1-17-17

Trimming and then pressing.

suznquiltsnewdesigns1-25-172

Turning right side out and making pretty points.

suznquiltsnewdesigns1-25-173

All 384 of them!

And, not 1 was lost since I was using my new cutlery tray

to transport them back & forth to the ironing board and my sewing machine.

I had made the Mini Dresden centers last week.

suznquiltsnewdesigns1-25-177

Roxanne’s EZ-Squeeze glue, my Classic Metal Company brochure,

suznquiltsnewdesigns1-25-176

and Appliquick Bar give me very precise results every single time.

I also had 4 half (+ seam allowance) circles to made for the 4 half Mini Dresden blocks.

suznquiltsnewdesigns1-25-178

Same process, but you don’t have to cover the long straight edge

since it will go inside the seam allowance when it’s sewn into the quilt.

Fun, fun, fun!!!

suznquiltsnewdesigns1-25-174

32 Tiny Dresden plates

5 Mini Dresden plates

4 half Mini Dresden plates

32 freezer paper leaves

&

8 stems

(but I needed 16… 4 x 4 =16, not 8!!!)

suznquiltsnewdesigns1-25-175

Each 23″ block has 1 Mini Dresden plate,

8 Tiny Dresden plates,

8 leaves & 4 stems.

 I got 3 of the 4 big blocks appliqued before we left Sunday,

but you’ll have to wait to see those, sorry.

suznquiltsnewdesigns1-25-176

This is all that’s left of the pieces.

Can’t wait to finish it.

It’s been a whole month since Christmas.

What are you creating?

Just Keep Sewing…

Susan

A Giveaway!, Blog tour with give-aways, Dresden Plates, Mini Dresden Patterns, My Life, New ideas

Welcome to Day 1 of Quiltmaker’s 100 Blocks Volume 14 Blog Tour

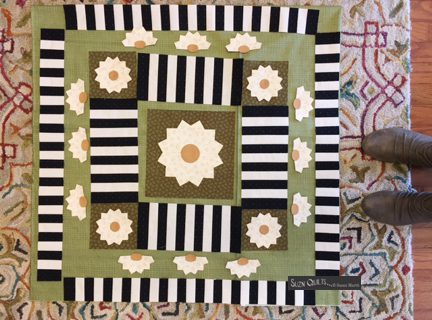
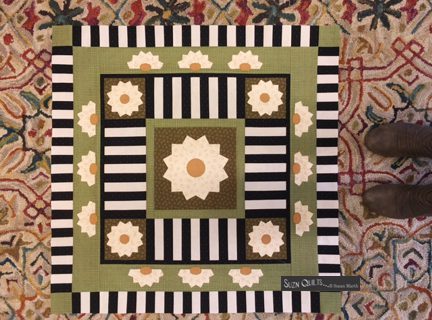
I’m happy to finally show you my block that’s in the

newest volume of Quiltmaker’s 100 Blocks magazine.

Dresden Framed #1348,  is on page 35.
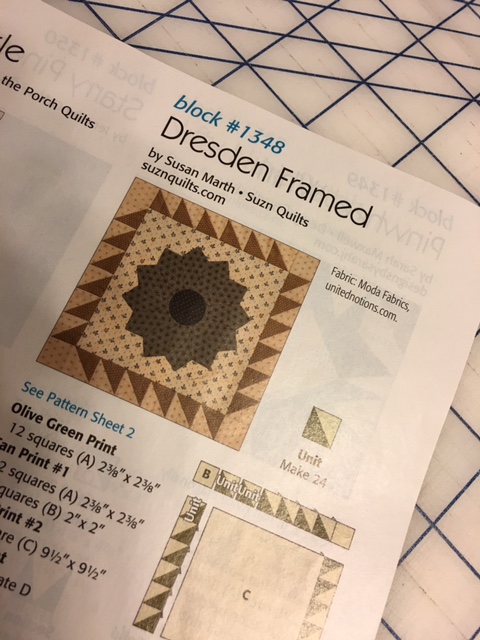
100blocksvol14block

It’s fun to make.

With a little bit of piecing &

a little bit of applique,

you get a beautiful Mini Dresden plate with pizzazz.

qm100-marth

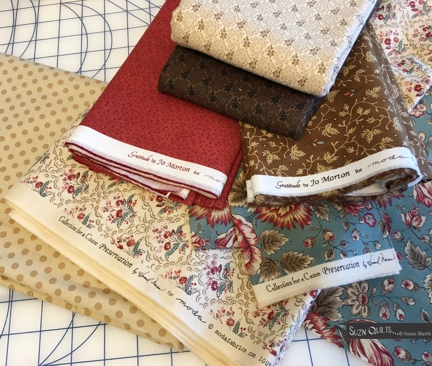
I used the new “Pumpkin Pie” fabric collection by Laundry Basket quilts for Moda.

(all but the olive green which is a Jan Patek also by Moda).

I love to make little Dresden plates!

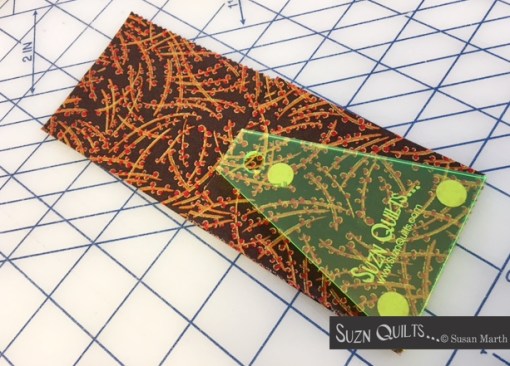
This block uses my Mini Dresden Plate template.

The paper template is included in the magazine,

but if you want the ease and accuracy of cutting 8 petals at once with a rotary cutter,

use my plastic template.

You can purchase them on my website here.

How about a pretty table runner?
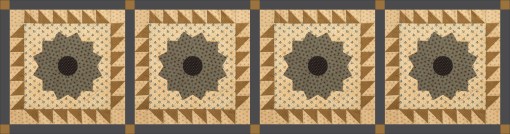
 100blocks1348dresden

Make 4 blocks.

Cut 13 sashing strips 1 1/2″ x 12 1/2″.

Cut 10 corner stones 1 1/2″ x 1 1/2″.

Make a 14 1/2″ x 53 1/2″ table runner.

Perhaps you’d prefer to make a lap or wall quilt.

100blocks1348dresdenwallquilt

Make 16 blocks.

Cut 40 sashing strips 1 1/2″ x 12 1/2″.

Cut 25 corner stones 1 1/2″ x 1 1/2″.

Make a 53 1/2″ x 53 1/2″ quilt.

Here’s a little Dresden plate tutorial.

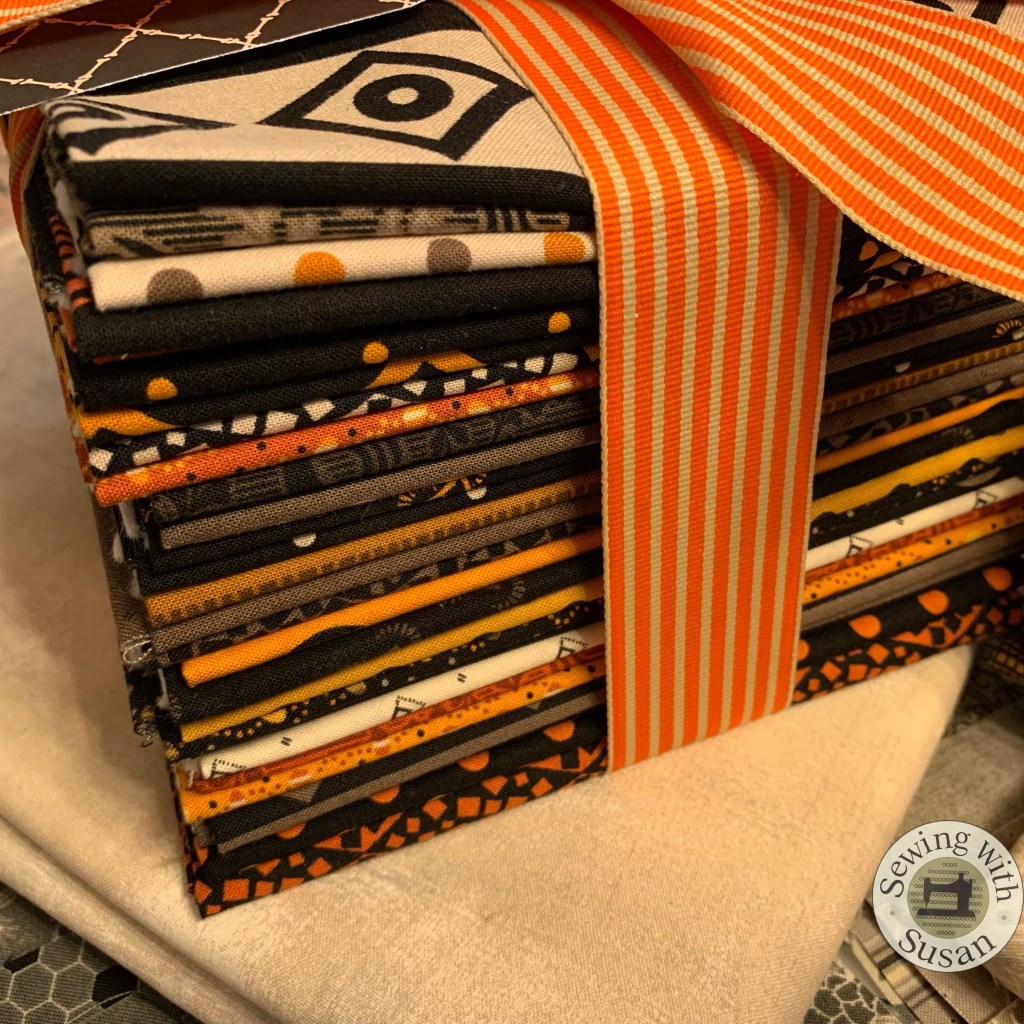
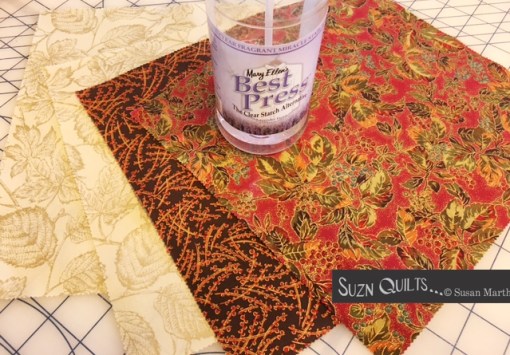
This block makes perfect use of 10″ layer cake squares!

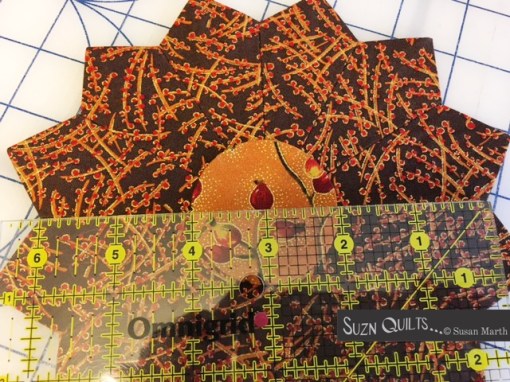
This is the gorgeous “Autumn Elegance” layer cake by Sentimental Studios for Moda.

suznquiltsautumnelegancelayercake

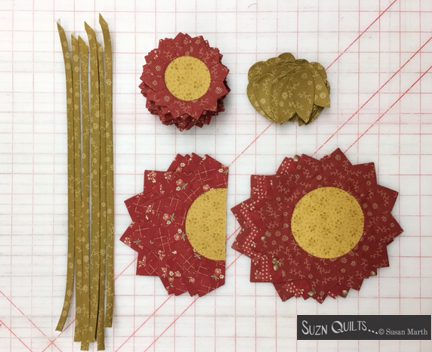
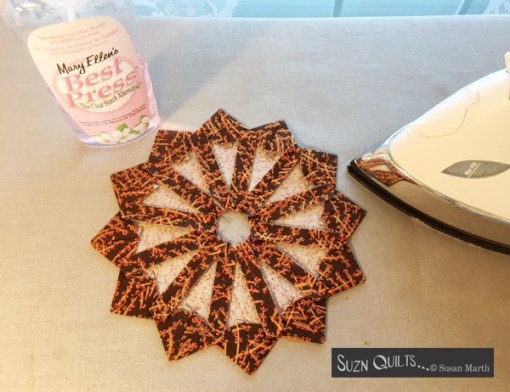
Choose 4 squares and press them with Mary Ellen’s Best Press.

suznquiltsautumnelegancebestpresssquares

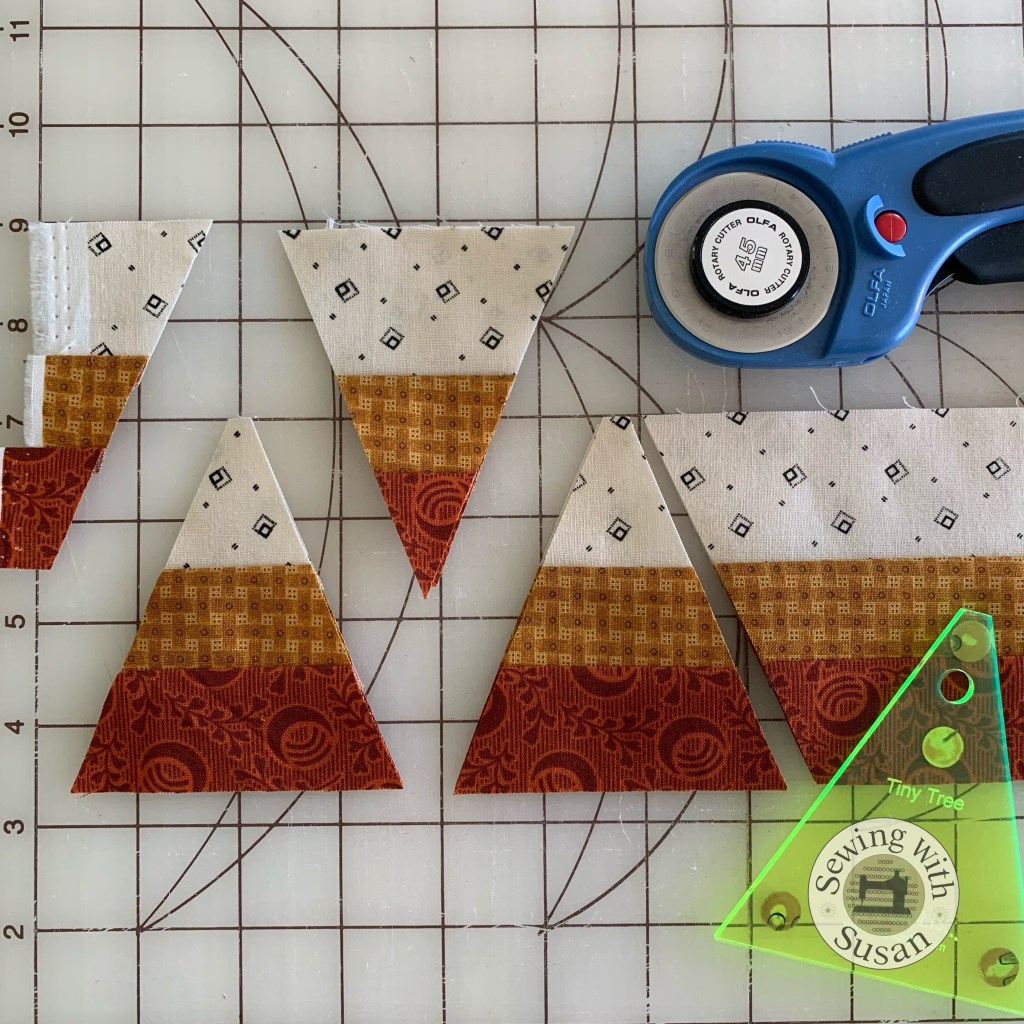
With 1 square, cut 2 strips 3 1/2″, subcut 10 petals with the template.

suznquiltsautumnelegancecutpetals

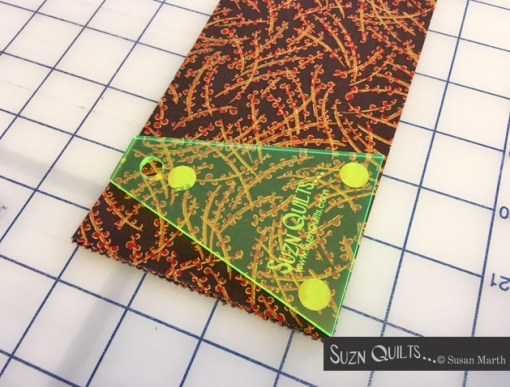
2 more petals will need to be cut the other direction from the remaining strip so be sure and use a non-directional print.

suznquiltsautumnelegancecut2morepetals

After cutting 12 petals, there will be a corner left over to cut a center circle for another plate.
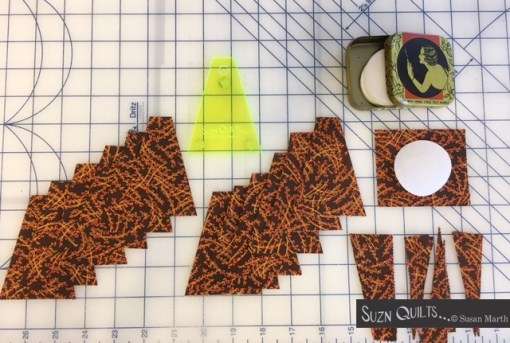
suznquiltsautumnelegancecutwholesquare

Hardly any waste!

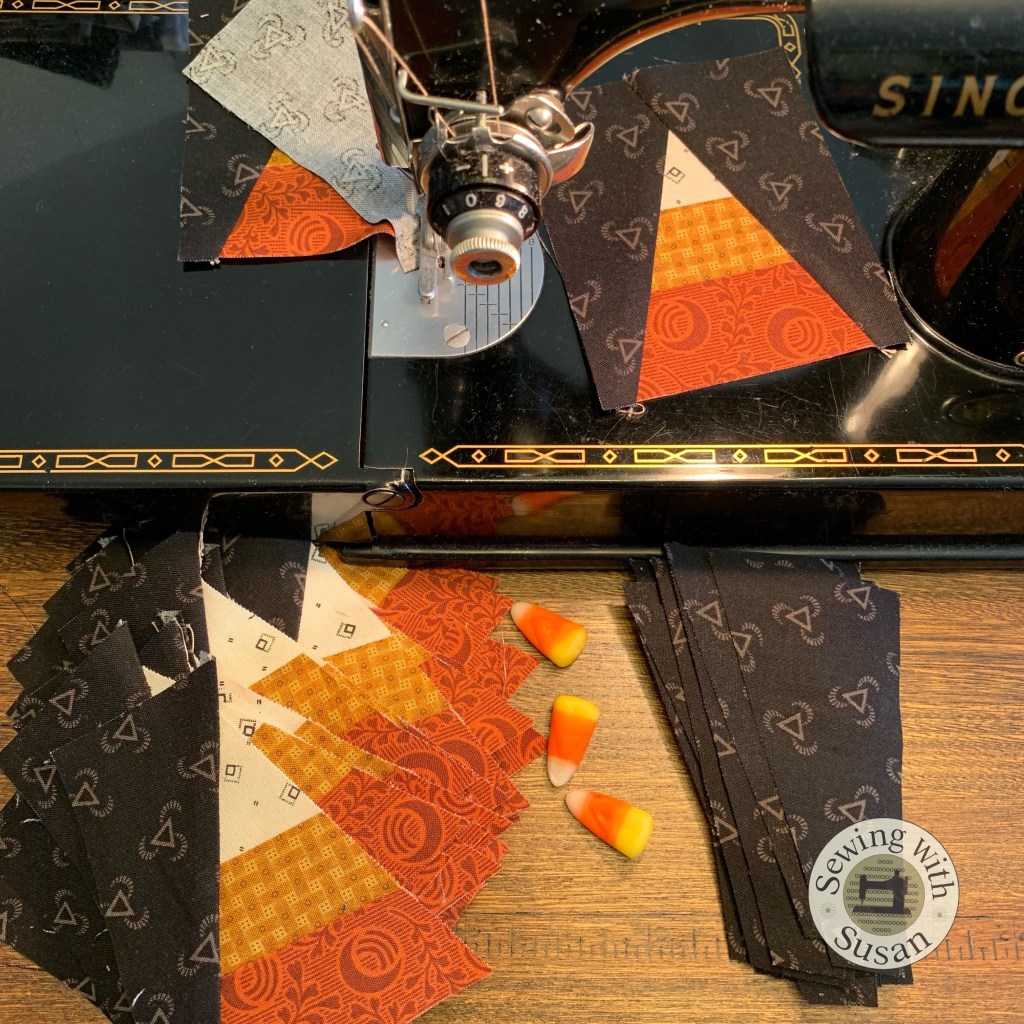
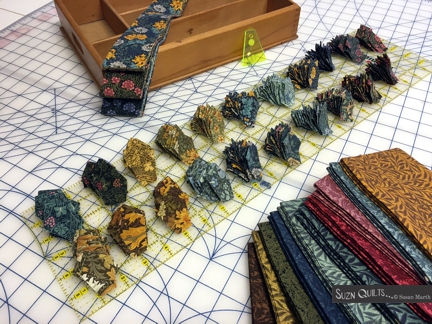
Fold each petal in half chain piecing all 12 petals using a scant 1/4″ seam.

suznquiltsautumnelegancechainsewpetals

Trim away most of the seam allowance near the fold, then press the petals flat as sewn.

suznquiltsautumnelegancetrimpresspetals

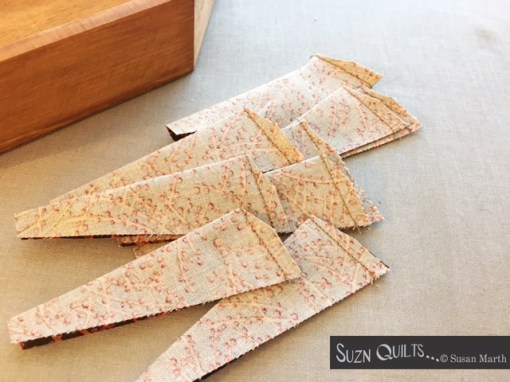
Turn them right side out, carefully poking out the points, then press them again.

suznquiltsautumneleganceturnpresspetals

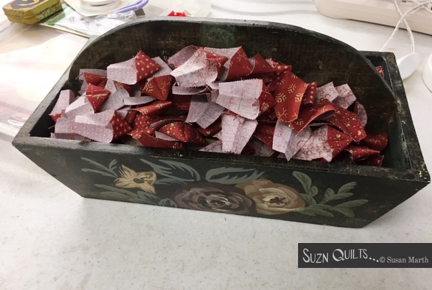
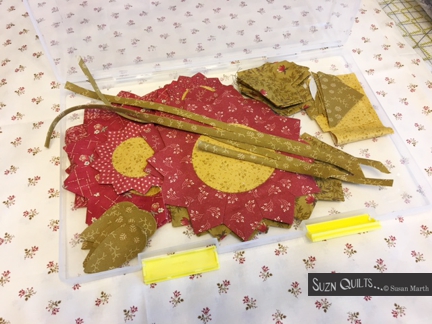
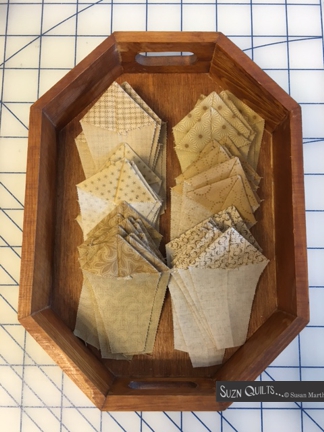
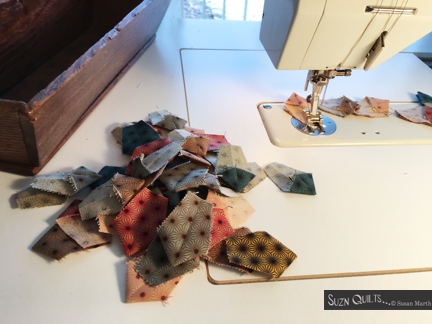
A little tray helps me transport ALL of the petals to my ironing board and back again.

Chain piece the petals together in pairs, again using a scant 1/4″ seam.

suznquiltsautumnelegancesew2petals

Press the seams open, then chain sew 2 of those pairs together.
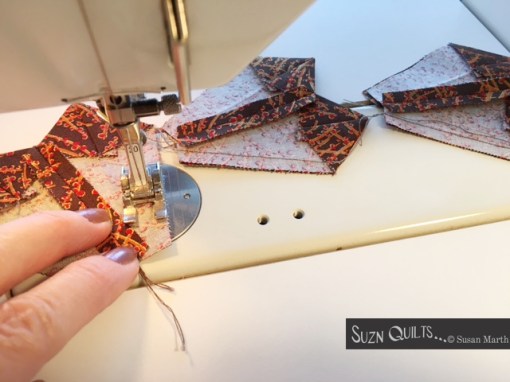
suznquiltsautumnelegancesew4petals

Press again…

suznquiltsautumnelegancepress4petals

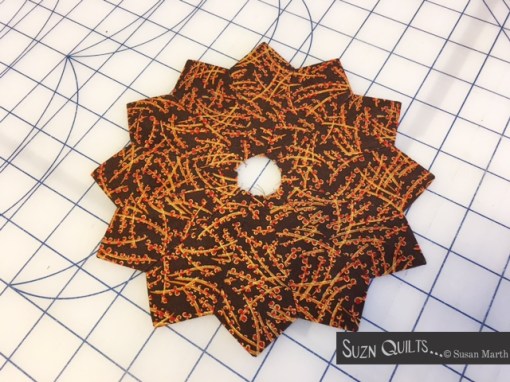
Sew these 3 units to complete the plate,

suznquiltsautumnelegancecompleteplate

Be sure to press all of the seams open.

No trimming necessary!

Give another press with more Best Press using the single finger pump bottle.

It sprays with a fine spray that doesn’t over saturate the little pieces.

I spray both sides of the plate, but only press the back side.

suznquiltsautumnelegancecompleteplatefront

If you’ve used scant 1/4″ seam allowances your plate will lie perfectly flat.

If it doesn’t lay flat, you need to adjust your seam allowance.

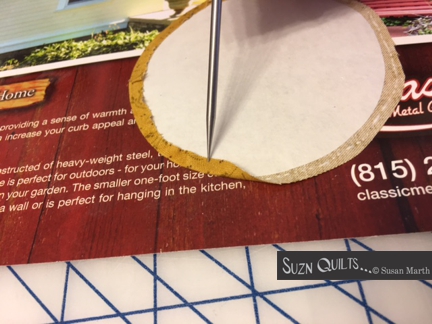
Using the pattern in the magazine, cut a 2″ circle of freezer paper.

Fuse it to the wrong side of another 10″ layer cake square.

Cut out with a 3/16″ seam allowance.

suznquiltsautumnelegancefusecentercircletemplate

Glue the edge of the seam allowance with Roxanne basting glue.

suznquiltsautumnelegancegluecentertemplate

Press glued seam allowance to paper side of template.

(Notice my gluing surface?

I’ve been using this same plastic coated brochure from  Classic Metal Company for over 2 years!

I know because I bought one of their big metal barn quilts and have been using this brochure ever since.

It protects my table and my glued pieces don’t stick to it.

After all this time, it’s still like new and all I do is brush off the loose glue once in a while.

Next week I will be giving away 2 cool new products that they now have in addition to their metal barn quilts.

I’ll give you a hint; they light up!

Come back next week for those!)

suznquiltsautumneleganceglueseamallowance

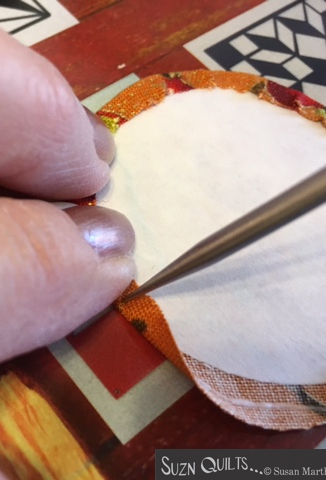
Easily work out any imperfections with Apliquick bars like I show in detail here.

No clipping necessary.

suznquiltsautumneleganceperfectcircle

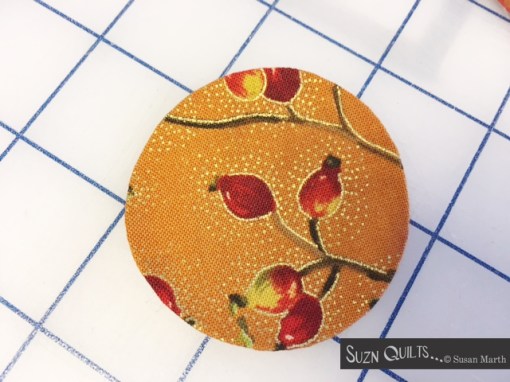
Voila! Perfectly round circle.

Center and glue the circle on the plate.

suznquiltsautumnelegancecentercircleonplate

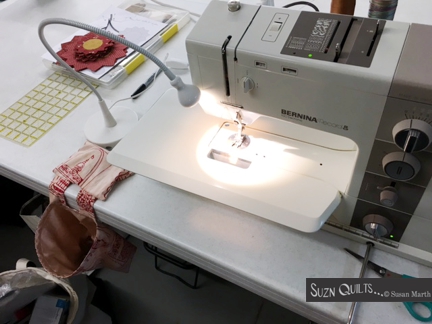
Stitch the circle in place using thread that matches the circle.

I use a tiny blind hem stitch.

It resembles a hand stitch,

but it’s much quicker!

suznquiltsautumnelegancestitchcircletoplate

You can hardly see it, right?

Wet the center circle and let it rest a minute.

Remove the freezer paper through the hole in the back of the plate.

Let the plate dry.

Don’t press the wet plate, that will distort it.

While it’s drying, make the 24 half square triangles

using 2 more layer cake squares.

suznquiltsautumnelegancethangles

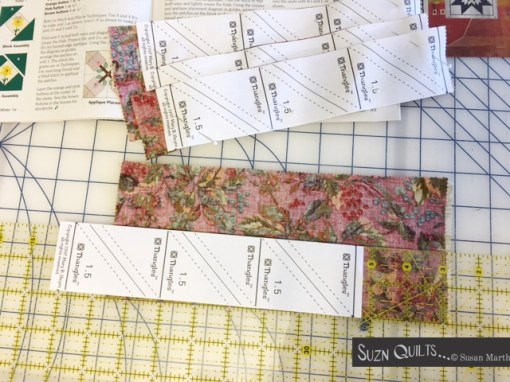
I like using Thangles. They’re quick and accurate.

Cut the 4 corner squares.

suznquiltsautumnhstscornersquares

Assemble the block following the instructions in the magazine.

I use the same tiny blind hem stitch to applique the plate to the center of the background square.

I got so caught up in finishing the block that I forgot to take photos of that part, sorry!

suznquiltsautumncompleteblockmovie

That may have happened because I was also listening to Little Women

& started watching when Jo came home to spend time with poor sick Beth.

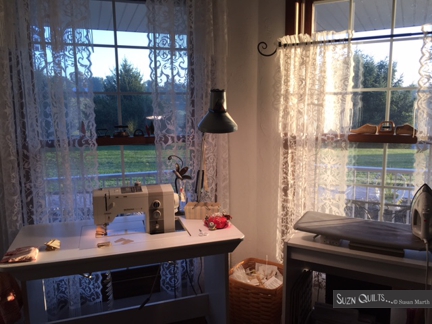
Movies often keep me company while I sew.

I have a library of movies that I listen to over and over because they’re not so distracting that I can’t sew, well, usually!

Anyway,

it only takes about an hour to make one of these blocks.

(less than 1 movie!)

suznquiltsautumnblockwfallcolors

It looks lovely with my front yard’s fall colors don’t you think?

Sorry the drawing is over now.


go

UP

UP

UP

to the top of this post

and

leave me

a comment

telling me if you’ve ever made a Dresden plate.

And…

I will be having a second drawing as well.

One of my lucky blog followers will win not only this block that I just made,

but also the remaining layer cake to make more blocks with!

If you’d like to win the block & remaining layer cake,

become one of my blog followers then leave me a second comment

UP

Up

Up

above.

If you already follow my blog,

let me know that in your second comment.

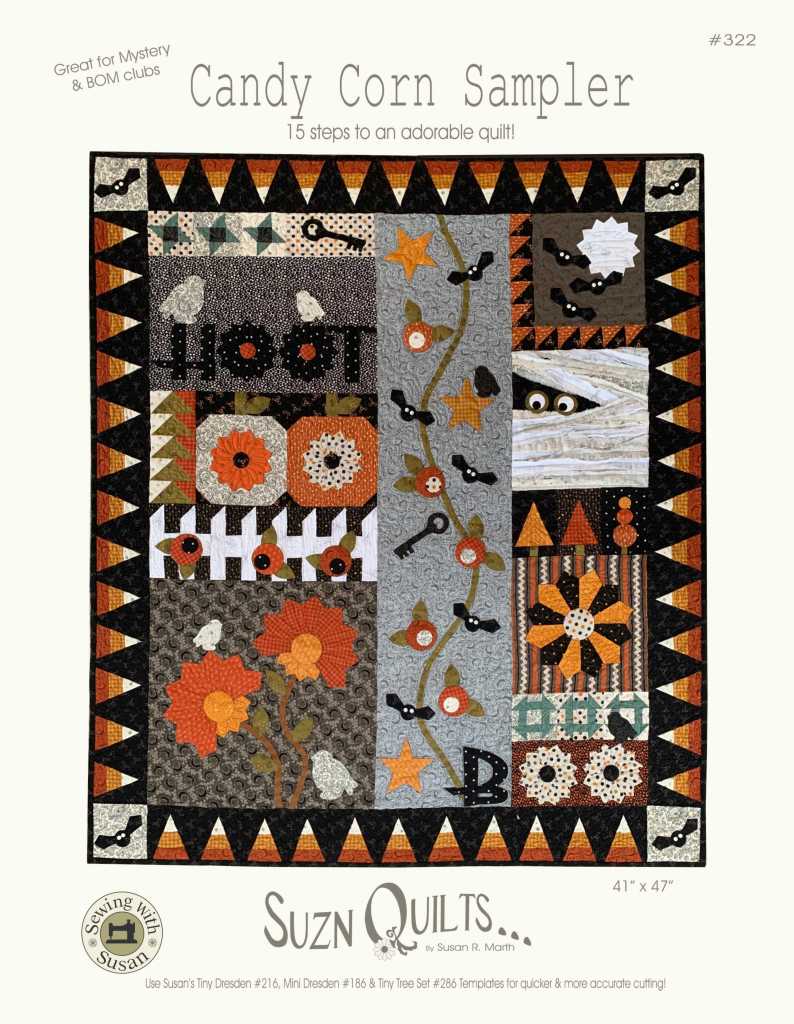
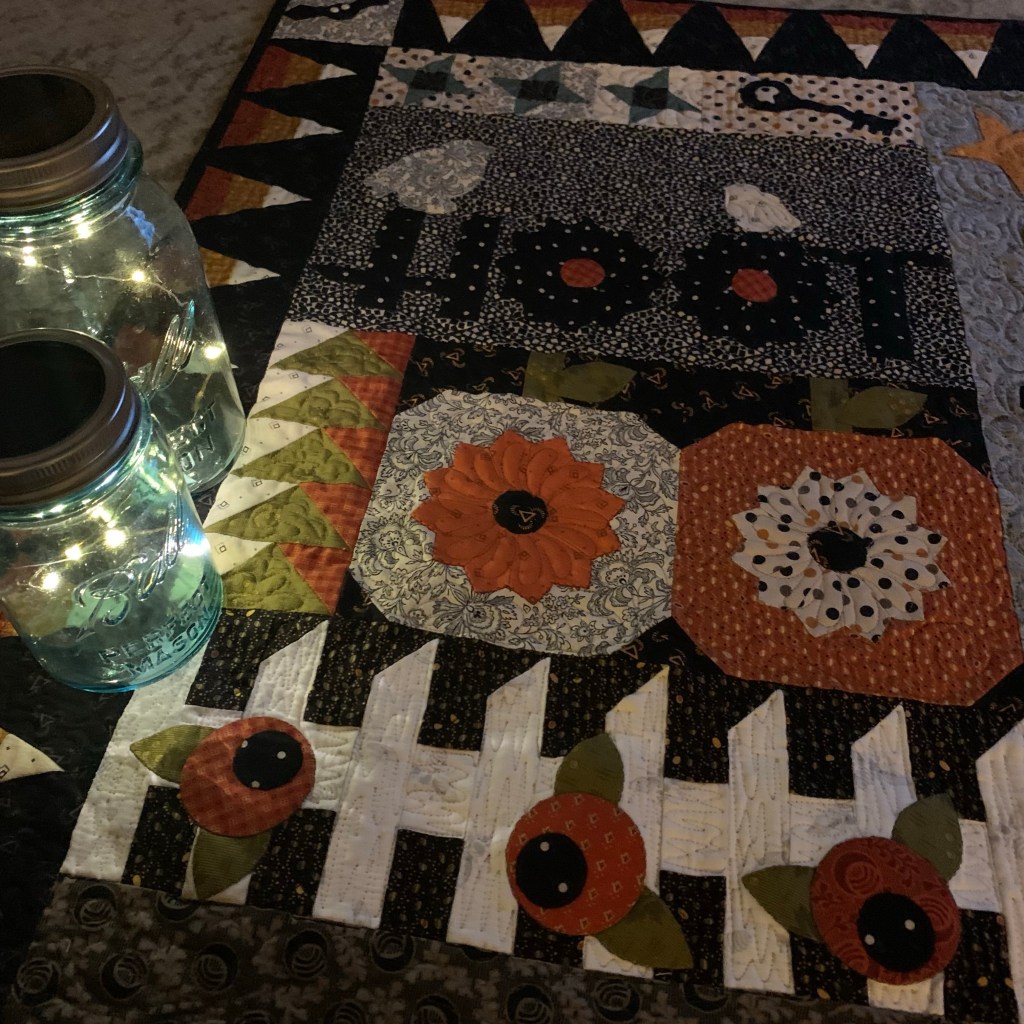
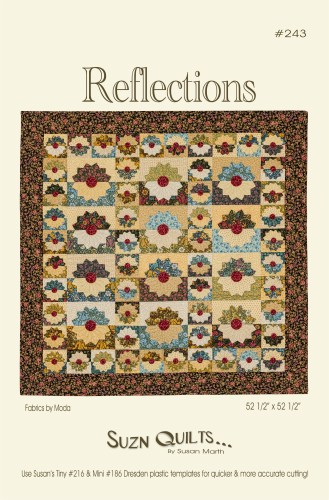
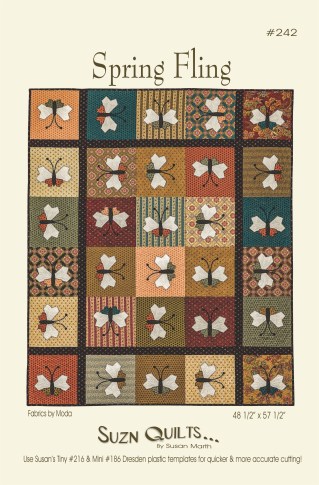
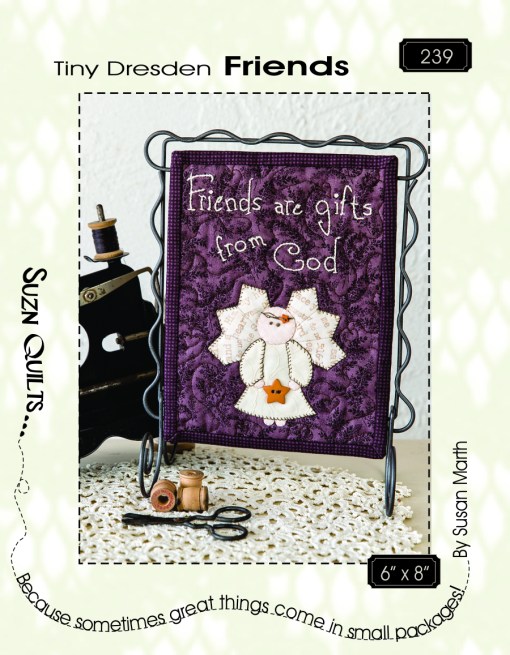
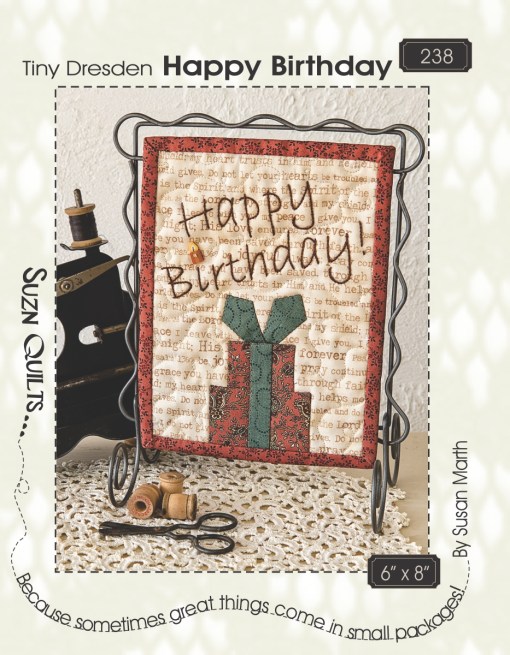
If you love making Dresden plates like I do,

here are a few of my latest patterns that use either

my Tiny Dresden and/or

my Mini Dresden plates.

suznquiltsbrochure10-16

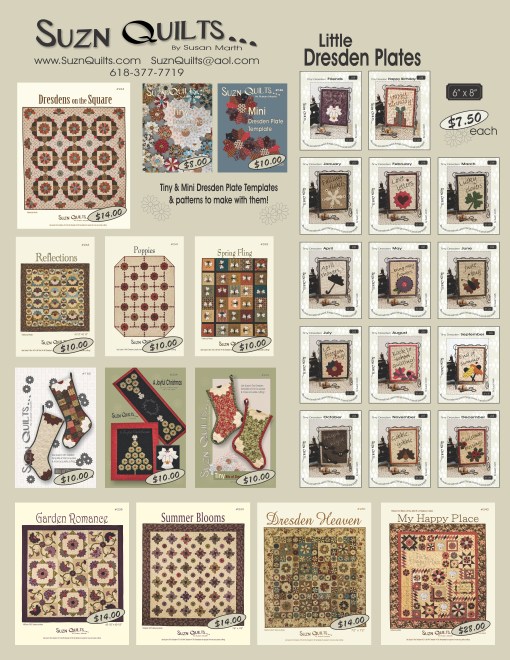
You can see them all on my website here.

Be sure to visit the other designers on the blog tour

& Quiltmakers’ Quilty Pleasures blog for more fun and many free prizes.

I will choose the 2 lucky winners this Saturday.

Be sure & tell all of your friends.

Good luck &

Just Keep Sewing…

Susan

Mini Dresden Patterns

New Pattern, Dresdens on the Square

Last but not least,

(actually it’s my favorite of my new 4)

#4, with yes, Tiny & Mini Dresden plates!

Dresdens on the Square

Suzn+Quilts+Dresdens+on+the+Square+#244+cover+WEB.jpg

I used two collections in this quilt;

Gratitude & Preservation both by Moda.

Suzn+Quilts+Sewing+Gratitude+Cause+selvages

I love how the two collections worked together to add variety to this quilt with lots of coordinating fabrics.

I could use these fabrics over and over and never get tired of them.

I’m sure it’s the whole low contrast thing that I love about this quilt,

but it was also really fun to make.

Suzn+Quilts+Sewing+Gratitude+Cause+petals

Chain piecing saves a lot of time and thread.

Suzn+Quilts+Pressinging+Gratitude+Cause+petals

And every time I was making a Dresden plate I couldn’t wait to see how it turned out.

Suzn+Quilts+Pressinging+Gratitude+Cause+pressing+petals

Perfect every time!

suznquiltssewinggratitudecauseplates

I’m not perfect, I just sew with precision!

2 good tips, start with good quality fabric and use Best Press to give the fabrics more body.

suznquiltsmorrissunnyday

Chris tested this pattern for me.

Dresdens+on+the+Square+Chris.JPG

She said she loved making the quilt and she helped me decide how to write some of the steps so they would be easy to interpret.

I’m envious of her design wall in her new sewing studio!

Dresdens on the Square is available on my website for $14.00 plus shipping.

Thanks to all of my testers and also to Robin for editing all of my new patterns.

I get by with a lot of help from my quilting friends!

I hope you’ve enjoyed seeing what I’ve been making.

Just keep sewing…

Susan

Dresden Plate Quilt, Mini Dresden Patterns, Tiny Dresden quilts

New Pattern, Reflections

I hope you’re enjoying seeing my new patterns.

#3 if you couldn’t guess has even more little Dresdens.

Reflections

Suzn+Quilts+Reflections#243+WEB.jpg

 I loved using the new Morris collection, Earthly Paradise, by Barbara Brackman.

Remember them?

They were so pretty to work with!

Suzn+Quilts+box+of+sewn+Morris+petals

I did the trimming in front of the TV…

Notice another cutlery tray?

I have several because I have several projects going at once.

Suzn+Quilts+Morris+petal+stacks

I’m putting matching petals together here.

suznquiltsmorristinypetals

Making the reflecting Tiny petals…

suznquiltsmorrisminipetals

Organizing to keep me on track…

(In yet another little tray!)

suznquiltsmorrisminihalves

Just look at my pretty garden growing!

Suzn+Quilts+Helper+Betsy

And of course, Betsy helped me to keep on task and untangled…

suznquilts1inchdpcircle5212

This is the quilt that I used all the Dr. Pepper circles on.

Heather tested this one for me.

I offered to help her glue the center circles at a guild meeting since I’m always in a bit of a time crunch to get everything ready for maket.

I usually give my testers the pre-cut freezer paper circles that I cut with the paper cutters.circlepapercutters

They’re so quick to cut and perfectly round each time!

It took us about an hour or so to glue all of the Tiny and Mini circles.

It goes quickly when you’re doing something else at the same time.

I think that’s one of the things that I love about these little Dresdens.

I can watch TV, talk on the phone or watch a quilt program while working and before I know it, I’m done!

suznquiltsappliquickworkingcircle

Don’t let the circles scare you.

Apliquick Bars are a big help!

I showed you step-by-step how easy they are here.

The Apliquick Bars and circle cutters are available on my notions page on my website.

Reflections is available on my website too for $10.00 plus shipping.

Back tomorrow with #4!

Just keep sewing…

Susan

Mini Dresden Patterns, New quilt pattern, New tiny Dresden plate quilts, Suzn Quilts Patterns, Tiny Dresden quilts

New Pattern, Spring Fling

In case you can’t guess,

new pattern #2 also has little Dresden plates!

Spring Fling

Suzn+Quilts+Spring+Fling#242+Cover+WEB.jpg

The wings are a combination of Tiny & Mini Dresden petals.

Spring Fling was made using a layer cake and a bit of yardage of Pumpkin Pie.

Remember me showing you those fabrics here?

Using  a layer cake makes it easy to use a rainbow of fabrics without buying a lot of different yardages and having a lot left over.

Suzn+Quilts+check+Dresden+plate+accuracy+petals

I just pop in a movie and the time flies by!

Suzn+Quilts+check+Dresden+plate+accuracy+mini+tiny

The wings were fun to make.

I’ve been collecting old cutlery trays to keep my petals corralled.

It makes it easy to transport ALL OF THEM from my cutting table to the sewing machine and ironing board.

spring-fling-antenna

The antennas are really easy to create with baby rick rack.

I have fool-proof instructions for making each antenna perfect and I even give you instructions  on how to sew the buttons on with your sewing machine.

Loraine tested this one for me.

She got the entire top put together in about 2 days!

She is a speed demon!

It was her first experience with the Sulky 12 wt. thread.

I love the way it makes my applique “POP!”.

She probably has it quilted by now on her new long arm machine.

I hope you’re enjoying the show of my new patterns.

Spring Fling is available on my website for $10.00 plus shipping.

Back tomorrow with #3.

Just keep sewing…

Susan

Mini Dresden Patterns, My Life, New Pattern Sample, New quilt pattern, New tiny Dresden plate quilts, Quick Little Projects, Quilt Market, Suzn Quilts Patterns, Tiny Dresden quilts

New Patterns Fall 2015

I know I’m a bit late to the party…

International Fall Quilt Market was over two weeks ago…

Moda+Fall+Quilt+market+2015

(Image from Moda’s Cutting Table Blog)

I wasn’t able to attend, but I do have new quilt patterns that would have been there. I was with my family instead since my wonderful Mother-in-law passed away the day before Chloe & I were to fly to Houston.

How appropriate that this is the first of my three new patterns.

Suzn+Quilts+Tiny+Dresden+Friends+cover+RGB

I’m sad, I’m tired & I’m so blessed to have such a wonderful family & such dear friends. Getting older is not an easy thing for anyone involved. I will miss my mother-in-law dearly. She was one of my best friends. I’m so thankful that she was able to live independently in her own home & will not be going into assisted living or to a nursing facility.

So, if you’ve been wondering why I’ve been lacking in presence here, she is one of the reasons. Also, my dad had heart surgery the day Chloe & I were to fly to Minneapolis for spring quilt market back in May. We did fly out the next day though so we didn’t miss that. I then spent the majority of the next six weeks at the hospital & then rehab with him helping him to recover from the surgery. I’m happy to report that he was able to resume baling hay this summer, his passion!  Once a farmer, always a farmer…

One of the reasons I do what I do is because of the ability to work around my family & its many schedules. I can work at any hour & stop at the drop of a hat to help whoever needs me at that moment. It started with raising our children but more recently it’s been helping with our parents.

I’m very fortunate & I’m so thankful they at least take turns!

How appropriate that this is my next new pattern.

Suzn+Quilts+My+Happy+Place#240+cover+RGB

I’m definitely in “My Happy Place” with my family & in my sewing room!!!

My third & final new pattern: Suzn+Quilts+Tiny+Dresden+Happy+Birthday+cover+RGB

All three use my Tiny Dresden Template,

SuznQuilts+Tiny+Dresden+Plate+Template+RGB+web

& “My Happy Place” also uses my Mini Dresden Template.

Suzn+Quilts+Mini+Dresden+Plate+Template+insert+front+11-24-14

Like my previous Dresden plate patterns,

the paper template is included in the pattern, but you’ll want to also purchase the plastic template because it will make your cutting so much quicker & more accurate.

Look for them on my website & hopefully soon at your local quilt shop!

Just keep sewing…

Susan