Mystery Quilt-Along

Yet Another, 12 Days of Christmas Mystery Quilt-Along, Day 1

Welcome to Day 1!

Are you ready to sew your way to the Epiphany with me?

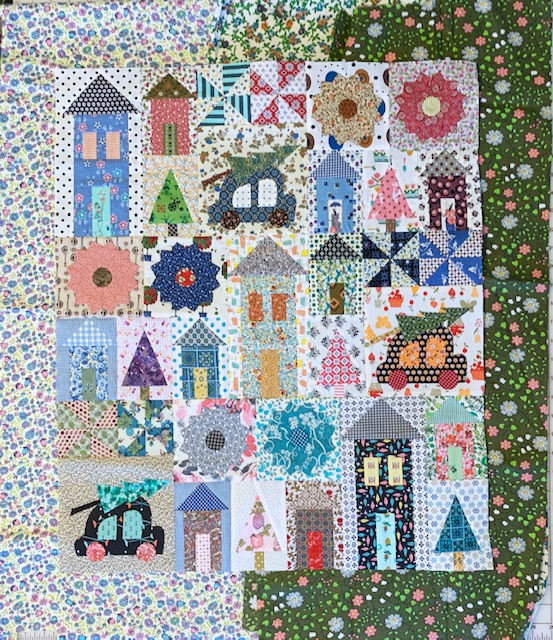
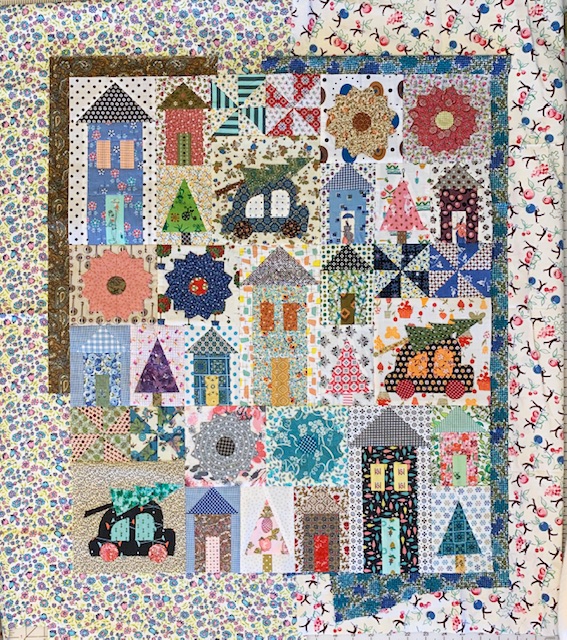
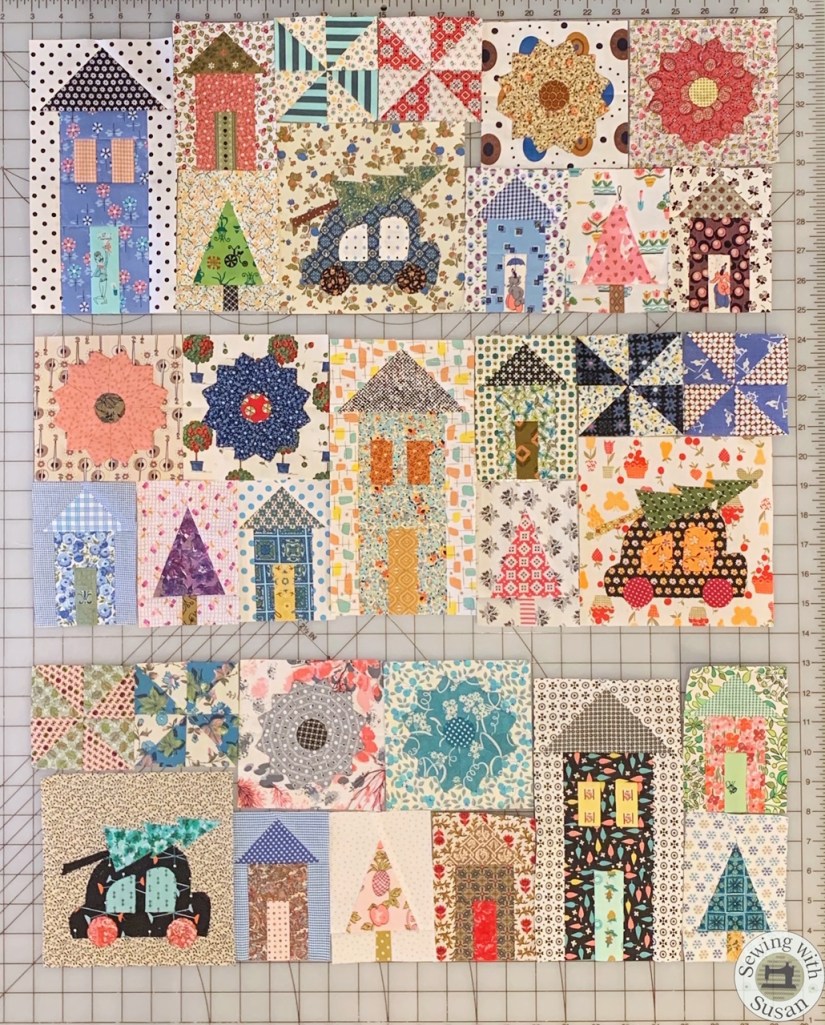
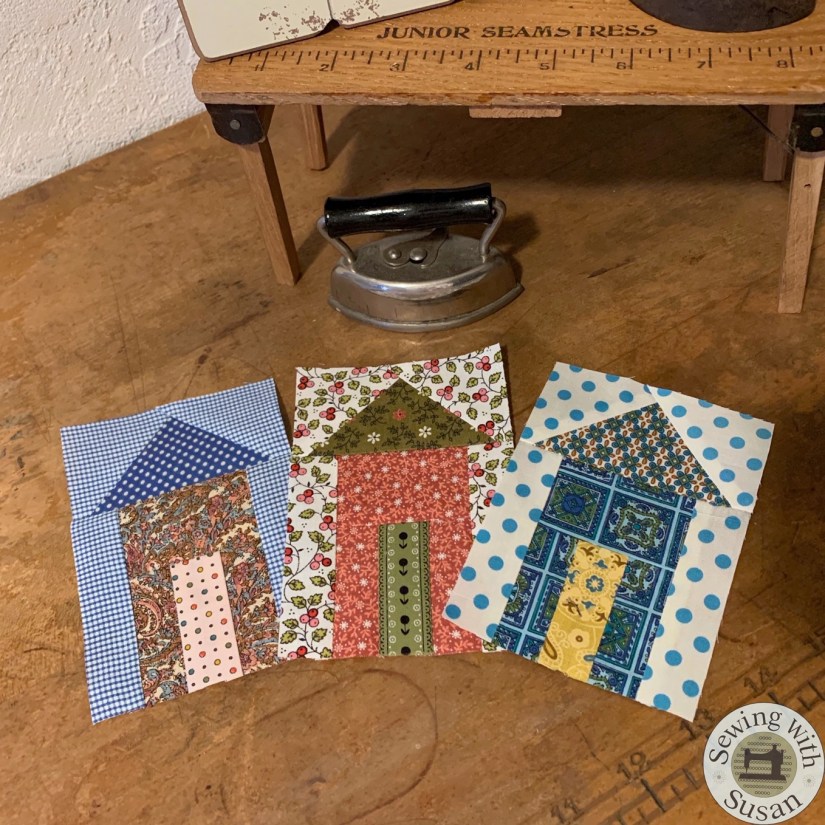
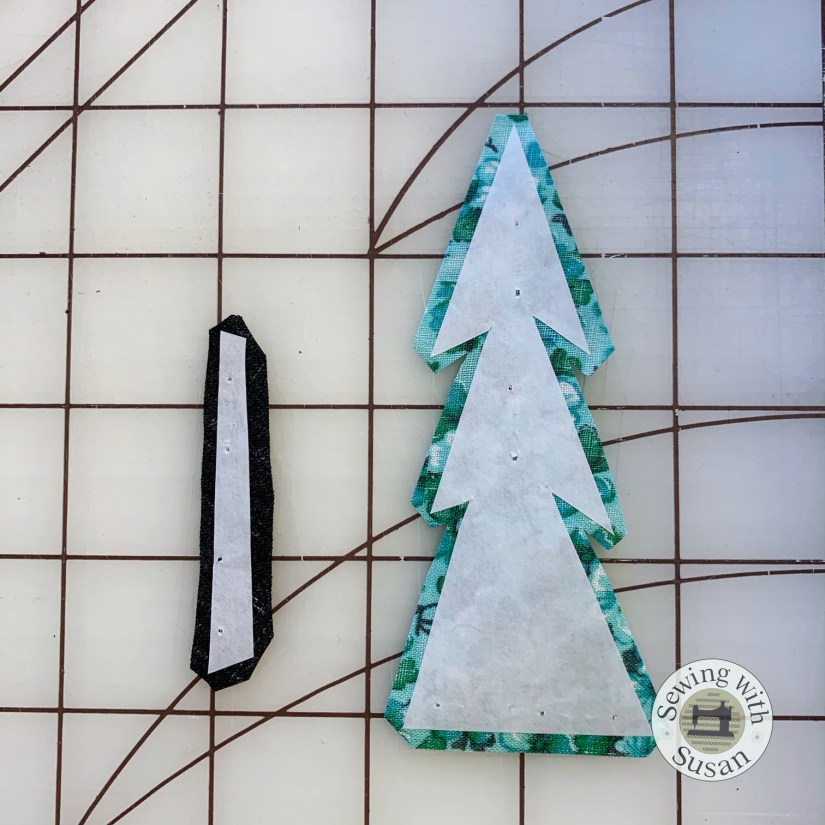
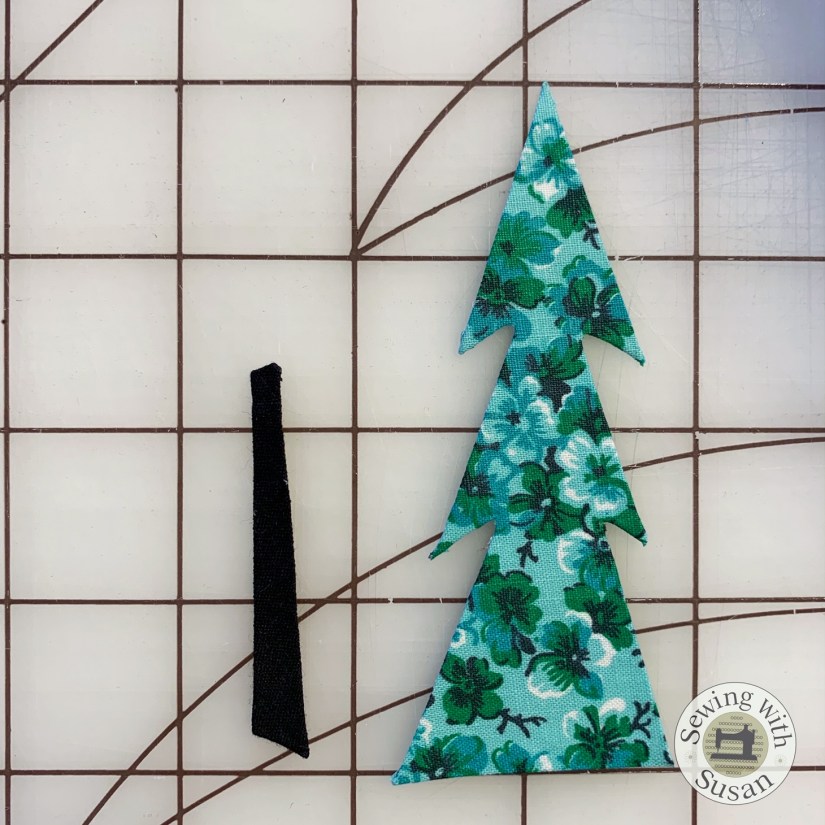
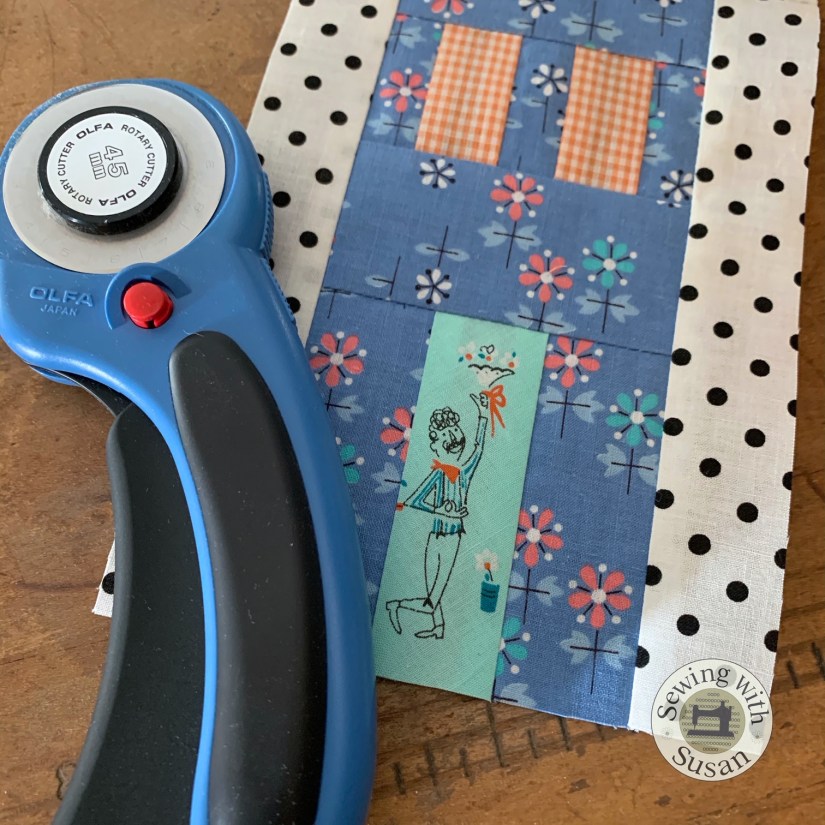
The first block we’re going to make is one of my Tiny Trees.

tinytreewredstar-3

You can easily sew this in an hour or less.

You’ll need 4 fabrics for the tree.

I’m going old time Christmas scrappy.

Watermarked Photo

If you already own my Tiny Tree Template Set #286

just use the instructions on the template sheet.

If you’d like to purchase the template set

you can find them on my website by clicking here.

The block should measure 3 1/2″ x 5″.

For the star you’ll need to download the PDF at the bottom of this post.

Be sure to appliqué the star at least 1/4″ below the top of the block to be sure it doesn’t get sewn into the seam allowance.

Click the link at the bottom of this post to bring up the PDF.

Be sure the 1″ square prints out exactly 1″ for the templates to be the proper size.

I hope you enjoy making the tiny tree as much as I did!

When you get your tiny tree made please share them with us on my Facebook group here: https://www.facebook.com/groups/SewingWithSusan

I’ll be back tomorrow with the Day 2 block.

Let me know if you have any questions.

Just Keep Sewing…

Susan

Mystery Quilt-Along

Another 12 Days of Christmas Mystery Quilt With Borders

It’s fun seeing the completed tops that everyone is posting in our FB group.

Thanks for sharing!

Today I was inclined to add borders to mine.

I liked the thin inner border some of you were adding

along with an outer border so I decided to do likewise.

Back to the scrap tote I went this morning.

Since these are scraps I was a bit limited on border options

because of the size of the scraps

but it was still a time consuming proposition.

I love being able to use my phone

to easily get perspective on the finished quilt.

I knew I wanted a multi-color print for the outer border for sure.

When I added a contrasting inner border

it made both the blocks & the outer border “pop.”

When I wasn’t totally sold on any of those options however,

I consulted my stash of vintage yardage.

I’ve been collecting pieces the past few years

when I find an awesome print at an estate sale or antique mall.

In the end I decided on 2 prints from the same tote

that I pulled all of the other prints from used in the top.

If you want to use my same dimensions,

inner border is cut 1 1/4″ & outer is cut 2 1/2″.

My design assistants, Gracie & Annie approve of my decisions.

(biased by the fact that now that it’s done gma’s taking us outside to play!)

Since it’s going to be nice later today

I’m going to take down the outside Christmas lights.

That will give them plenty of time to play.

Now that I’m finally feeling better

this weekend we’re going to celebrate Christmas with our kids

along with my birthday, our anniversary,

Clare’s graduation, David’s retirement…

Beyond excited!

I know I said it before,

but I love this quilt even more than I thought I would.

I hope I’ve enticed you a little more to finish (or start) yours.

When your top is complete please share it with us on my Facebook group here:

https://www.facebook.com/groups/SewingWithSusan

I hope you love your quilt as much as I love mine!

Just Keep Sewing…

Susan

Mystery Quilt-Along

Another 12 Days of Christmas Mystery Quilt-Along, Day 12, Epiphany


Welcome to Another 12 Days of Christmas,

Epiphany!

Thanks for spending time these past 12 days with me

& for sharing your love of quilting with the group.

It means so much to me &

I’ve enjoyed looking at everyone’s fabric choices.

Hopefully, like mine,

your scrap bag is a little less full

now that we’re ready to assemble these 33 lovely blocks.

I took a pic of my blocks in rows

to see if I needed to rearrange any for color placement.

I love this quilt even more than I thought I would!

The pics do not do it justice &

I’m typically not into scrappy quilts

but I couldn’t resist the challenge

having been trying to think of a way

to use these lovely vintage prints.

It reminds me of the “I Spy” books that my kids used to bring home from school.

Every block is unique & different.

What do you think?

I liked this arrangement so I sewed the blocks into rows.

After the decisions were made

it only took about 30 minutes to complete the top.

The final step is to sew the 3 rows together.

Click the link below to bring up the PDF of the assembly diagrams.

Another+12+Days+Assembly

When your top is complete please share it with us on my Facebook group here:

https://www.facebook.com/groups/SewingWithSusan

I hope you love your quilt as much as I love mine!

Now to contemplate quilting.

Just Keep Sewing…

Susan

Mystery Quilt-Along

Another 12 Days of Christmas Mystery Quilt-Along, Day 11


Welcome to Day 11!

For the last time we will delve into the scrap bag.

Today we will make the last 2 blocks which are Tiny Dresden plate blocks.

The instructions are the same as the last 2 times we made them,

but I’ve attached the Day 11 PDF if you need it.

Click the link below to bring up the PDF.

Another+12+Days+Day+11+Tiny+Dresden+Plate+Blocks

In case you’re not excited about your center circles,

I’ve included my circle making video again below for you to review.

If you have any questions about your Tiny Dresden results just let me know.

I’m sure I’ve seen every pitfall of making them not perfect

& can advise you about what’s wrong.

When you get your blocks made please share them with us on my Facebook group here: https://www.facebook.com/groups/SewingWithSusan

I’ll be back tomorrow with Day 12, assembly!

Just Keep Sewing…

Susan

Mystery Quilt-Along

Another 12 Days of Christmas Mystery Quilt-Along, Day 10

Welcome to Day 10!

Since I’ve been giving us so much work

& I don’t want us to start the year off creating another UFO,

today is ketchup day!

Whether you need to delve into the scrap bag,

or just run your sewing machine,

today is the day to hopefully get caught up.

If you’re not sure, let’s recap our lists together.

Need 3 car blocks… I need to make 2 more car blocks.

Need 9 Tiny House blocks… I need to make 6 more Tiny House blocks.

Need 4 Tiny Dresden Plates, check!

No photo description available.

Need 3 Big House blocks, check!

Image may contain: stripes

Need 6 pinwheel blocks, check!

Need 6 Tiny Tree blocks, check!

No need to click today unless you’re behind on your clicking too!

Share your progress with us on my Facebook group here:

https://www.facebook.com/groups/SewingWithSusan

I’ll be back tomorrow with Day 11 instructions.

Just 2 more blocks & then assembly!

Just Keep Sewing…

Susan

Mystery Quilt-Along

Another 12 Days of Christmas Mystery Quilt-Along, Day 9 Addendum- Freezer Paper Removal

Day 9 Addendum!

To finish the car blocks that we started on Day 5,

I used the tiny blind hem stitch.

This is what it looked like after I completed the stitching.

Since the freezer paper needs to be removed,

I carefully cut slits behind each of the areas with a template inside.

Notice there are 2 layers of freezer paper in some areas. This is the only reason this is a bit tricky.

Please use patience.

It’s not hard, but you need to be gentle so you don’t tear out stitches & ruin all of your nice work!

Since there are multiple layers I got the block generously wet.

Typically a little bit of water will do,

but I want the water to go through both layers of fabric & freezer paper.

Pulling on two opposite sides of the applique will pop the freezer paper out of the stitching so you can reach in and pull out the paper.

I removed the top layer of paper from behind the windows then with tiny scissors, I cut away the background fabric inside the stitching leaving about 1/4″ seam allowance.

Next I cut slits in the car (black) fabric.

I could then see the paper and carefully pull it out.

Next I did the same thing behind the wheels.

I think the rest of the paper removal is self explanatory.

I used the point of these scissors to remove the paper in the tiny tree trunk.

I pressed wet block flat with my fingers just to be sure it dries as flat as possible, not distorted.

The block is now under the ceiling fan drying!

Don’t try to iron it to dry it, you’ll distort the block.

Once it’s dry I will trim up my wicked looking seam allowances,

spray it with Mary Ellen’s Best Press & press it, then it will look like new! (I hope lol)

I’m not sure why I find this so exciting, but I do.

I can’t wait to see it finished!

That’s #1 of 3…

Let me know if you have any questions about this process.

I want you to enjoy it as I do!

When you get your blocks made please share them with us on my Facebook group here: https://www.facebook.com/groups/SewingWithSusan

I’ll be back tomorrow with Day 10 blocks.

Just Keep Sewing…

Susan

Mystery Quilt-Along

Another 12 Days of Christmas Mystery Quilt-Along, Day 9

Welcome to Day 9!

Again we delve into the scrap bag.

Today we will finish the car blocks that we started on Day 5.

We’ll make a tree to put on top then appliqué it to background square.

Click the link below to bring up the PDF with templates to complete the car blocks.

Another+12+Days+Day+9+complete+cars

I like to use freezer paper templates

& turn under the fabric edges

so there are no raw edges on my appliqué.

Try my method, or use your favorite!

Since we need 3 blocks,

cut 3 freezer paper pieces for the trees & trunks,

layer them with the templates on top,

then staple the layers together.

Cut out the tree templates with paper scissors.

Carefully remove the staples.

Fuse the wax side of the templates to the tree & trunk fabrics.

Use your magic Apliquick Bars to glue the seam allowances to the back of the templates.

It really is very easy with a bit of practice.

Below are videos showing me gluing both corner

& round shapes.

If you don’t have Apliquick Bars & would like to buy them,

you can find them on my website by clicking here.

Assemble the parts of the car by gluing the overlapping pieces together using the template that I’ve provided you.

NOTE, Don’t glue the car to the paper template sheet!

Position the bottom edge of the car 1″ above the bottom of the

6 1/2″ x 6 1/2″ square of background fabric.

Glue only the seam allowance of the perimeter to the background square.

I like to use a 6 1/2″ ruler to press the entire piece onto the background to help the edges get glued tight.

This is important & will make the appliqué portion a snap!

Use your favorite appliqué stitch to stitch the car & tree to the background.

I will be using the tiny blind hem stitch that I love to use because it resembles hand stitching.

The thread colors should match the fabrics that are being stitched down not the background fabric.

You can also use decorative stitches.

If you’re going to use this freezer paper appliqué process I have another post that will show you how to remove all of the freezer paper templates after your block is stitched.

Click here to go to the Day 9 Addendum for those instructions.

Enjoy making cute cars!

When you get your blocks made please share them with us on my Facebook group here: https://www.facebook.com/groups/SewingWithSusan

I’ll be back tomorrow with Day 10 blocks.

Just Keep Sewing…

Susan

Mystery Quilt-Along

Another 12 Days of Christmas Mystery Quilt-Along, Day 8

Welcome to Day 8!

Again we delve into the scrap bag.

Today we will make 4 more Tiny House blocks.

Am I the only one that it takes 30 minutes to choose the fabrics for each block & then only 2 minutes to sew it together???

Today is the last of the Tiny House blocks!

They’re the same instructions as the Day 4 Tiny House blocks,

but today we only need to make 4.

Click the link below to bring up the PDF.

Another+12+Days+Day+8+Tiny+House+Blocks

When you get your blocks made please share them with us on my Facebook group here: https://www.facebook.com/groups/SewingWithSusan

I hope to be back tomorrow with Day 9 blocks.

Just Keep Sewing…

Susan

Mystery Quilt-Along

Another 12 Days of Christmas Mystery Quilt-Along, Day 7, Happy New Year!


Happy New Year 2021 & Welcome to Day 7!

6 steps down, 6 to go!

Are you keeping up?

I hope so, but if not, don’t be discouraged.

There will be some slower days ahead where you can catch up.

I still have some tiny & big houses to make &&& 2 cars.

Hopefully next week I’ll feel up to doing that.

Again we delve into the scrap bag.

Today we will make 2 more Tiny Dresden plate blocks, yay!!!

I already gave you a PDF of those detailed instructions,

but I’m sharing it with you again today.

If you don’t have the plastic template & would like to purchase one

you can find them on my website by clicking here.

Click the link below to bring up the PDF.

Another+12+Days+Day+7+Tiny+Dresden+Plate+Blocks

When you get your blocks made please share them with us on my Facebook group here: https://www.facebook.com/groups/SewingWithSusan

I hope to be back tomorrow with Day 8 blocks.

Just Keep Sewing…

Susan

Mystery Quilt-Along

Another 12 Days of Christmas Mystery Quilt-Along, Day 6


Welcome to Day 6!

Again we delve into the scrap bag.

Today we will make Big House blocks!

Did you notice my door greeter?

Isn’t he cute???

I could have had this to you a lot sooner if I didn’t have so many fabric options…

Also notice my new blue rotary cutter matches the blue house?

I sure miss my pink Olfa cutter, but alas I wore it out!

Anybody know where to get a new one?

I’ve Googled it time & again but with no luck…

I hope Olfa offers them again, soon!

This block is from my Dresden Village pattern

& my Christmas Greetings pattern.

I decided to go a bit crazy & use 3 different fabrics for the roof, windows & door.

No wonder it took me so long to choose fabrics from my scrap tote, right?

You’ll need to make 3 Big House blocks today.

I made a PDF of the detailed instructions.

Click the link below to bring up the PDF.

Another+12+Days+Day+6+Big+House+Blocks

When you get your blocks made please share them with us on my Facebook group here: https://www.facebook.com/groups/SewingWithSusan

I hope to be back tomorrow with Day 7 blocks.

I hope you have a happy & safe New Year!

Just Keep Sewing…

Susan