A Quilt Along, Applique quilt projects, Dresden Plate Quilt, Halloween quilts, Mini Dresden Patterns, New quilt pattern

Candy Corn Sampler Quilt-Along Step 6, Dresden Pumpkin Blocks

Welcome to Step 6 of making your Candy Corn Sampler!

Thanks for sharing pics on our FB group, Sewing With Susan!

Step 6 is Dresden Pumpkin Blocks.

No need to make the flying geese blocks today,

but you’re going to need to make them sooner or later, lol.

I borrowed these blocks from my new-ish Dresden Pumpkins table runner pattern.

2 Tiny Dresden plates for today & tomorrow.

You’ll need these…

Refer to page 11, for the complete instructions.

A couple more leaves for this block.

If you remember the leaf making video I showed you, use the small bar w beveled end for the straight parts of the leaf then use the pointed end for the round parts.

If you don’t already have Apliquick Bars & Bohin glue you can find them & all the tools that I use for my appliqué on my website by clicking here.

More tiny blind hem stitch for the circle & leaf appliqué.

Can’t wait to see your pumpkins!

If you’re not already a member of my Sewing With Susan Facebook group, please join & share pics.

Find the group by clicking here to join.

Just Keep Sewing…

Susan

A Quilt Along, Applique quilt projects, Dresden Plate Quilt, Halloween quilts, Mini Dresden Patterns, New quilt pattern

Candy Corn Sampler Quilt-Along Step 3, HOOT Block

Welcome to Step 3 of making your Candy Corn Sampler!

Thanks for sharing pics on our FB group, Sewing With Susan!

Let’s start Step 3!

Tiny Dresden plates are the main topic for today.

Tip for today is to spray & iron all of your fabrics with Mary Ellen’s Best Press. Your plates will lie flatter when they’re complete.

I use the hand pump bottle when spraying yardage & the finger pump bottle when I’m spraying my finished plates or blocks. Its spray is really fine & won’t super saturate the small pieces & make them go wonky.

Refer to page 7, “HOOT Block” to get started.

Good news, Step 4 will be a lighter load, so if you’re feeling overwhelmed, sorry, but maybe you can use Thursday & Friday to get caught up.

I again chose to use freezer paper machine appliqué method for this block.

If, like I mentioned in Step 2, you cut multiple appliqué templates at once for the birds, you’re saving time! If not, you can still do so since there are more birds on this quilt.

Just stack up to 6 layers of freezer paper a bit larger than the shape to cut out & staple a template on top.

(Be sure the freezer paper is stacked up correctly. Notice some birds on the quilt face right & some face left, but you can cut them all at once. See notes on each block’s instructions)

Using serrated scissors helps to cut through lots of layers. I use a staple remover to remove the staple without tearing the paper layers.

You know I love this part of the quilt!

Having the right tools makes all the difference!

Use your favorite appliqué method!

Below I show how to manipulate a point with my favorite tools; Apliquick Bars. Use this short video to help with the birds.

Here I show how simple it is to manipulate a circle. Yes, simple! Just practice.

You’ll need them for the Tiny Dresden plates.

If you don’t already have Apliquick Bars & Bohin glue you can find them & all the tools that I use for my appliqué on my website by clicking here.

Be sure you have enough contrast between the background fabric and appliqué pieces then position all the appliqué on the background fabric then glue (or fuse) it in place.

“HOOT” is going to be a tight fit, just be sure you position the letters inside the 1/4″ seam allowance.

I do A LOT of fabric auditioning while designing a quilt. I originally designed this quilt with white birds so that’s where I went with them.

Choosing the right center circles is yet another decision…

My double guessing of myself just wastes time!

For some reason I thought the white birds were too stark so I made black birds.

Obviously they were too dark for me!

As you can see, my original idea of white birds was perfect! I think what makes it work is the pretty black designs in the light cream fabrics.

What I’ve learned over the years is that I like low contrast in fabrics across my quilts. You may think my quilts are too busy, if so, you probably like high or at least more contrast. Make your birds stark white, or maybe orange! lol

Good grief, grandma!!! Lol

I love of the tiny blind hem stitch* for plates & freezer paper appliqué. Done small enough it resembles hand stitching. If you don’t know what I mean, use the blind hem setting, but make the stitch length & width very small. *IF your machine won’t let you adjust the blind hem stitch, use a different one!

#1 rule, have fun oh, & ask questions!

If you’re not already a member of my Sewing With Susan Facebook group, please join & share pics.

Find the group by clicking here to join.

I can’t wait to see your HOOT blocks & your bird fabric choices!

If you have any appliqué questions you can ask them there too.

If you’re still undecided on your fabrics

you can order your Candy Corn Sampler kit today from Need’l Love by clicking here.

Just Keep Sewing…

Susan

A Quilt Along, Applique quilt projects, Dresden Plate Quilt, Halloween quilts, Mini Dresden Patterns, New quilt pattern

Candy Corn Sampler Quilt-Along Step 1, Candy Corn Blocks

Hello from Emma, my little pumpkin spice baby, & me!

Welcome long-time followers & all of my new followers

to Step 1 of making your Candy Corn Sampler!

I’m glad you’re taking this sewing journey with us to make my newest favorite quilt.

Hopefully you’ve made at least a few fabric decisions…

This Hootenanny fat 1/4 pack was a large part of my inspiration for this Candy Corn Sampler Quilt. It looks nice with this Grunge piece, don’t you think? I didn’t end up using it but Grunge goes with almost everything!

If you’re still undecided on your fabrics you can order your Candy Corn Sampler kit today from Need’l Love by clicking here.

Let’s start with Step 1!

My first step with any quilting these days is to spray & iron all of my fabrics with Mary Ellen’s Best Press. It doesn’t make the fabric stiff like starch does. It gives it more body & helps it press flatter which is really helpful especially when working with little pieces of fabric. I’ve also noticed that if I need to reposition something & press it again the first creases will press out unlike the results of using regular starch.

I use the hand pump bottle when spraying yardage & the finger pump bottle when I’m spraying my finished plates or blocks. Its spray is really fine & won’t super saturate the small pieces & make them go wonky.

The next task is to start cutting & making candy corns!

Refer to page 4, “Candy Corn Blocks” & “Cutting” to cut the strips then sew the strip sets together. Next, refer to the cutting diagram to cut the “trees”.

NOTE: Do not rotate the template to cut the candy corns or half of your candy corns will be upside down!

The in-between triangles will be discarded or if you’re like me, put away for another day…

Follow assembly instructions, page 4, to make the blocks. I sewed these blocks on my featherweight machine. That was fun!

In case you noticed, “real” candy corn has orange in the middle, but I prefer my fabric candy corn to have the orange on the outside.

Sew the left background onto the candy corn then press.

Sew the right background onto the candy corn then press again. Don’t forget to do the little bit of trimming. These blocks should measure 3 1/2” x 4 1/4”.

Make 48. Don’t worry, they go quickly & you have 2 days to make them (just 1 per hour lol) before we move on to Step 2!

Emma says they’re a snap!

If you’re using super cute fabric who cares how long they take?

I played with one of the super cute Hootenanny rick rack stripes to make a few trees too. I’m not sure where they’ll end up.

I love the ease & accuracy of this block’s construction. ❤️ I hope you do too!

If you’re not already a member of my Sewing With Susan Facebook group, please join & share pics.

Find it by clicking here to join.

I can’t wait to see your candy corn blocks.

Just Keep Sewing…

Susan

New quilt pattern, New tiny Dresden plate quilts

Gnomes At Home Will Love Your Home!

My brand new Gnomes At Home seasonal series

is now on my website & the gnomes are

waiting for you to call them to your home!

Make a cute little 6″ x 9″ gnome quilt each month

with a beard made of Tiny Dresden petals.

These are perfect displayed on an Ackfeld 6 x 6 stand,

also available on my website.

I’m a one-stop-shop!

Make just your favorite or all 12.

Only one stand necessary to swap the quilts onto.

Patterns include the adorable Just Another Button Company

button or buttons each month,

full-sized, reversed applique templates &

complete, illustrated Tiny Dresden plate assembly instructions.

I loved making these & you will too!

Be the first on your block, lol.

Just Keep Sewing… gnomes!

Susan

New quilt pattern

Another Fresh New Pattern, Baskets & Posies

This new pattern is made with Cider by Basic Grey

for Moda Fabrics plus I added the stripe fabric.

Some of the prints are new Grunge colors,

as part of the Cider collection.

This quilt just sings spring, don’t you think?

I showed you some of the basket work last fall while I was making this quilt.

I love the check print.

My pattern tester, Heather used the check print for her baskets and varied the flower fabric colors.

It looks fantastic! I’m a bit jealous…

There were circles to make…

Of course…

A nice pile of petals were also made.

This is such a fun quilt to make!

Baskets & Posies is now available in both paper & PDF forms

on my website by clicking here.

The pattern instructions include;

my Tiny Dresden plate tricks & techniques, of course,

freezer paper appliqué

& the piecing of the basket blocks.

This would make a great workshop for you quilting group!

Do you know that I travel to teach?

You can see my offering on my website by clicking here.

Just Keep Sewing…

Susan

New quilt pattern

Another Fresh New Pattern, Bazinga

Bazinga was such a fun quilt to make!

The color prints are from Winkipop by Jen Kingwell for Moda Fabrics.

In retrospect I probably should have named it something like “I Spy,”

or maybe “Ghost Trees.”

Can you see the (trunkless) trees from my Tiny Tree Template Set #286?

The block is similar to the 54-40 fight block,

but as you can see, there are no points to be fussy about!

Originally I designed this with Christmas fabrics.

My pattern tester, Chris,

thinks this would make a good Quilts of Valor quilt.

I agree!

I’m excited to be able to design more quilts using my

Tiny Tree Template Set like I’ve been doing with my

Tiny Dresden #216 & my Mini Dresden #186 templates.

I have a lot more designs in mind,

so if you already have my Tiny Tree Template Set you’re set,

if not, you can find it on my website by clicking here.

Bazinga can now be found in both

paper & PDF versions on my website by clicking here.

More fresh new designs to come!

Just Keep Sewing…

Susan

New quilt pattern

Fresh New Patterns For 2021!

I’m excited to show you the fresh new patterns

that I’ve been working so hard to bring to you.

I hope you enjoy seeing what I’ve been up to.

I also hope you’ll be excited to make 1 or 2 yourself.

Each one was so much fun to create!

If you remember, I showed you my favorite a couple of weeks ago,

Dredsens In The Park.

I love making little Dresden plates

more than any other quilting task these days.

Does it show???

They’re so relaxing & gratifying when

you have the right tools & know all of my tricks!

I discuss & illustrate these for you in every one of my patterns.

When you sew the rainbow it’s nice to have

a beautiful box of Sulky cotton threads to match!

I’ve included exact measurements to easily

lay them all out the same way so they match.

Yes, I like precision…

Most of the fabrics are Winkipop by Jen Kingwell.
I also added a couple other Moda fabrics

like this black dot by American Jane.


I intended to use one of these prints as an outer border, but when I laid it out,

the border was “too much” for the quilt.

Remember this pic?
It’s from back in October when I started cutting these fabrics!
This quilt has been done for quite a while.
Can you understand why it’s so exciting for me

to finally have this pattern ready to send to you???

Freezer paper along with glue &

my Apliquick Bars create perfect leaves so easily.
Practice definitely helps.

I shared with you several videos of me making & also

appliquéing these pieces back in November in my post

“Does Freezer Paper Appliqué Scare Or Excite You?”

You can watch them (again?) by clicking here.

There’s a little difference in the technique

between straight & rounded edges,

so be sure to watch each very short

video clip for the most tips.

Flying geese blocks add a bit of “zing”

around the quilt, don’t you agree?

Dresdens In The Park is now available

in both paper and PDF versions

on my website by clicking here.

Stay tuned for more fresh new patterns!

Just Keep Sewing…

Susan

Applique quilt projects, My Life, New quilt pattern

National Quilting Day 2021

Today is National Quilting Day!

What does this mean?

In my sewing room,

any day that ends in “y” is a quilting day, you?

On this “National Quilting Day”

I thought I’d give you a peak

at my very favorite of the new patterns

I’ve been working on

the past several months.

I showed you a few sneak peeks last fall when I was creating it, remember?

It’s the perfect spring quilt with these Winkipop fabrics

by Jen Kingwell for Moda.

I used freezer paper applique steps,

but you can use your favorite.

Having the right tools is key to

“Having Fun In Your Sewing Room”

which I can teach you & your friends

when you have me over for a workshop & lecture!

Dresdens In The Park is full of my favorite little Dresden plates.

Both my Tiny & Mini Dresden plate templates

are used in this pattern

& you probably already own them by now,

but no worries if you don’t

because the paper templates are included the pattern.

Easy & fun!

I put Dresdens In The Park on my website this morning.

You can purchase the PDF & start working on it today,

this National Quilting Day,

or you can pre-order the paper version

& I’ll ship it to you as soon as it’s available!

I hope you have fun in your sewing room today!

Just Keep Sewing…

Susan


Applique quilt projects, Dresden Plate Quilt, My Life, New quilt pattern

Does Freezer Paper Appliqué Scare Or Excite You?

If freezer paper appliqué scares you,

you should know that you’re not alone!

I used to be one of those people,

but the experience of making the centers of little Dresden plates

has changed all of that for me.

I now – LOVE – freezer paper appliqué.

& I think I’ve gotten pretty good at it.

Practice is the only real solution to this obstacle.

Practice easy techniques using the best tools available.

I now find it to be very easy & I love the challenge &

the self satisfaction that comes with each completed project.

That’s the best advice that I can offer you,

that & show you those easy techniques.

Sit back & view these images & short videos & also

go to my Instagram for more short videos that I made just for you!

First use the Apliquick bars to cover the freezer paper shapes. It’s a little different for the round shapes vs. a straight edge & point. You can see the differences in these 2 vidoes.

After the appliqué shapes are made

glue them onto the background fabric.

Stitch them with the tiny blind hem stitch that I use,

or use your favorite appliqué stitch by machine or by hand.

The threads should match the appliqué shape being stitched down,

not the background fabric.

Next you’ll need to CAREFULLY cut slits behind each shape

so the freezer paper templates can be removed.

Use sharp serrated scissors for best results.

With a white cloth, generously wet the shapes.

It’s only necessary to wet the applique shapes.

No need to get the whole block wet.

Let the piece sit for a few minutes

until the glue has a chance to release the paper.

A gentle pull on opposite sides of each shape

will release the paper from the stitches.

If the paper doesn’t easily release,

it’s probably not wet enough.

I’m loving Jen Kingwell’s newest line,

Winkipop by Moda.

I hope that I’m changing your mind about trying freezer paper applique.

It truly is worth the effort!

Just Keep Sewing…

Susan

Christmas Sewing, My Life, New quilt pattern

These Just In, New Christmas Patterns

I’m excited to announce my brand new patterns

& a new template too.

You know how much I love to sew for Christmas.

Well, these are all Christmas, all the time!

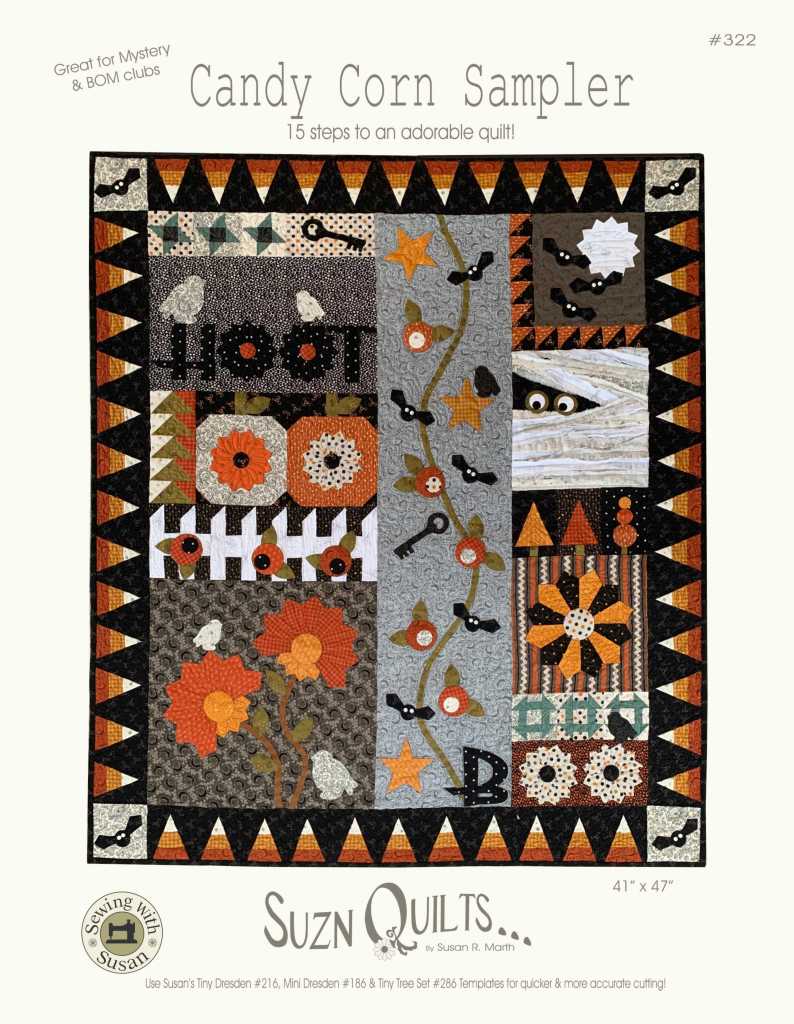
My favorite is my brand new sampler Christmas Greetings.

Like my A Merry Christmas to You pattern,

this pattern can be made into either 5 small quilts for you

or as gifts for 5 of your friends
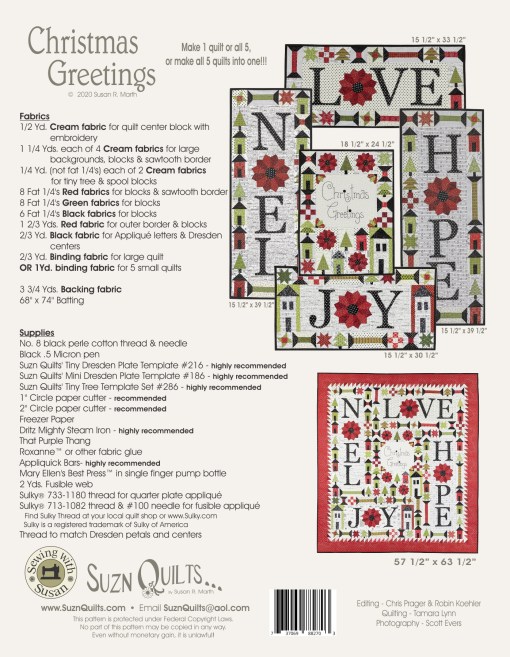
or

after making the 5 small quilts

you can sew them together into 1 larger quilt

then add a couple small borders

to make 1 awesome wall or table quilt for Christmas.

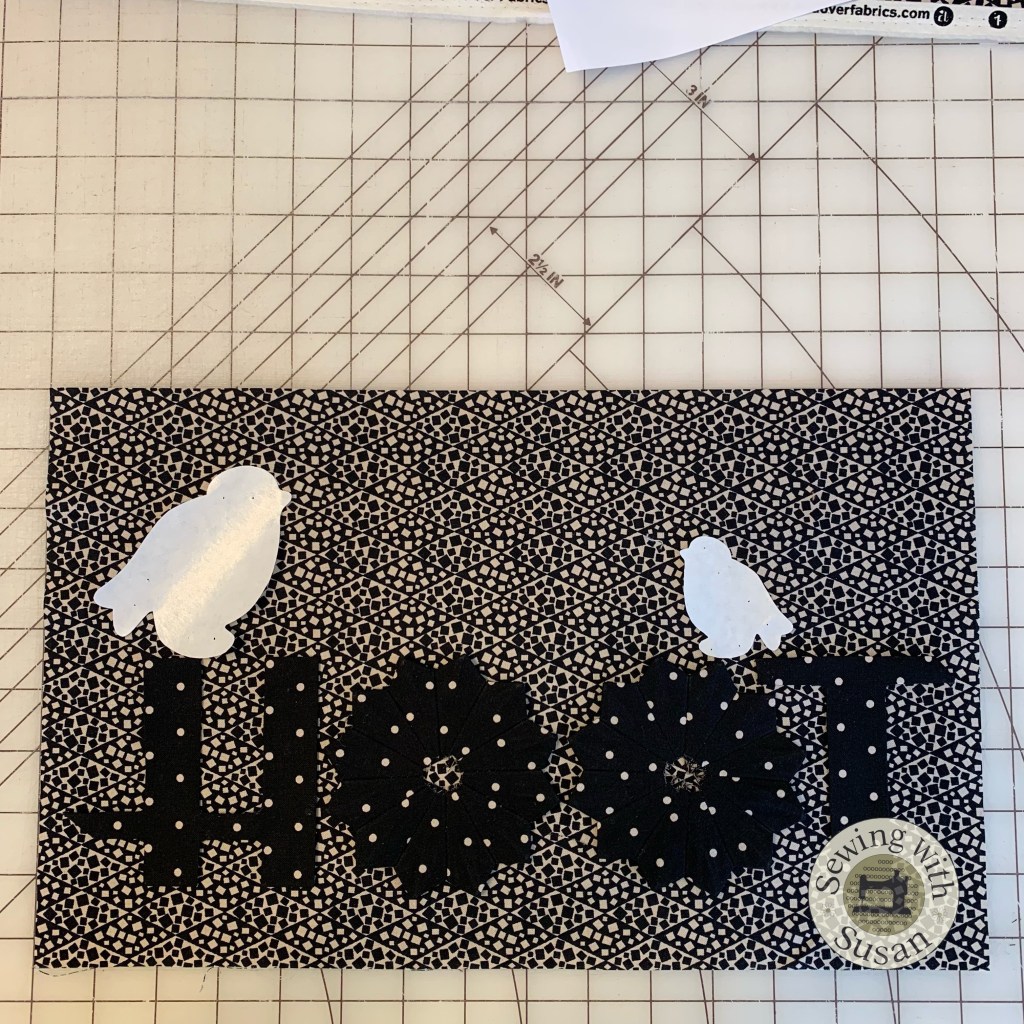
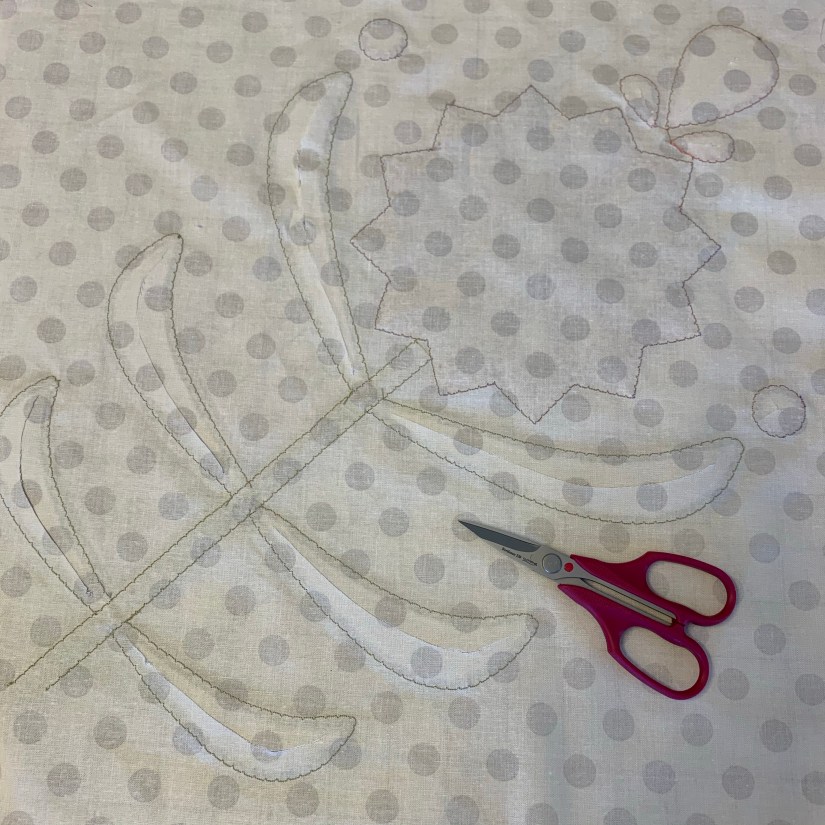
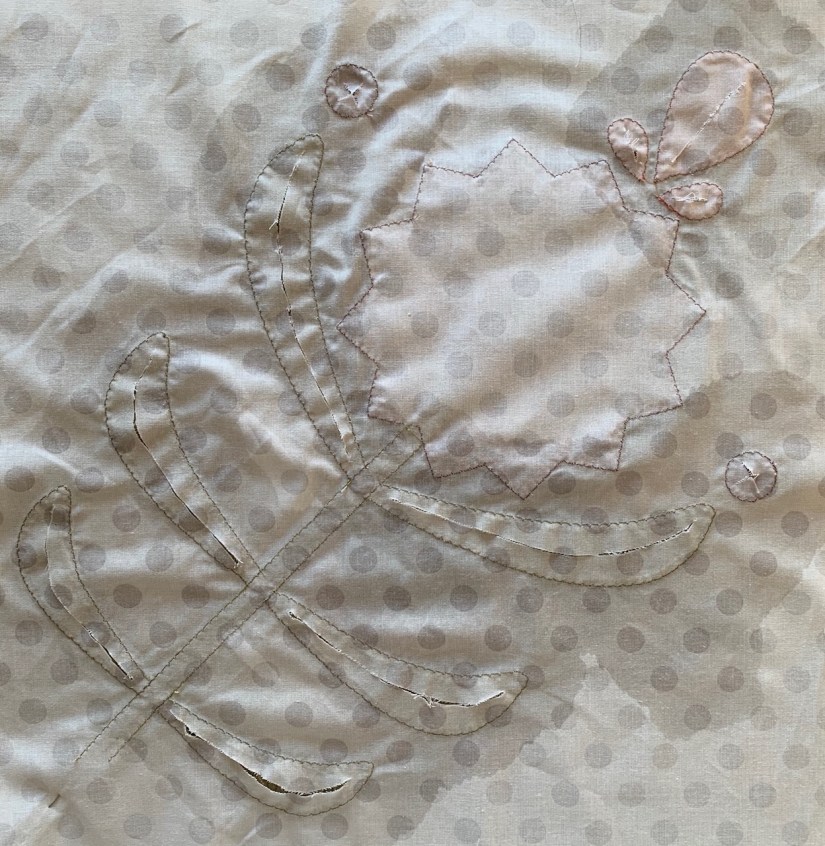
I enjoyed using my new Brightpad to trace

the letters for the perle cotton embroidery.

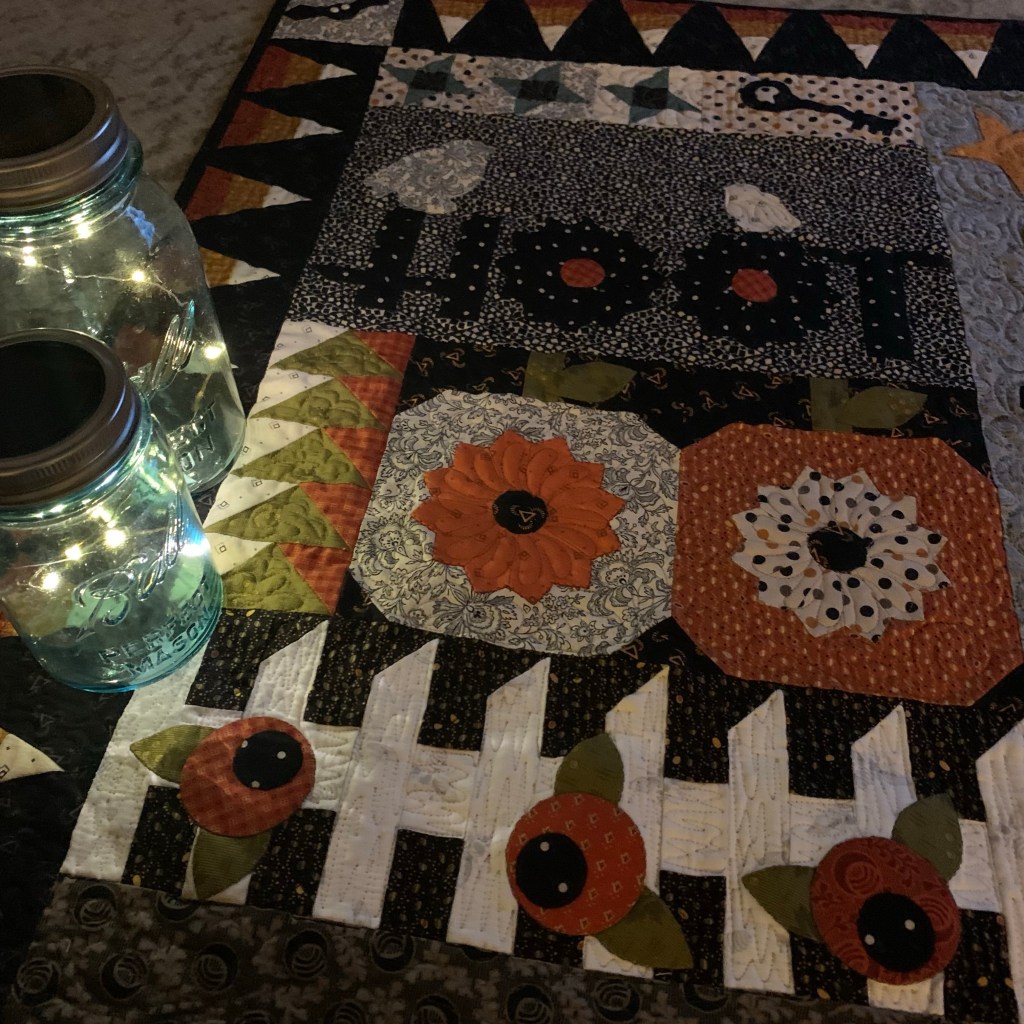
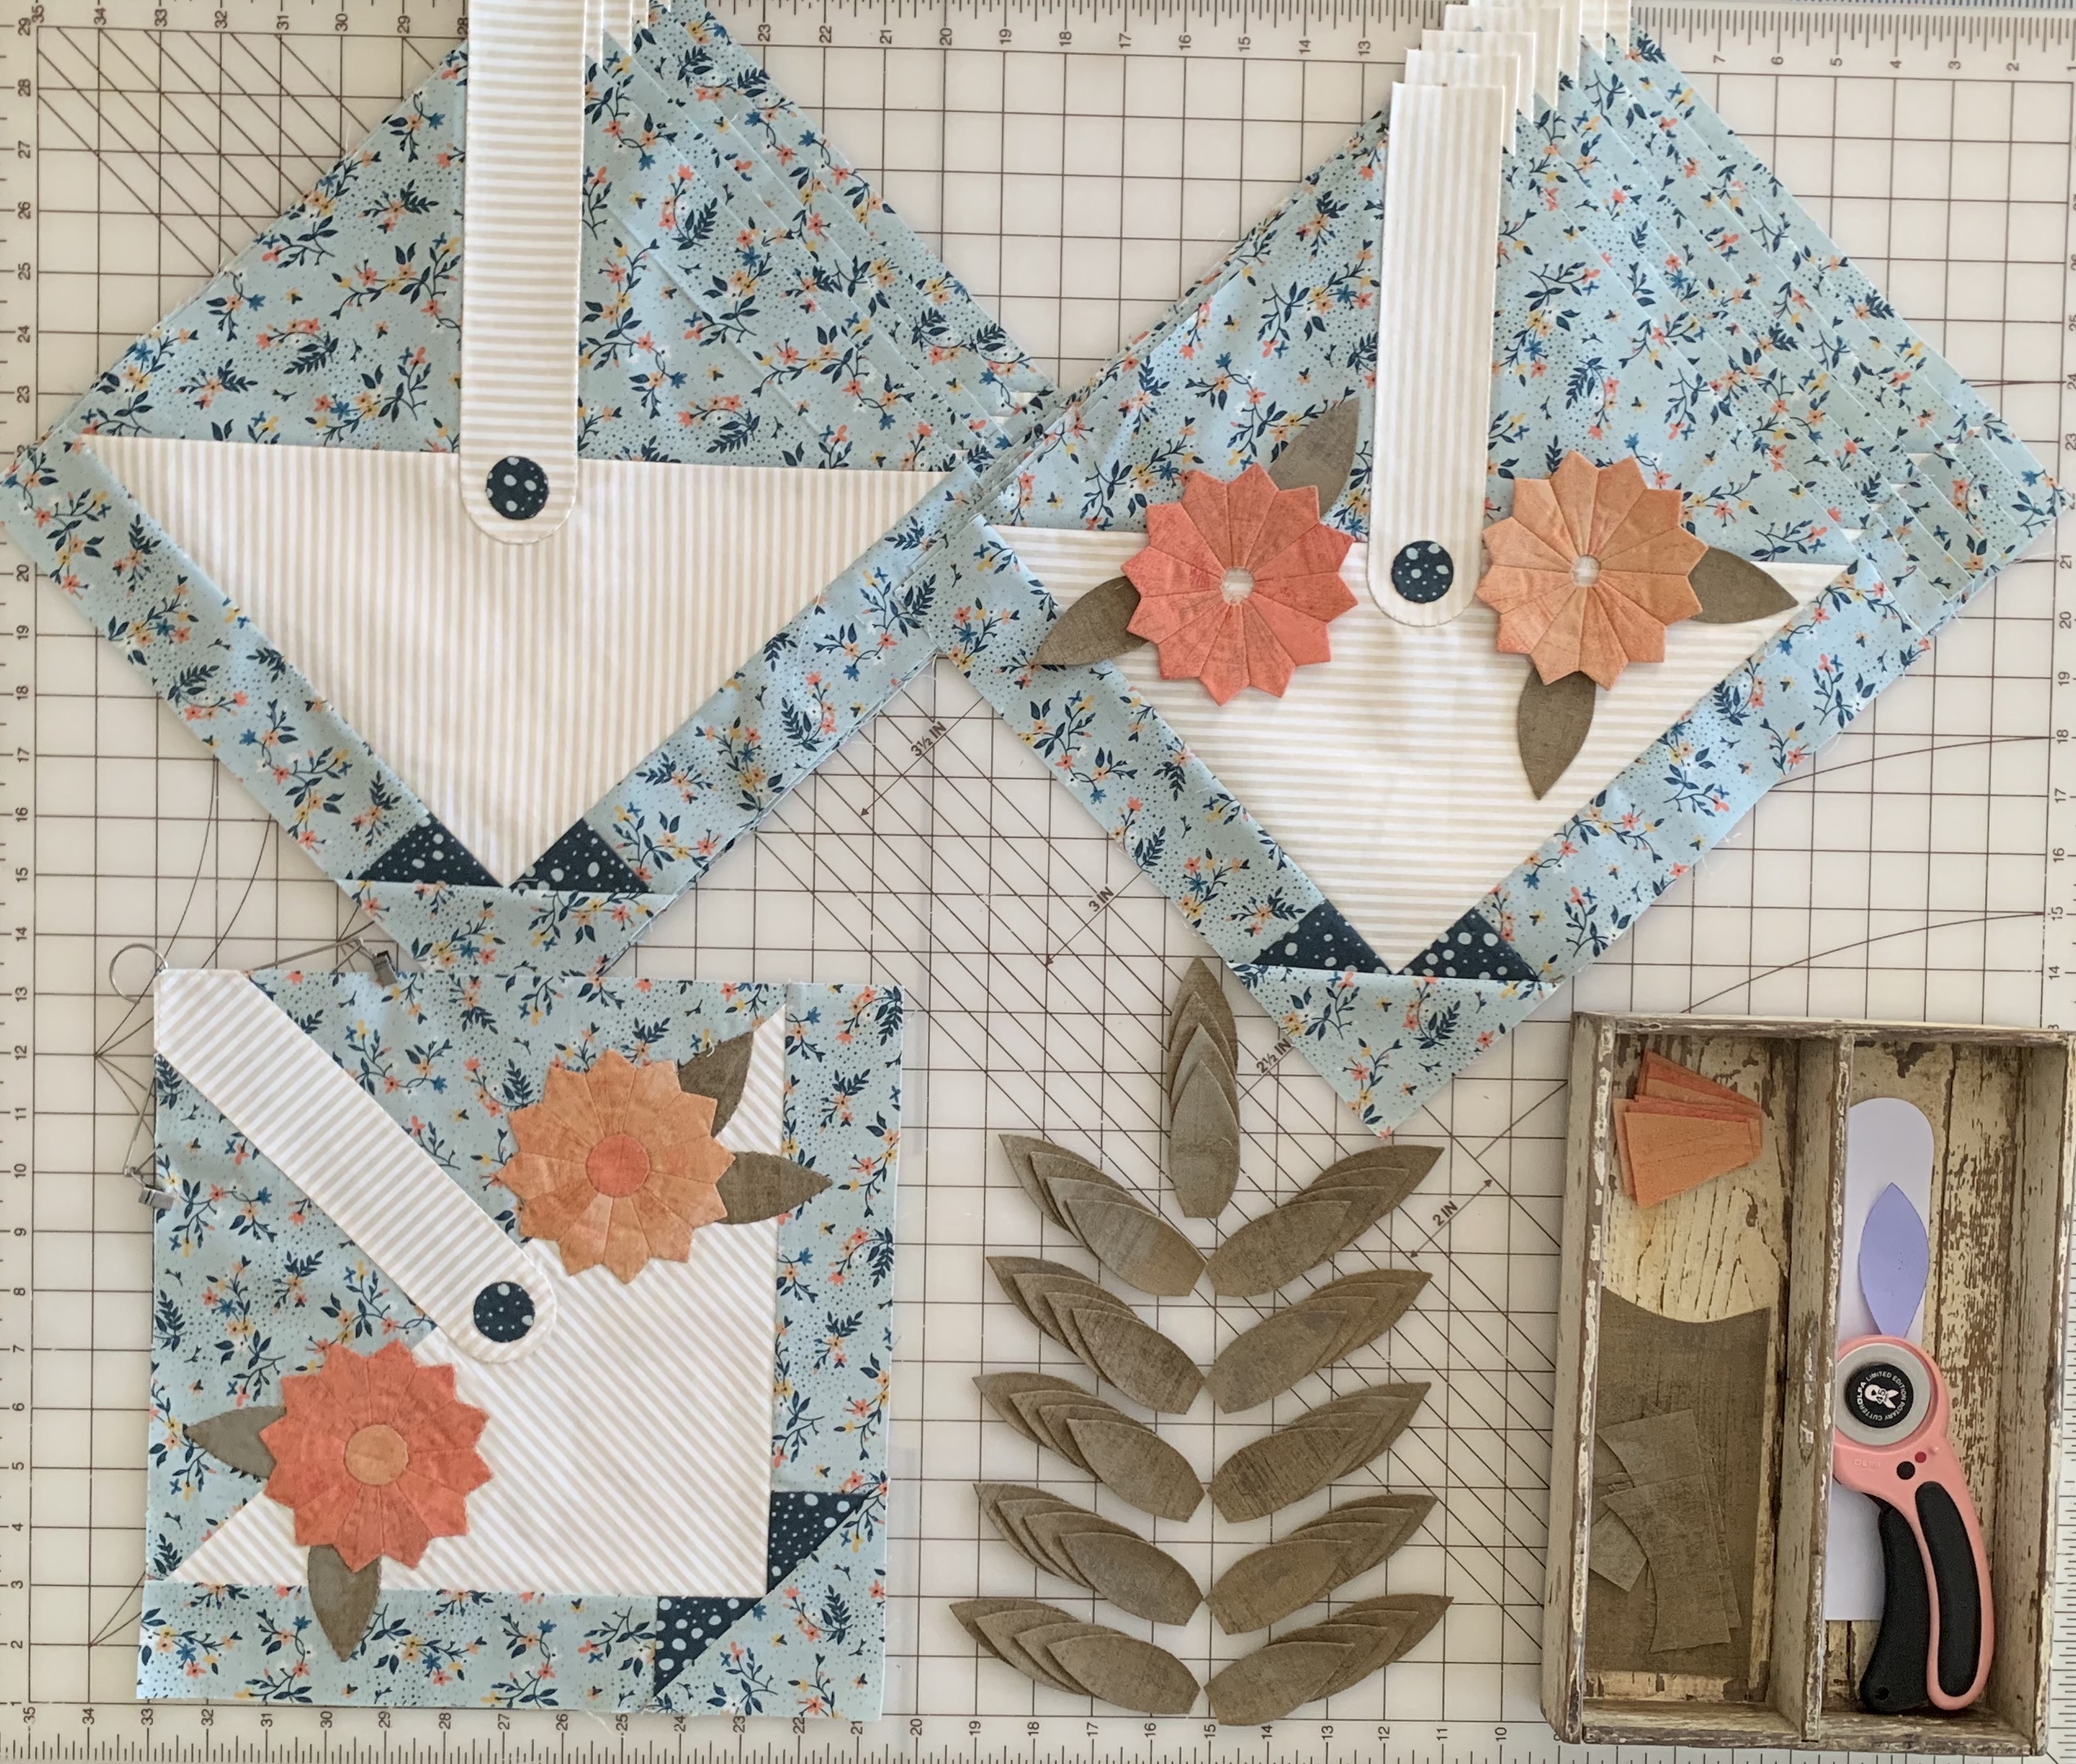
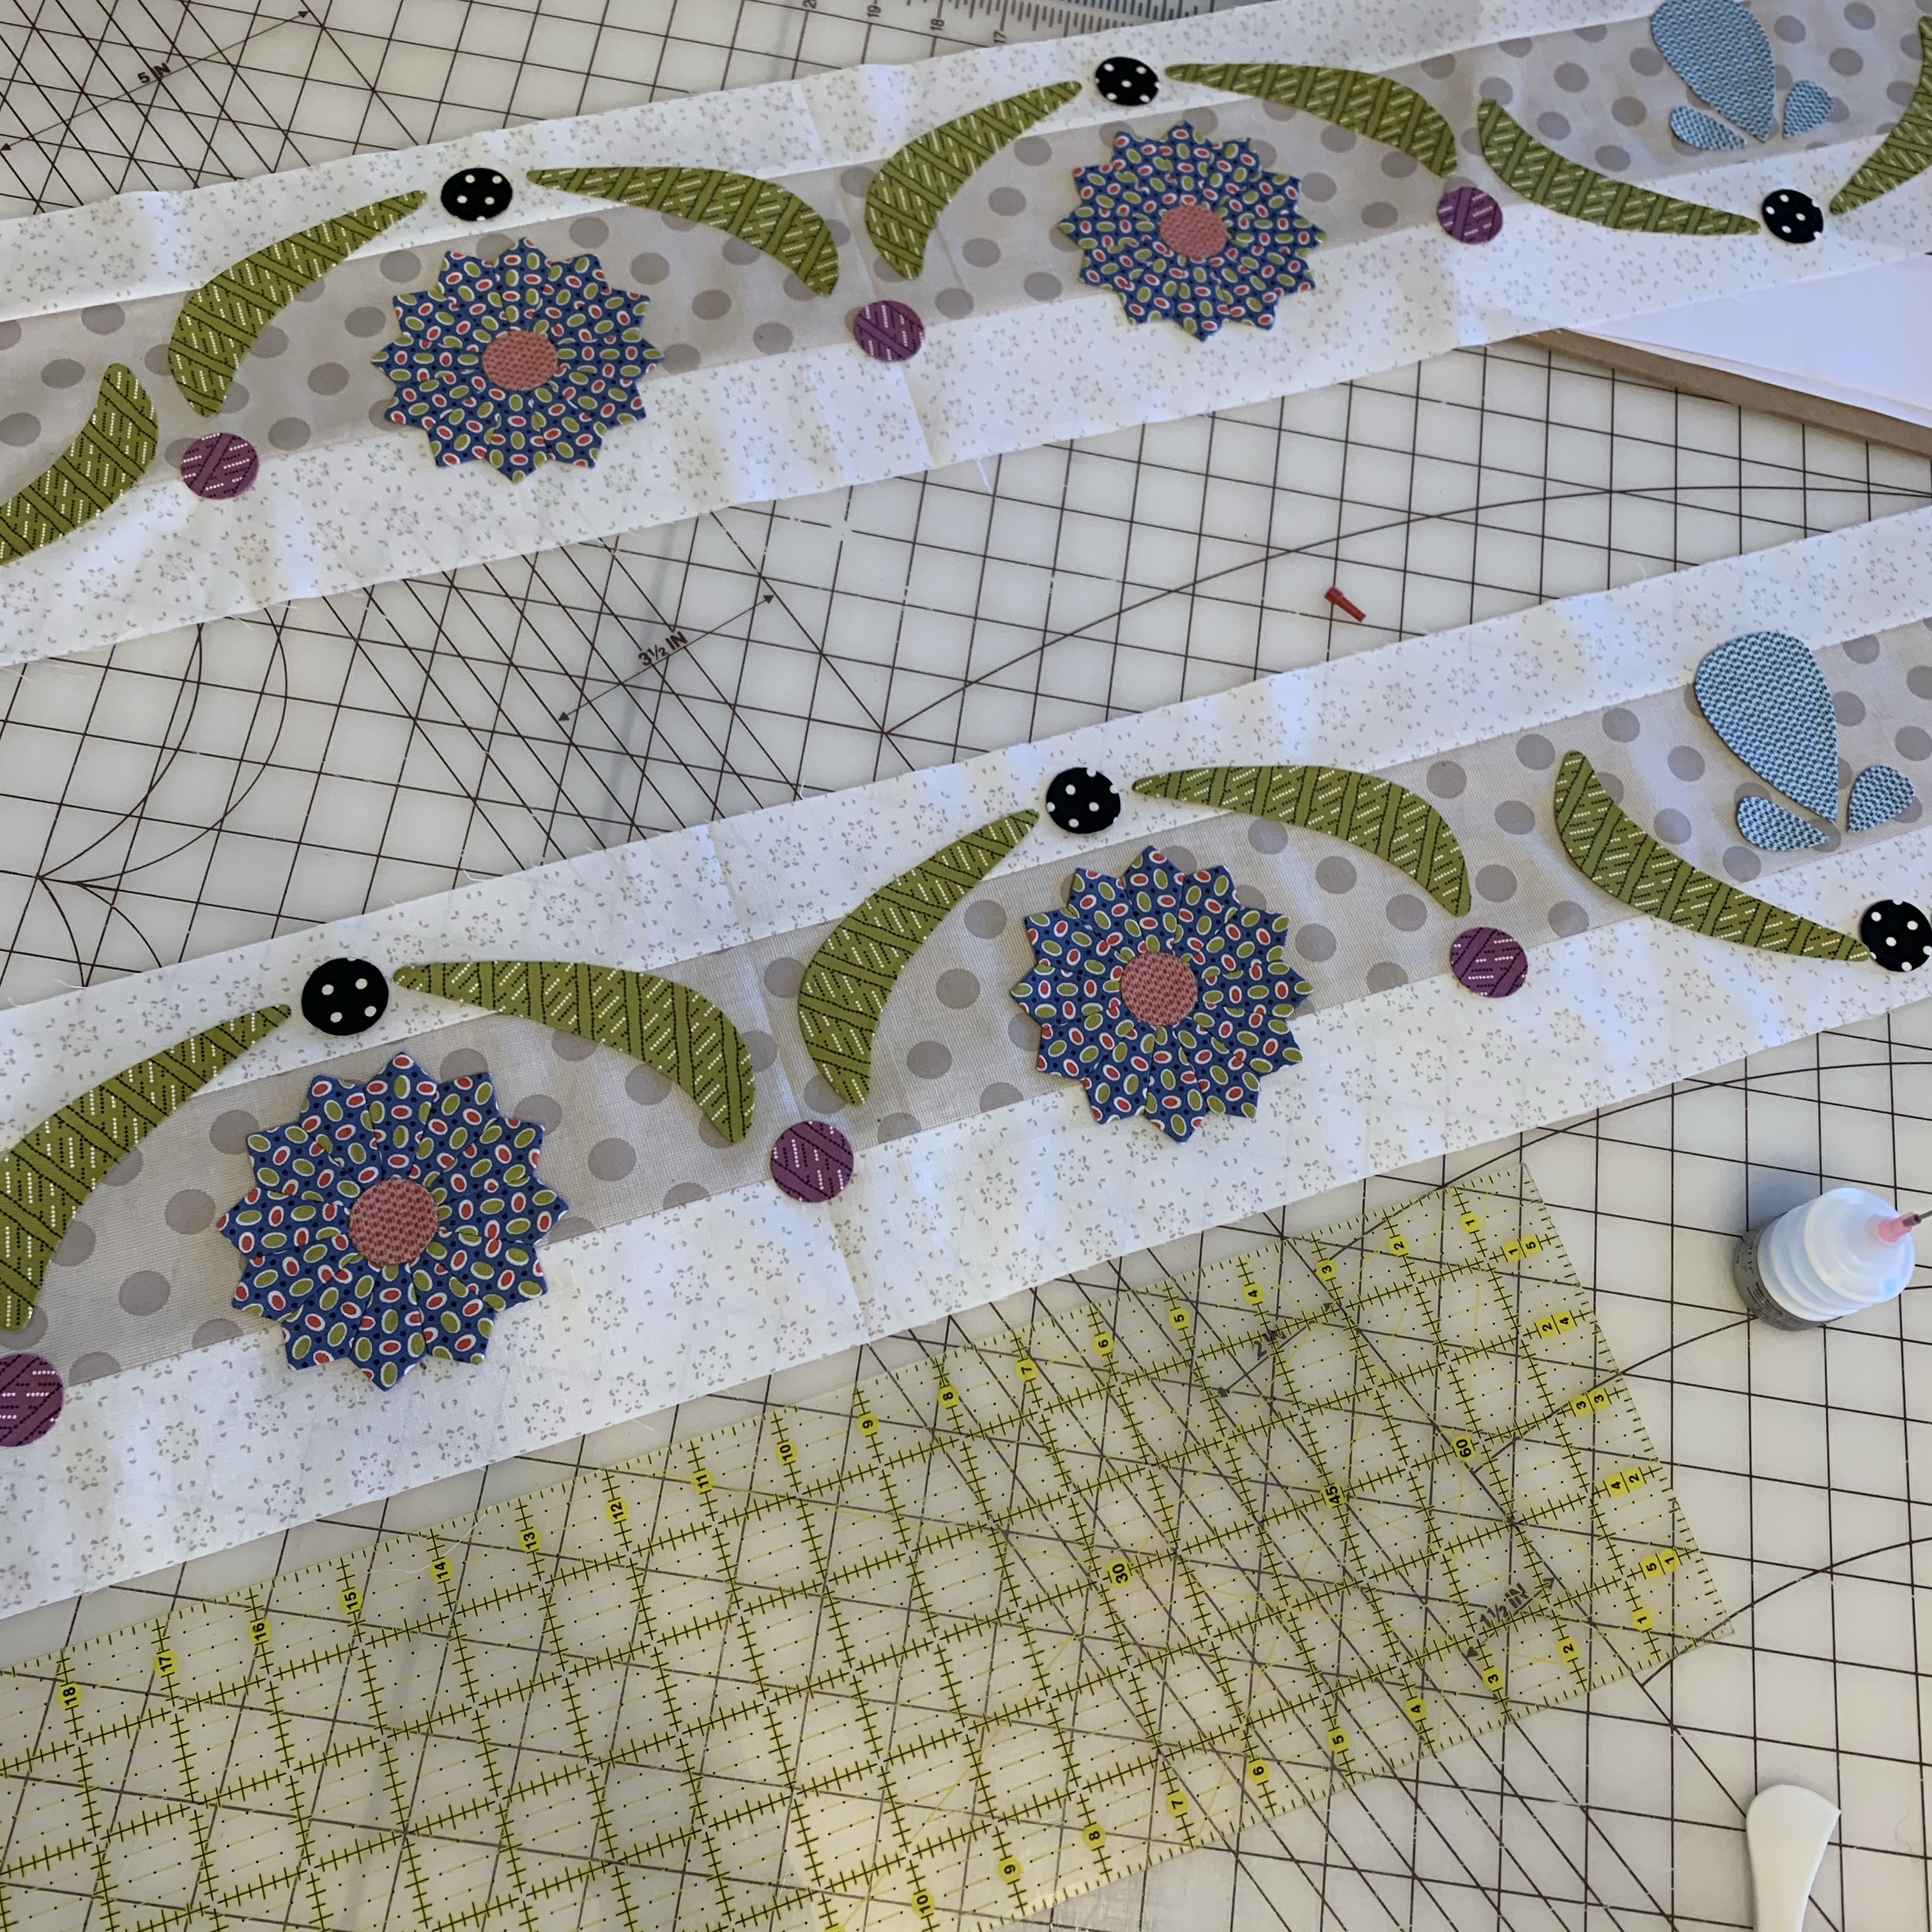
There are a handful of Tiny Dresden plates and partial plates involved.

I love using 2 different fabrics for each plate to add interest.

Just remember to always have the same fabric petal on top

when you sew the pairs together.

After the first seam the fabrics will automatically alternate.

I made 2 sets of everything

so I could photograph both versions for the cover

but you’ll only need to make 1.

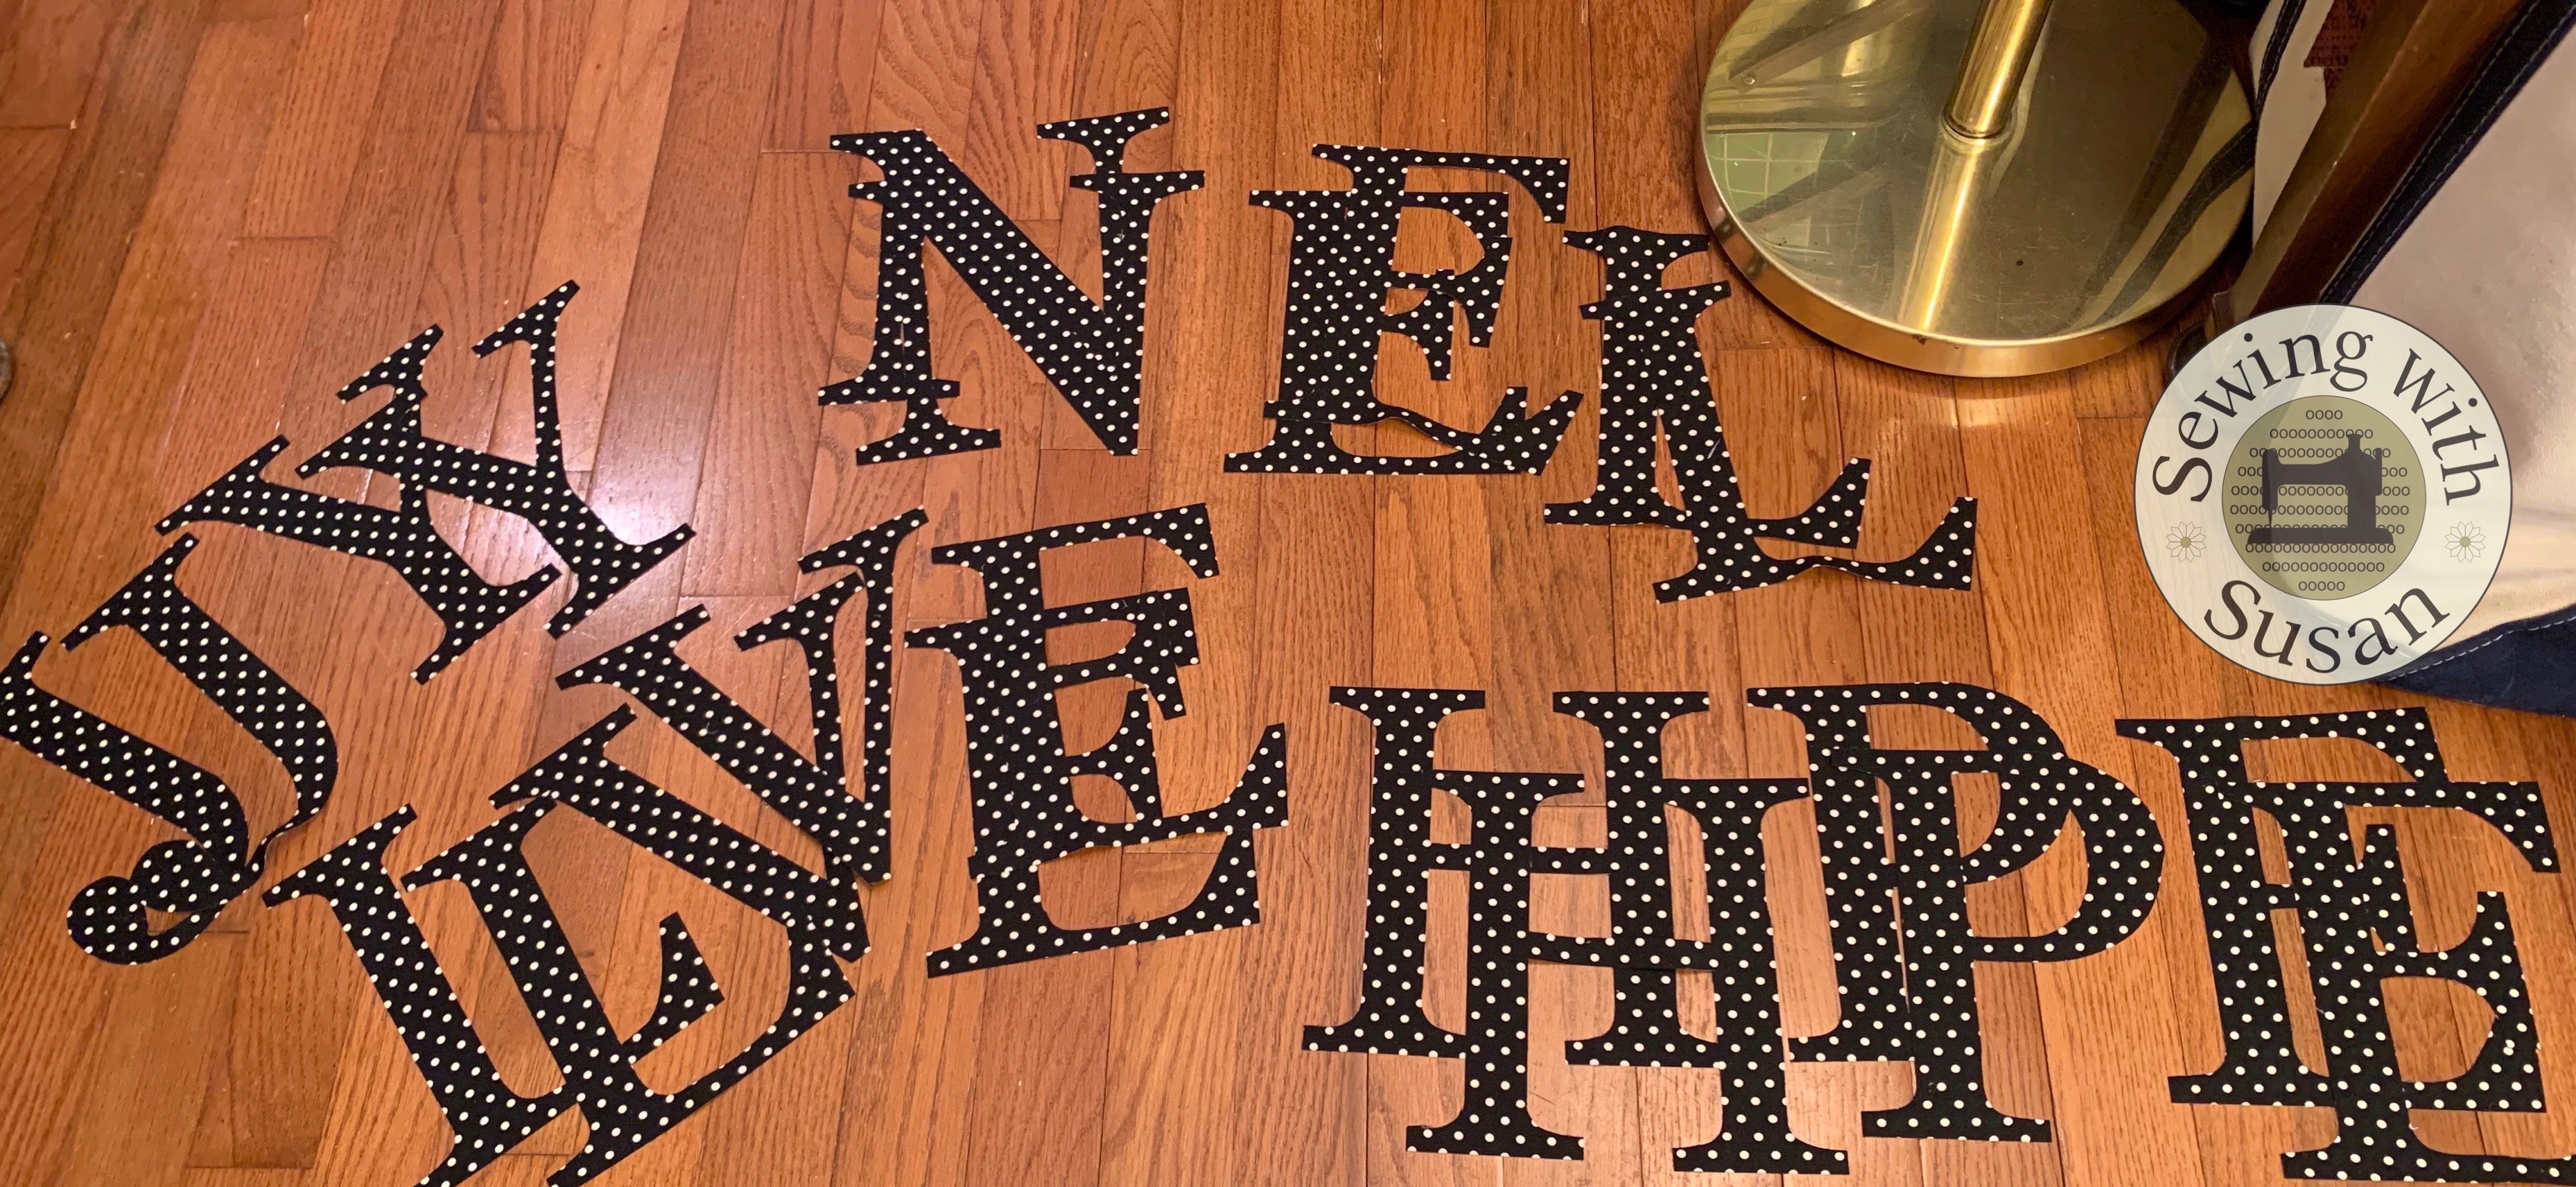
Fusible web appliqué makes the letters quick.

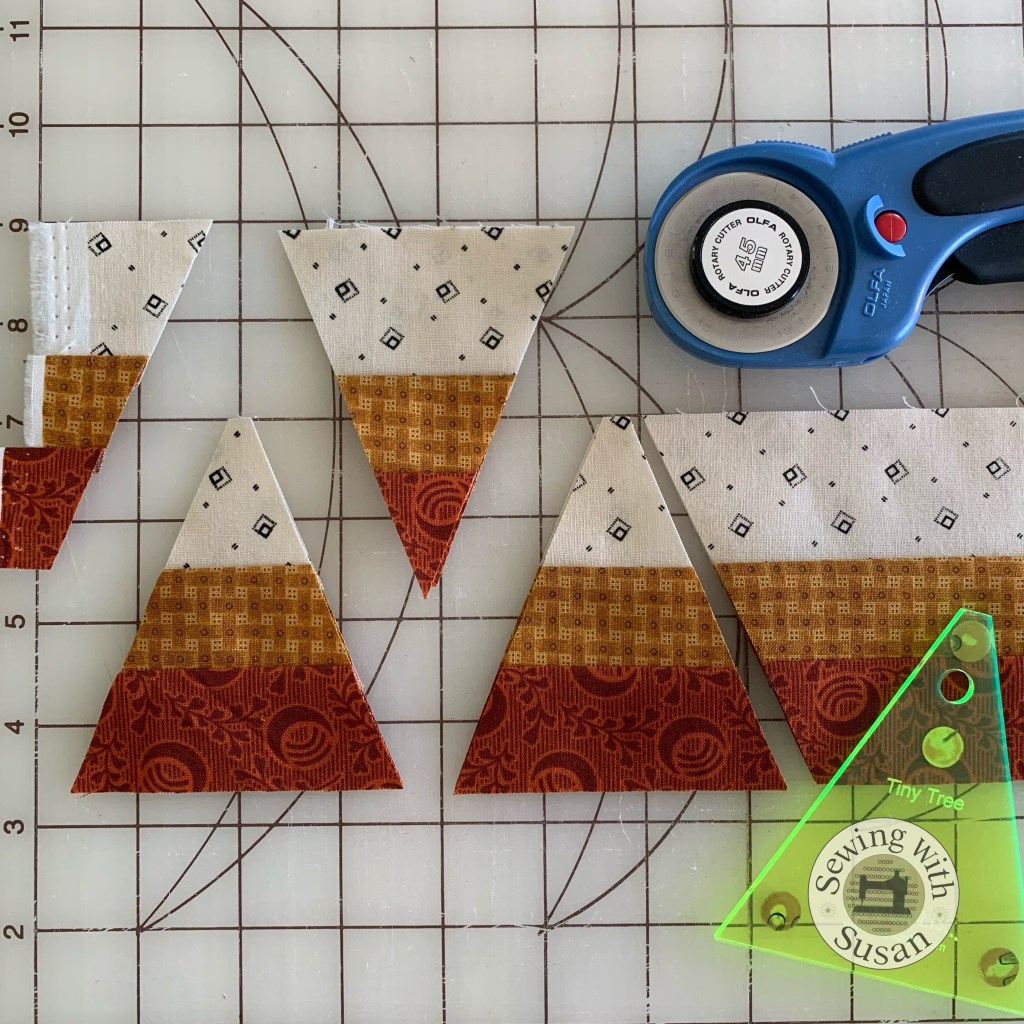
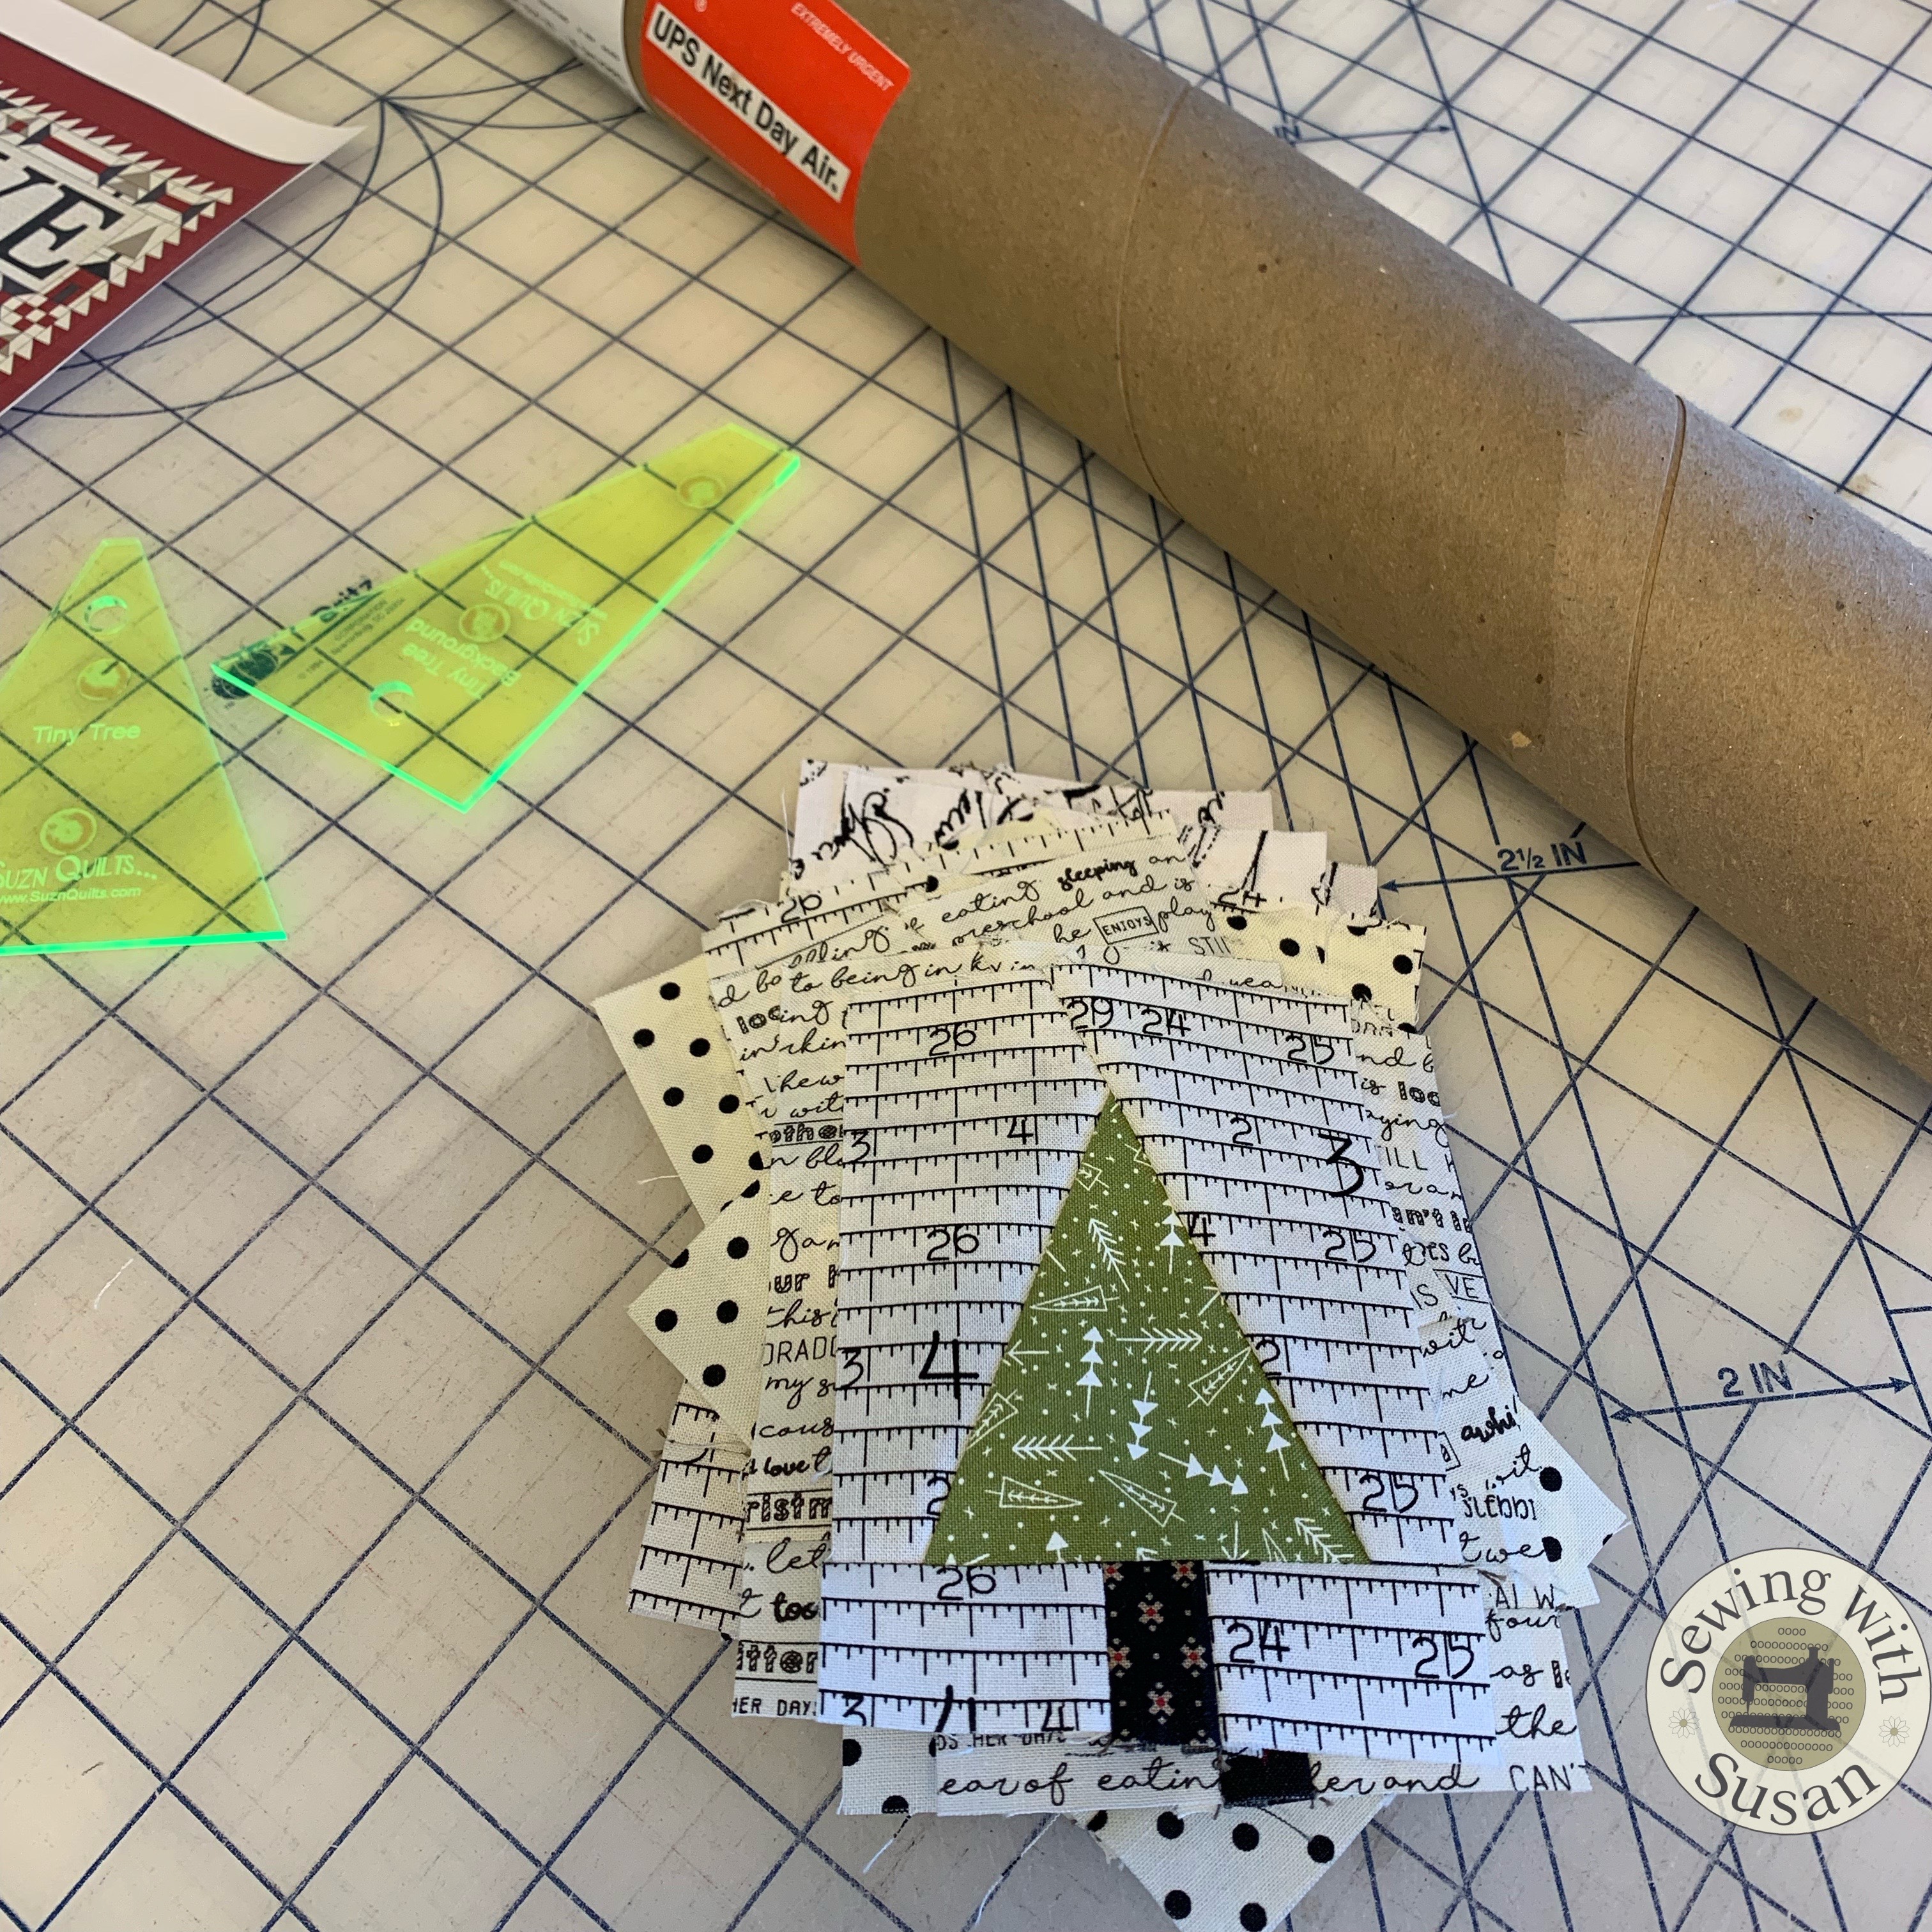
I tried out my new Tiny Tree Template Set!!!

I LOVE how easy & accurate cutting around my brand new

plastic templates make these trees!

(I also love my “new” tiny cupboard that I found

on black Friday when my sister, Lori, & I were antique shopping!)

These 2 trees were just for fun.

Beware!

I’ll for sure be designing many more patterns with these!

In no time I had a perfect stack of trees.

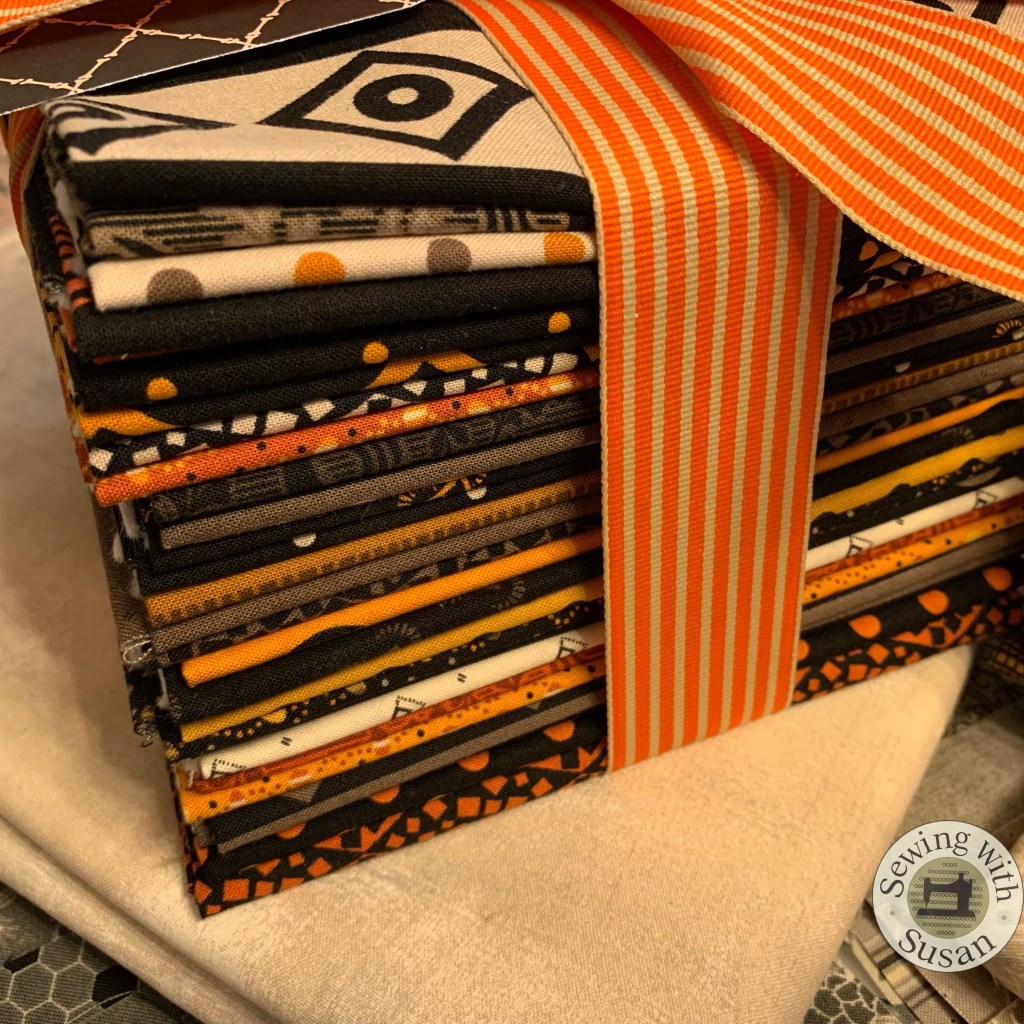
The hardest part of most of the blocks was deciding the fabrics!

I used a lot of Sweetwater’s new Christmas line,

The Christmas Card.

I noticed today that The Fat Quarter Shop now has it available.

I also used some of Jo Morton’s new line, Glad Tidings

plus I used several more reds & background fabrics.

Displaying them on my antique laundry basket helps me see them all at once.

It all started so MUCH tidier that this!

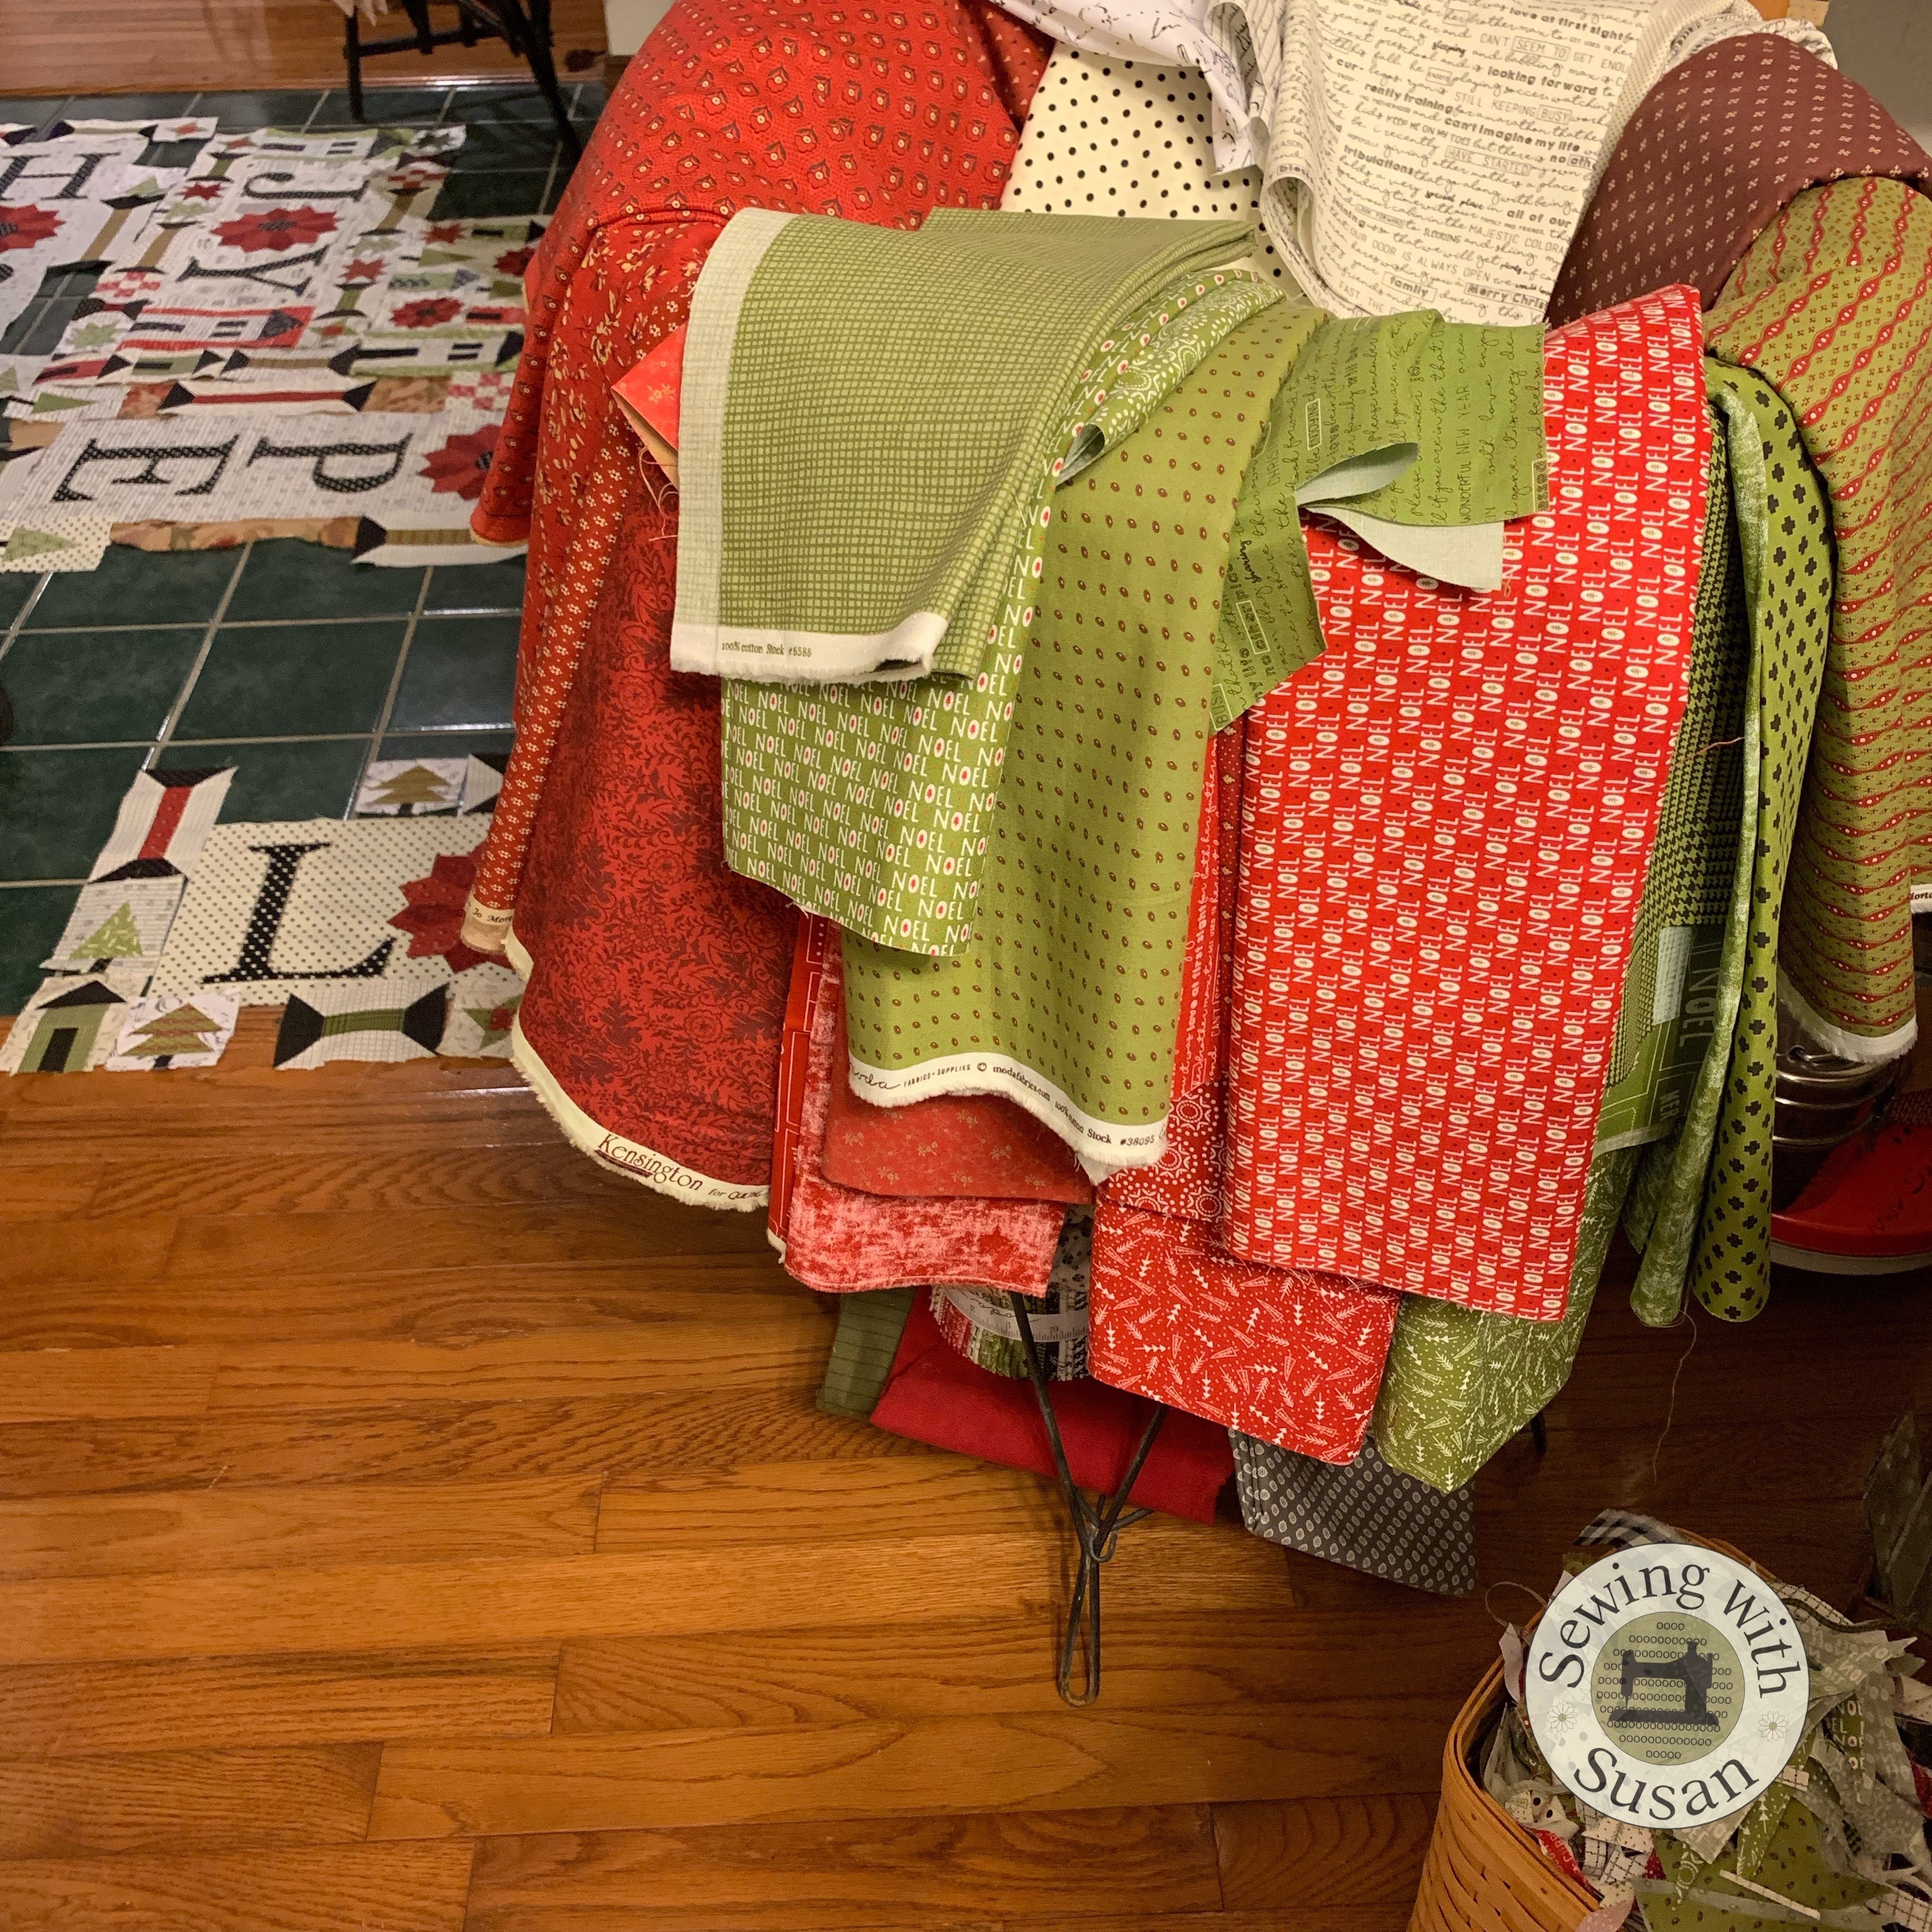
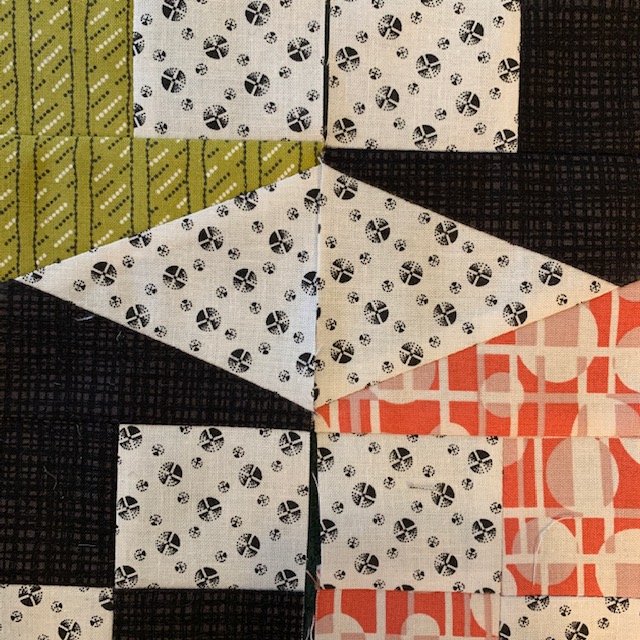
Key to the scrappy effect of these quilts is spacing out the fabrics.

Be sure to use a variety of fabrics in each type of block

so they will flow across the quilt &

not be sitting right next to each other

& fade one block into the next.

See what I mean?

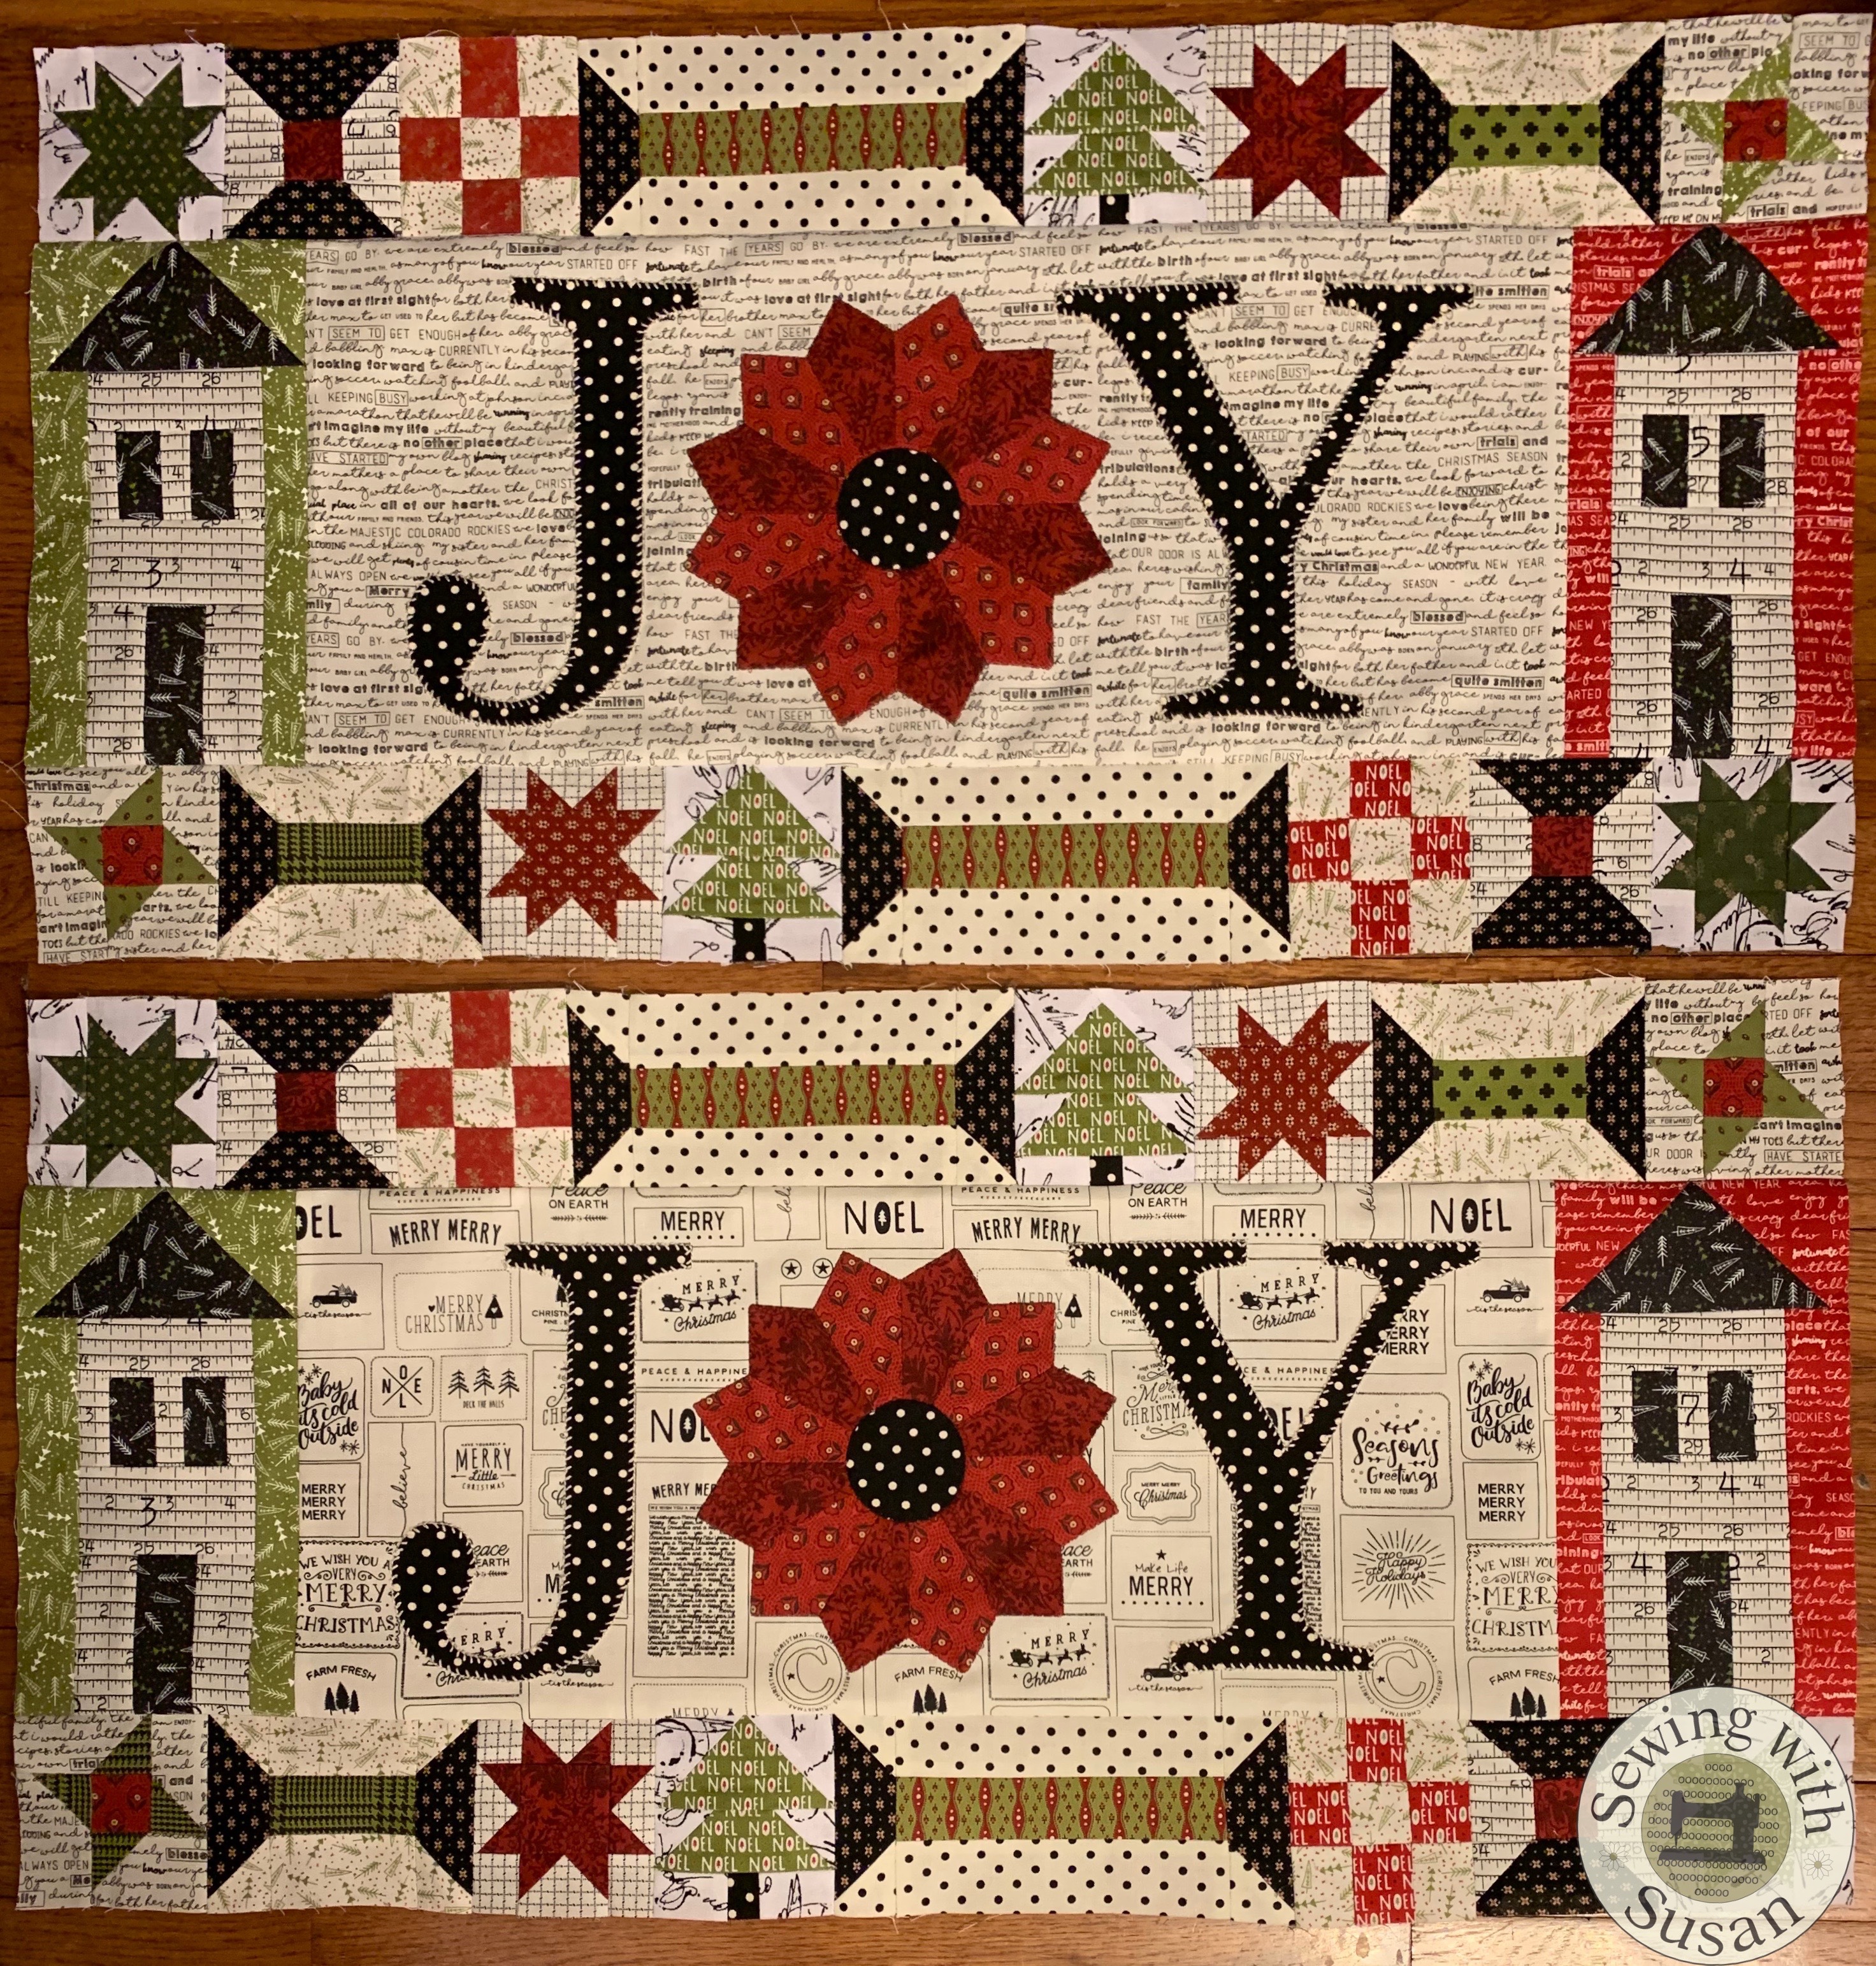
I tried to not put any of the same background fabric side by side with itself.

If this happens it can change the design of the blocks.

I wish I’d taken more pics of the assembly,

but I was so busy working that I forgot!

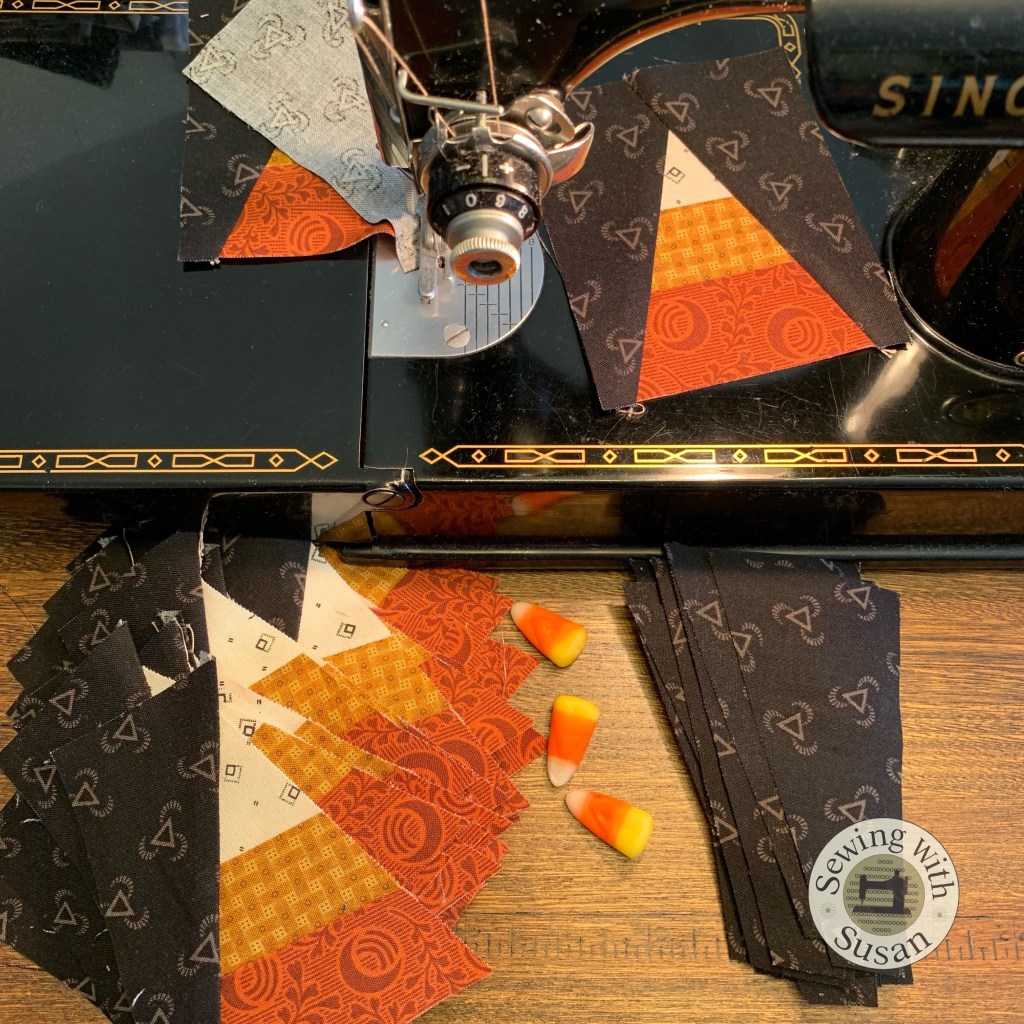
Aren’t these 3″ spool blocks cute?

Keeping track of scraps that can be used in other blocks can save fabric.

This is really important when I’m working with sample fabric

before it’s available in quilt shops.

I also kept close tabs on the quantity of blocks

that I needed to make for 2 sets of the quilts.

Anyone else find it annoying to find you’ve only made 17

blocks when you need 18?

Or when you KNOW you made enough blocks but you have no idea where they went?

I was obviously interrupted when I was

working on the spool blocks.

I almost started cutting more fabric but then decided to take a trip

to the kitchen for a drink or snack & spotted them!

Notice the tool on the counter right beside them???

I don’t remember now what I was asked to help with

but it certainly broke my train of thought!

Who needs any more excuses for mistakes

when working with so many moving parts x 2? lol

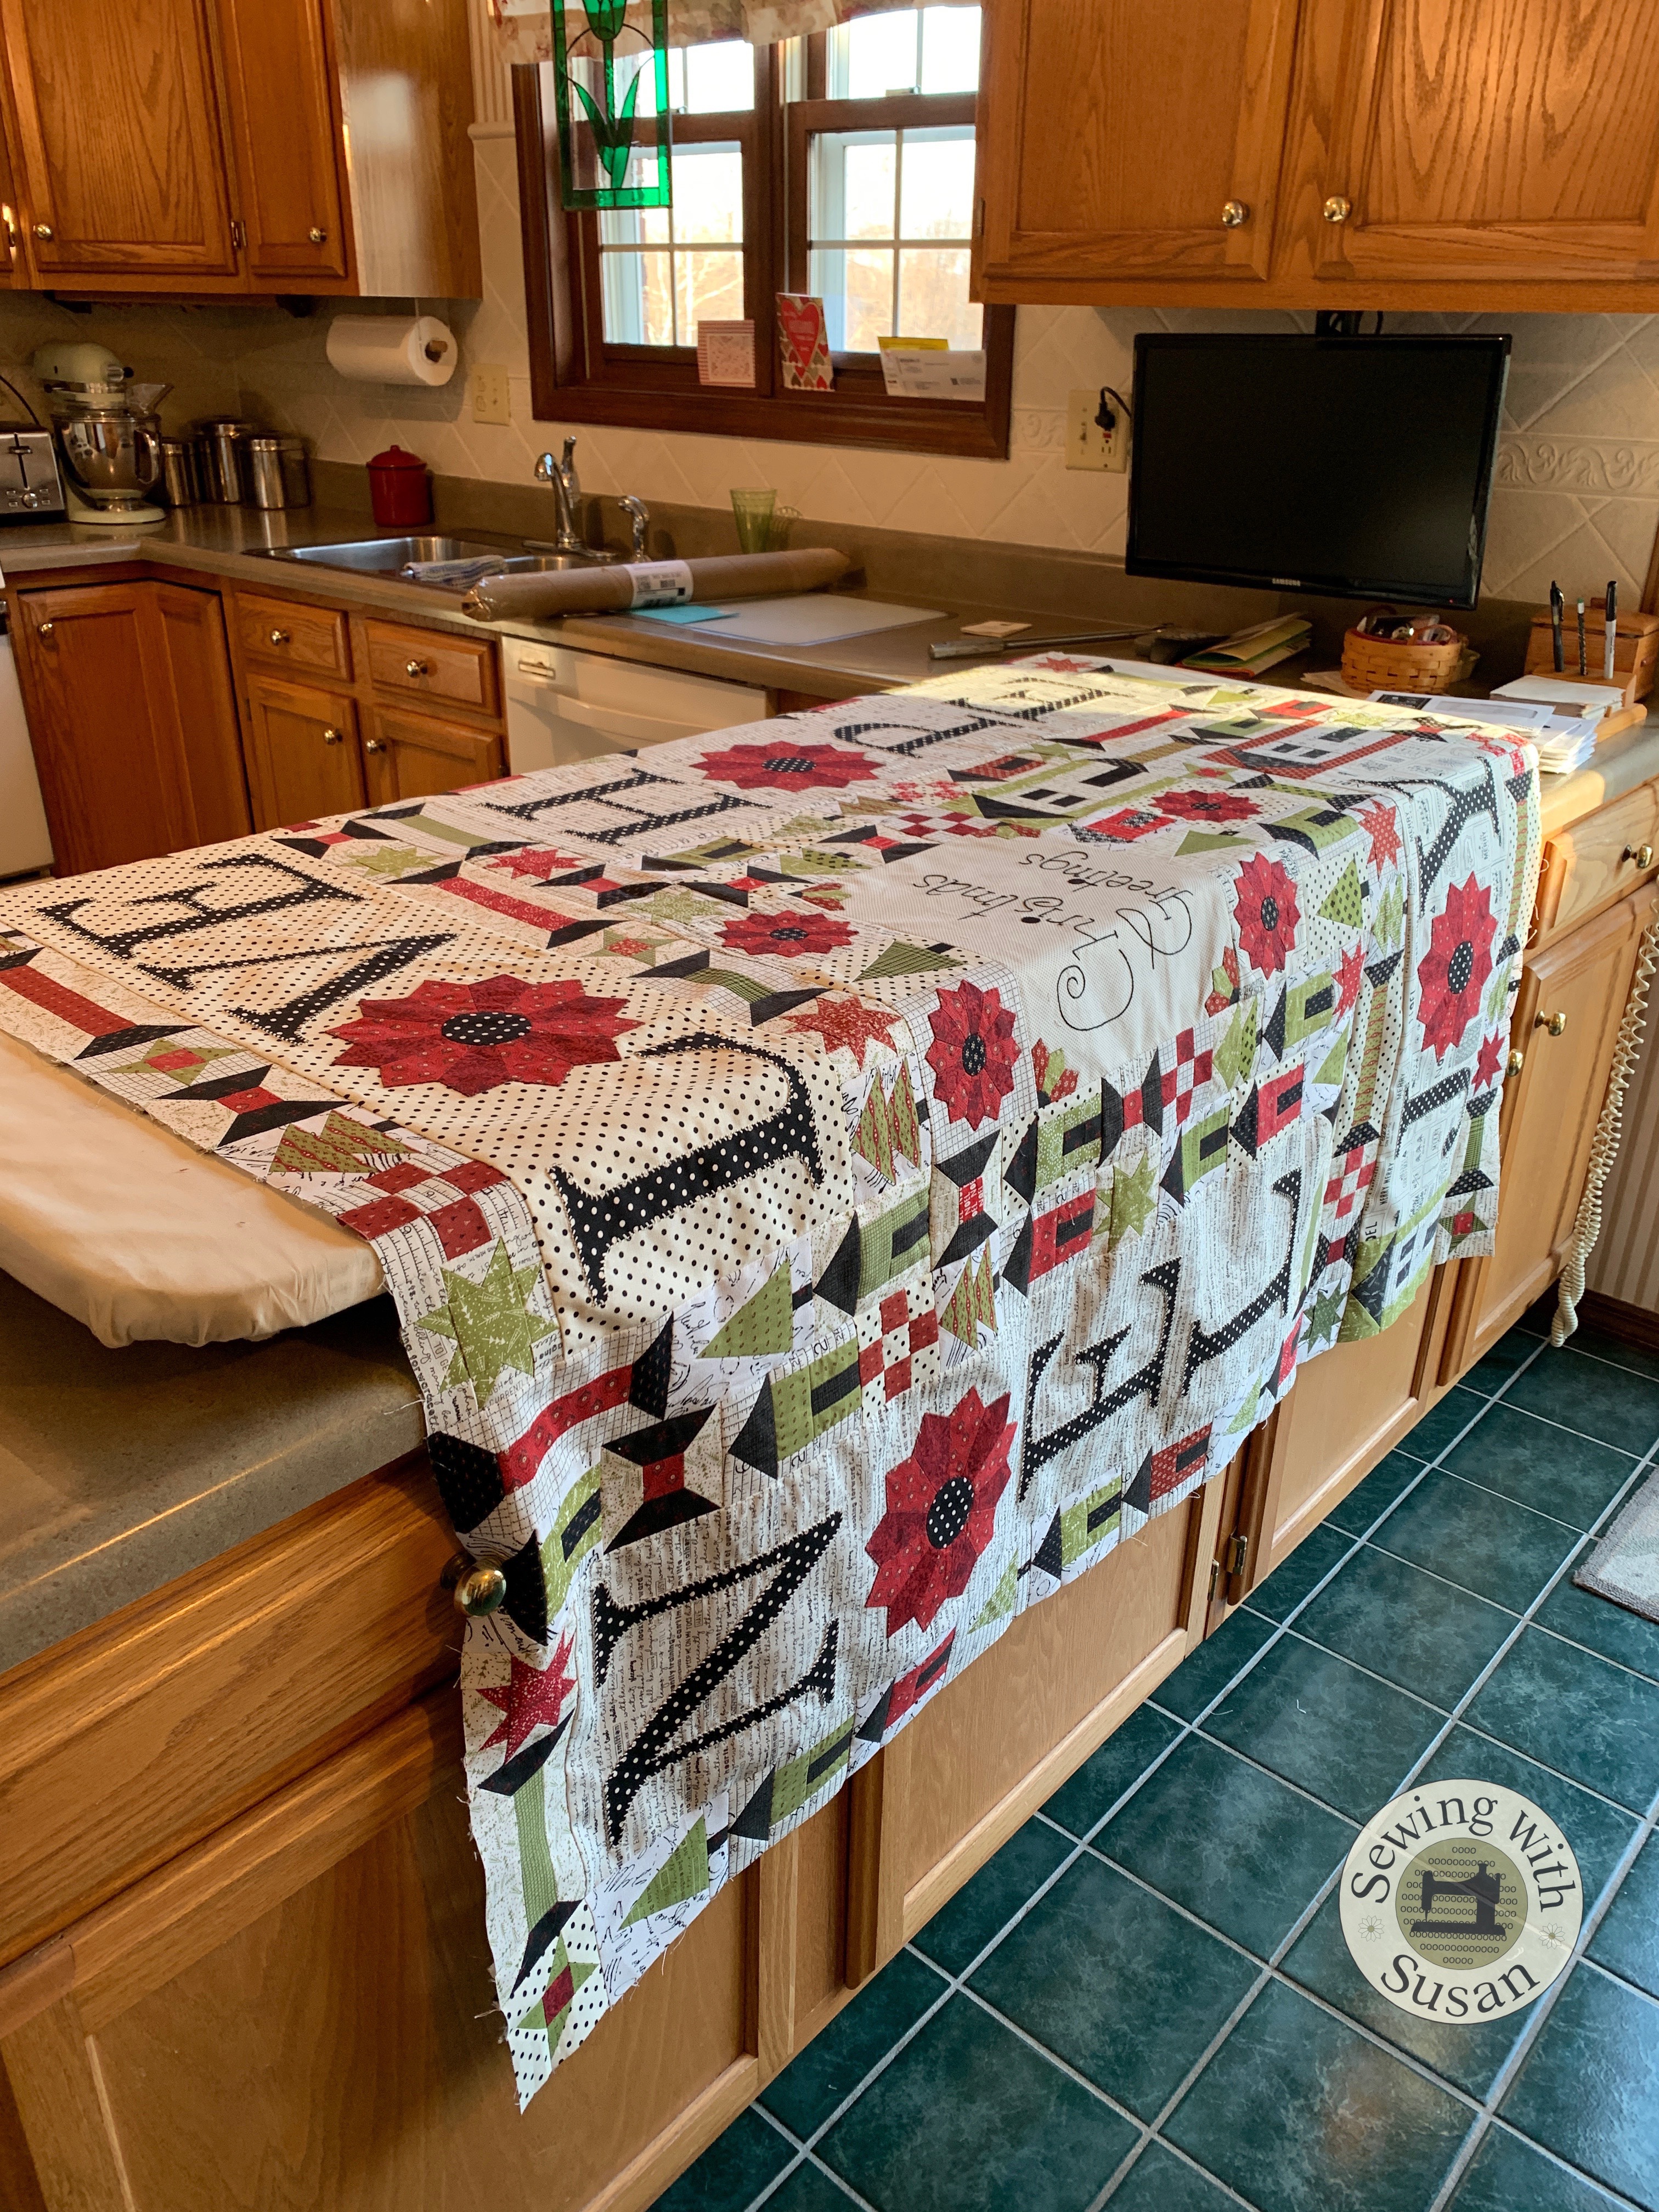
The Big Board was great help in pressing the

completed top before adding the borders

but the biggest help I promise you is Mary Ellen’s Best Press!

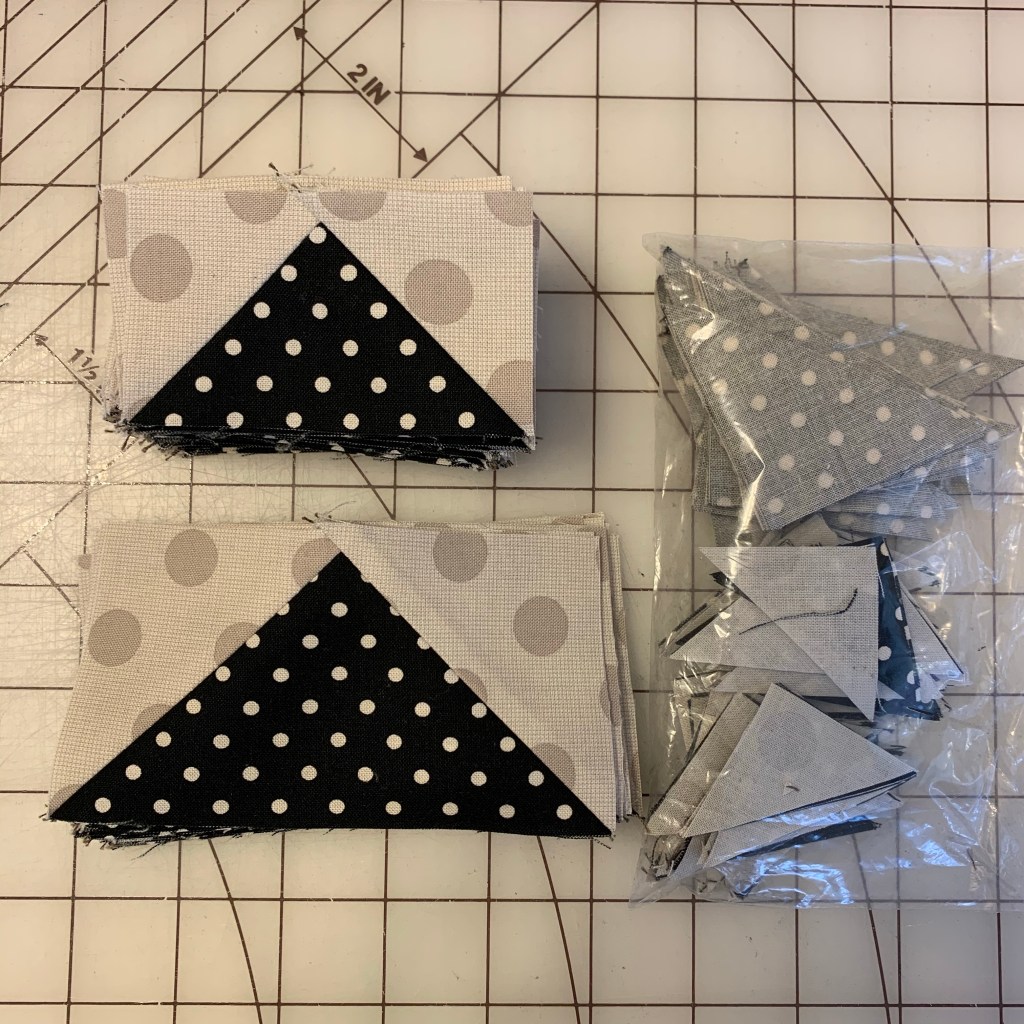
Next came the half-square triangles.

They’re a snap when you use Thangles.
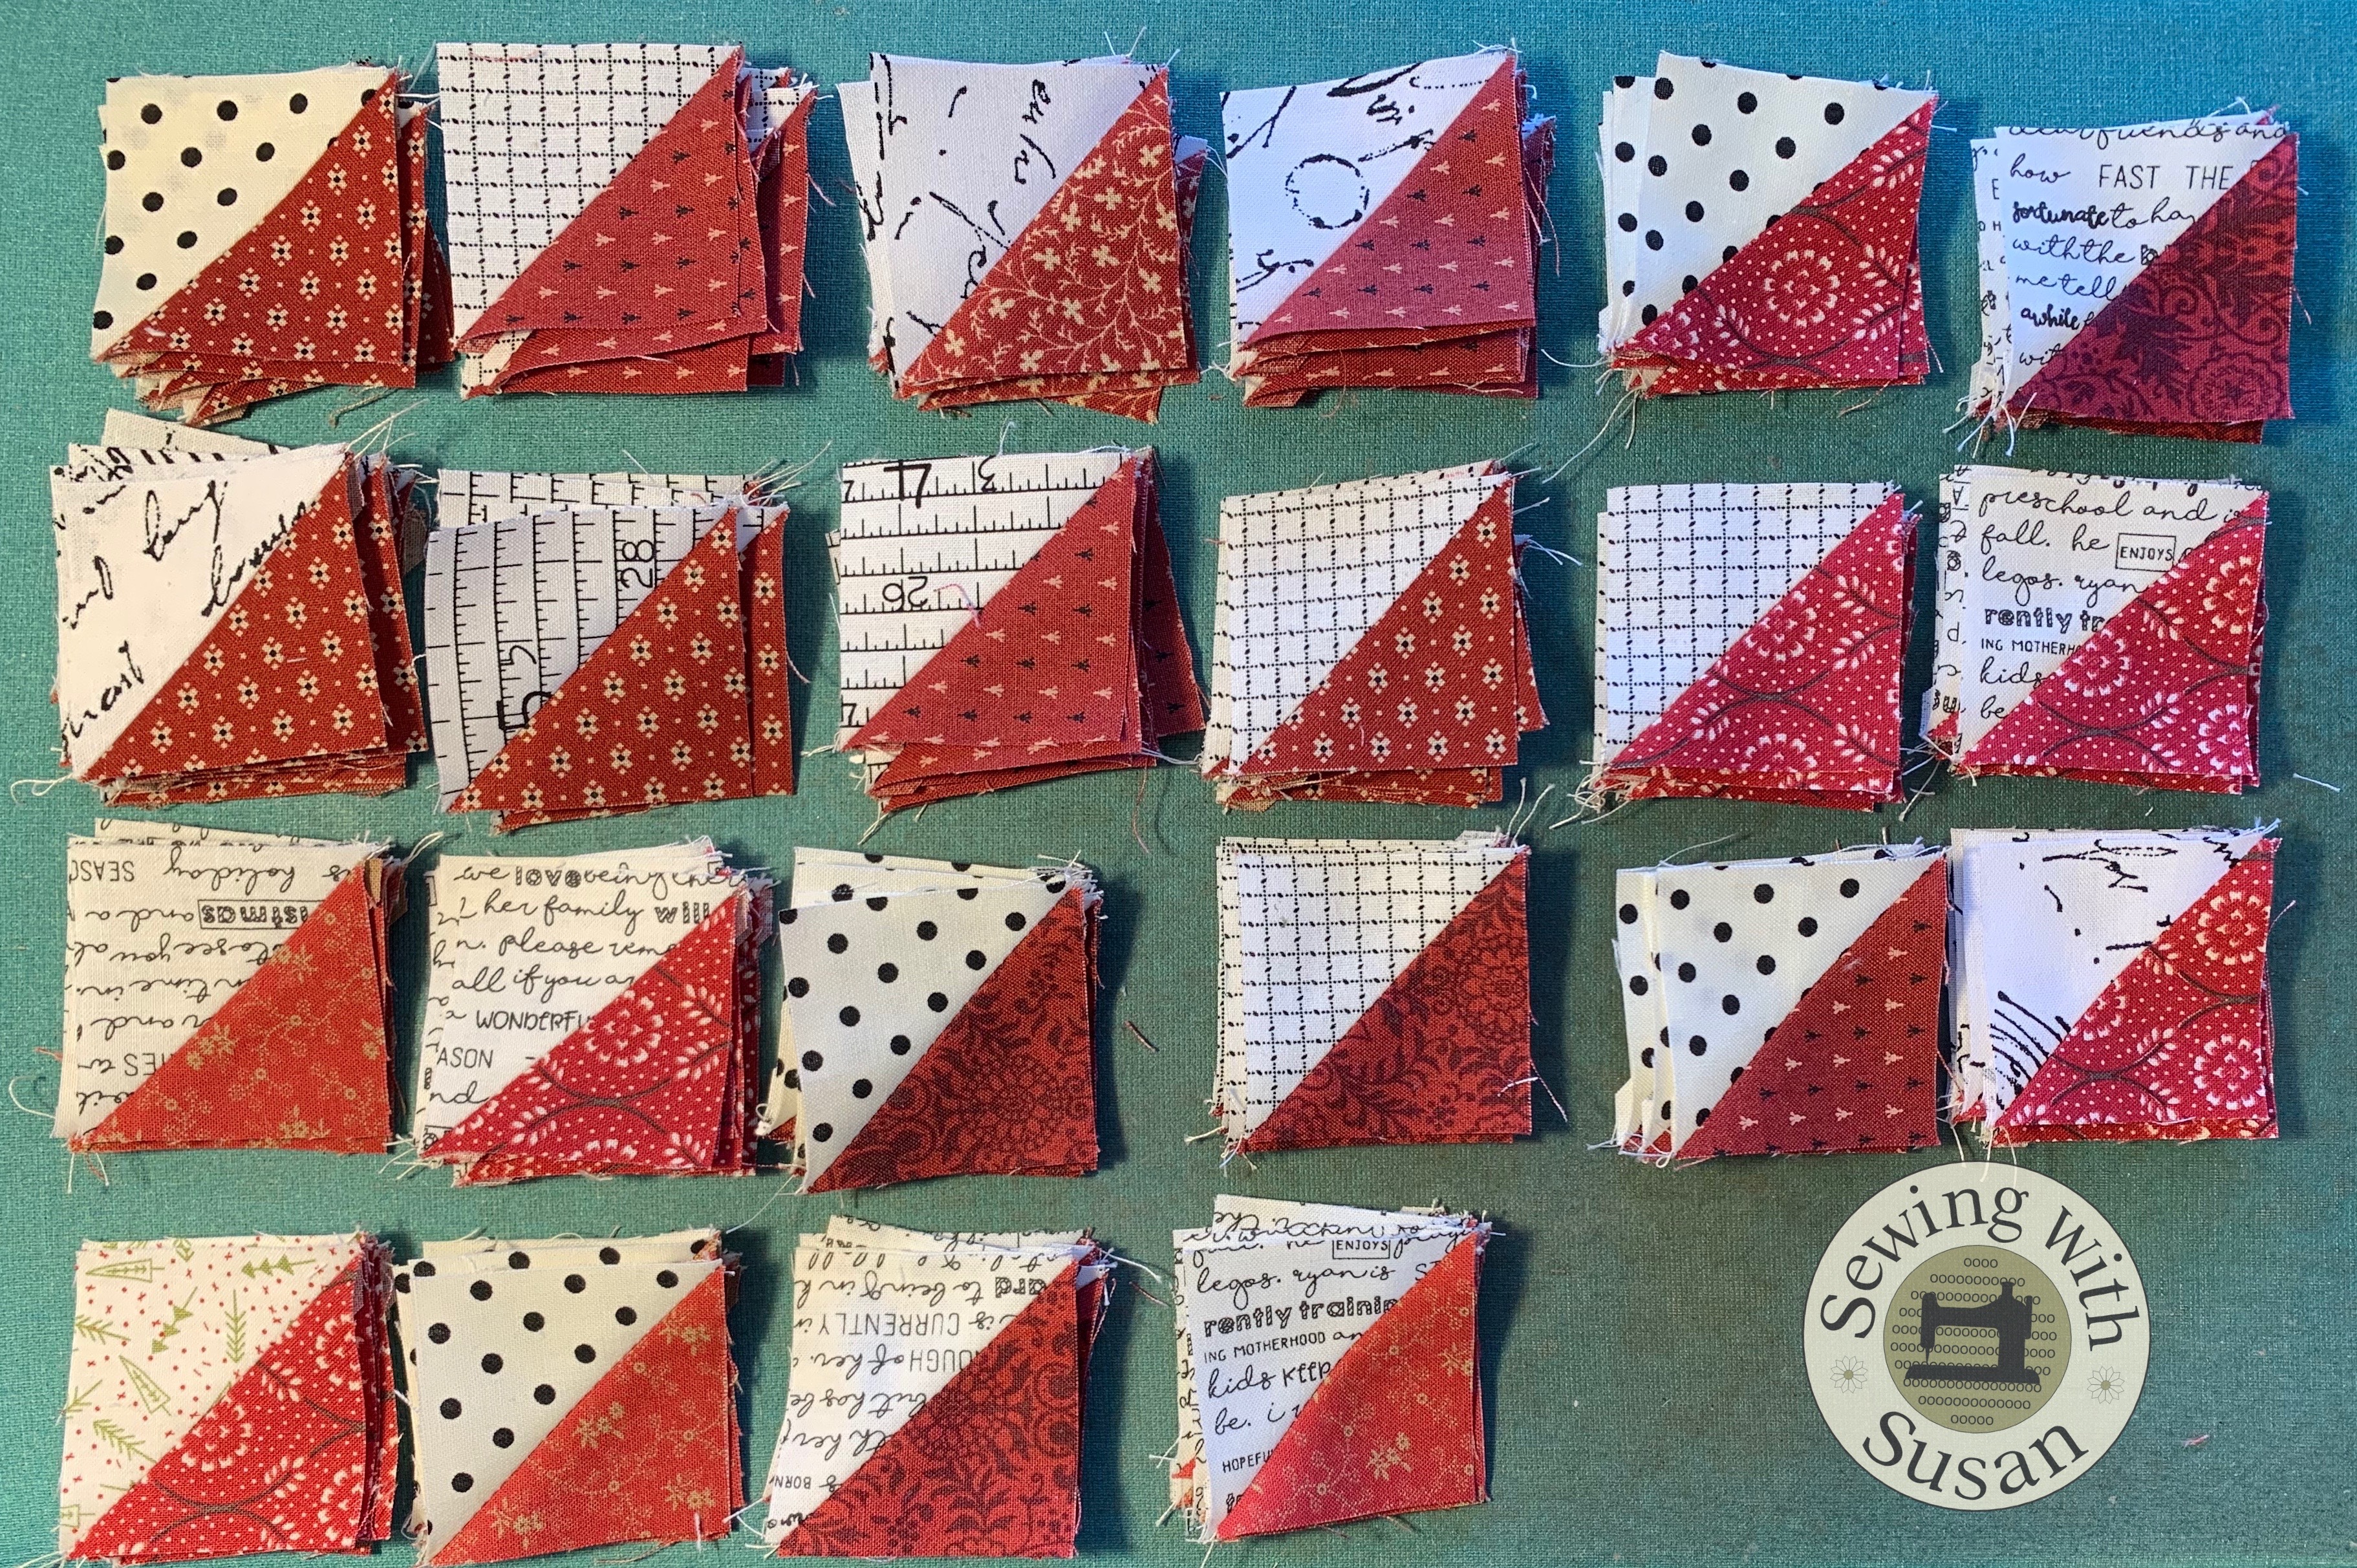
So much fun!

My generous tester, Chris, made her quilts into the 1 large quilt.

She mentioned that when I do this as a quilt-along here

that she wouldn’t mind making the 5 smaller quilts version.

So, what do you think?

Are you in for another quilt-along?

You can find Christmas Greetings on my brand new website here!

Look for more new patterns there too

and also here in the coming days.

Just Keep Sewing…

Susan