While making new Quilt-as-you-go pattern samples this week
I was reminded of a conversation I had last fall when a fellow quilter didn’t fill her foundation precisely with strips.
I personally don’t sew with perfection, but precision!
I’m not perfect, but I know how to make quilts with perfection; two different things.
From the beginning she didn’t find her scant 1/4″ seam allowance nor did she measure back as described & illustrated in every QAYG pattern of mine.
How many of us overlook those pesky instructions until we run into trouble…LOL!
So, I decided to take some photos & give some measuring tips.
I have a Quilt-as-you-go tutorial here,
so take at look at it
& this post will bring even more clarity.
First of all,
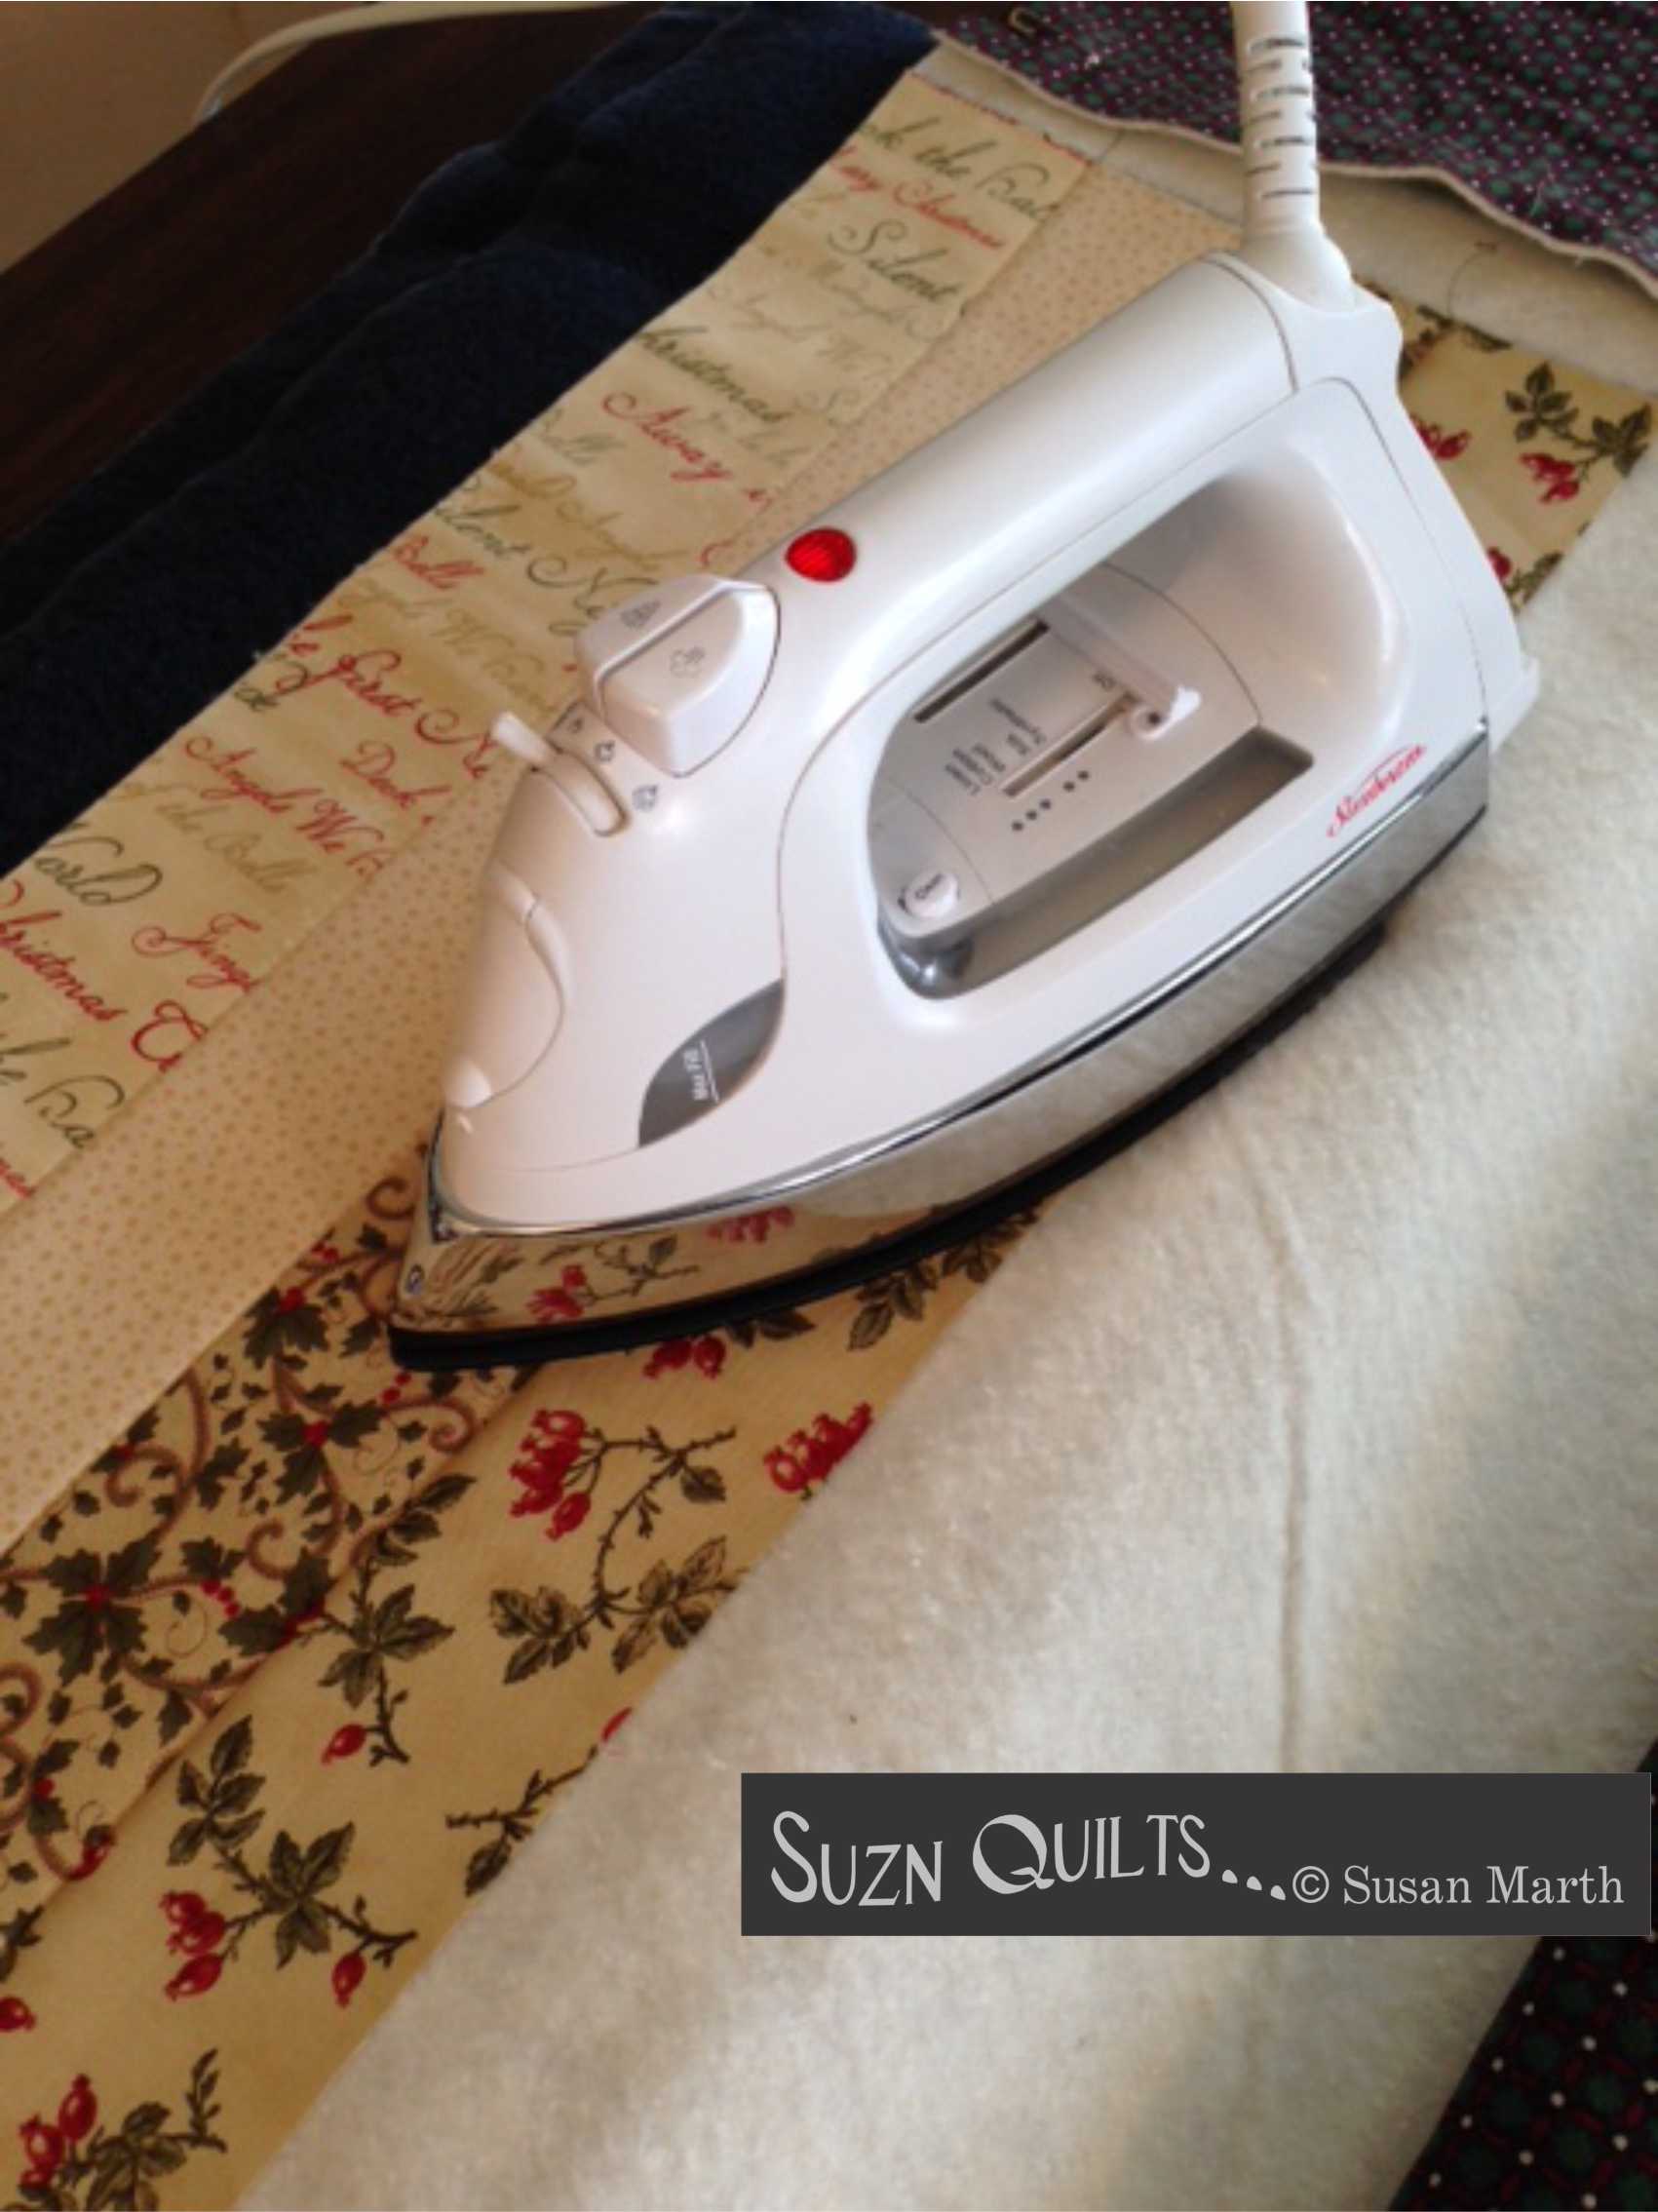
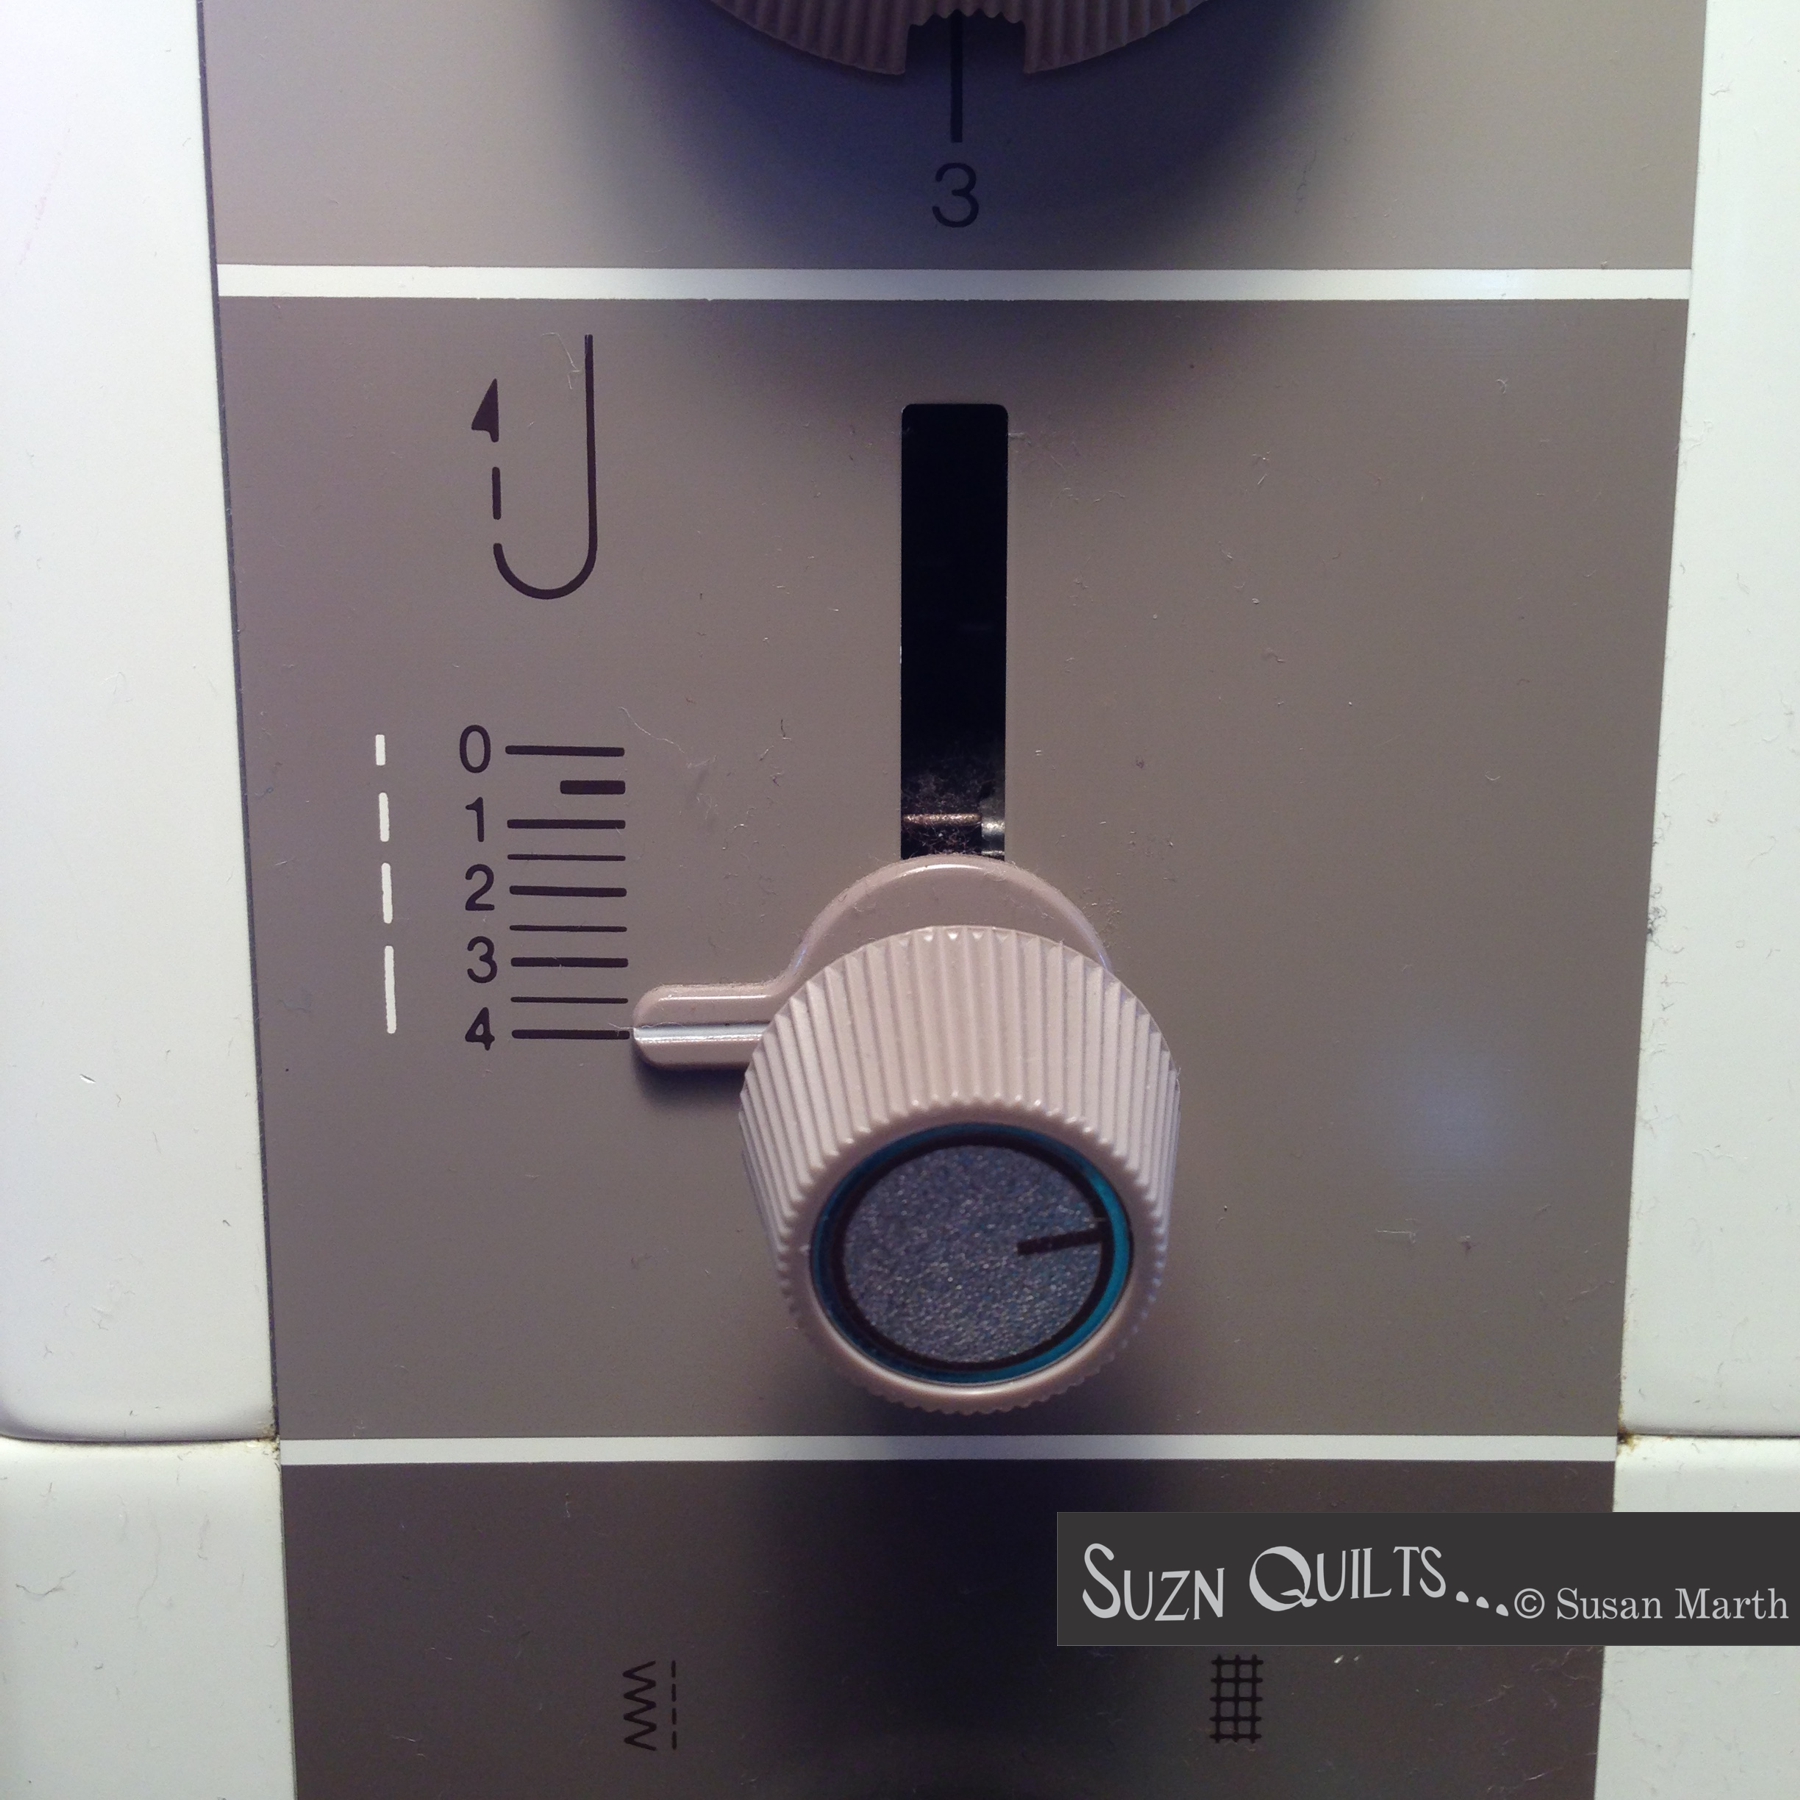
find your machine’s scant 1/4″ seam allowance with your walking foot!
 For my older Bernina 930
(Lucky me, I know! My mom found the magic of Bernina while I was still in college.)
I just move the needle position one click to the right
& lead the fabric along one of the openings in the walking foot.
 This gives me a perfect scant 1/4″ seam allowance & I can see the fabric under the foot at precisely where the needle is going into the fabric.
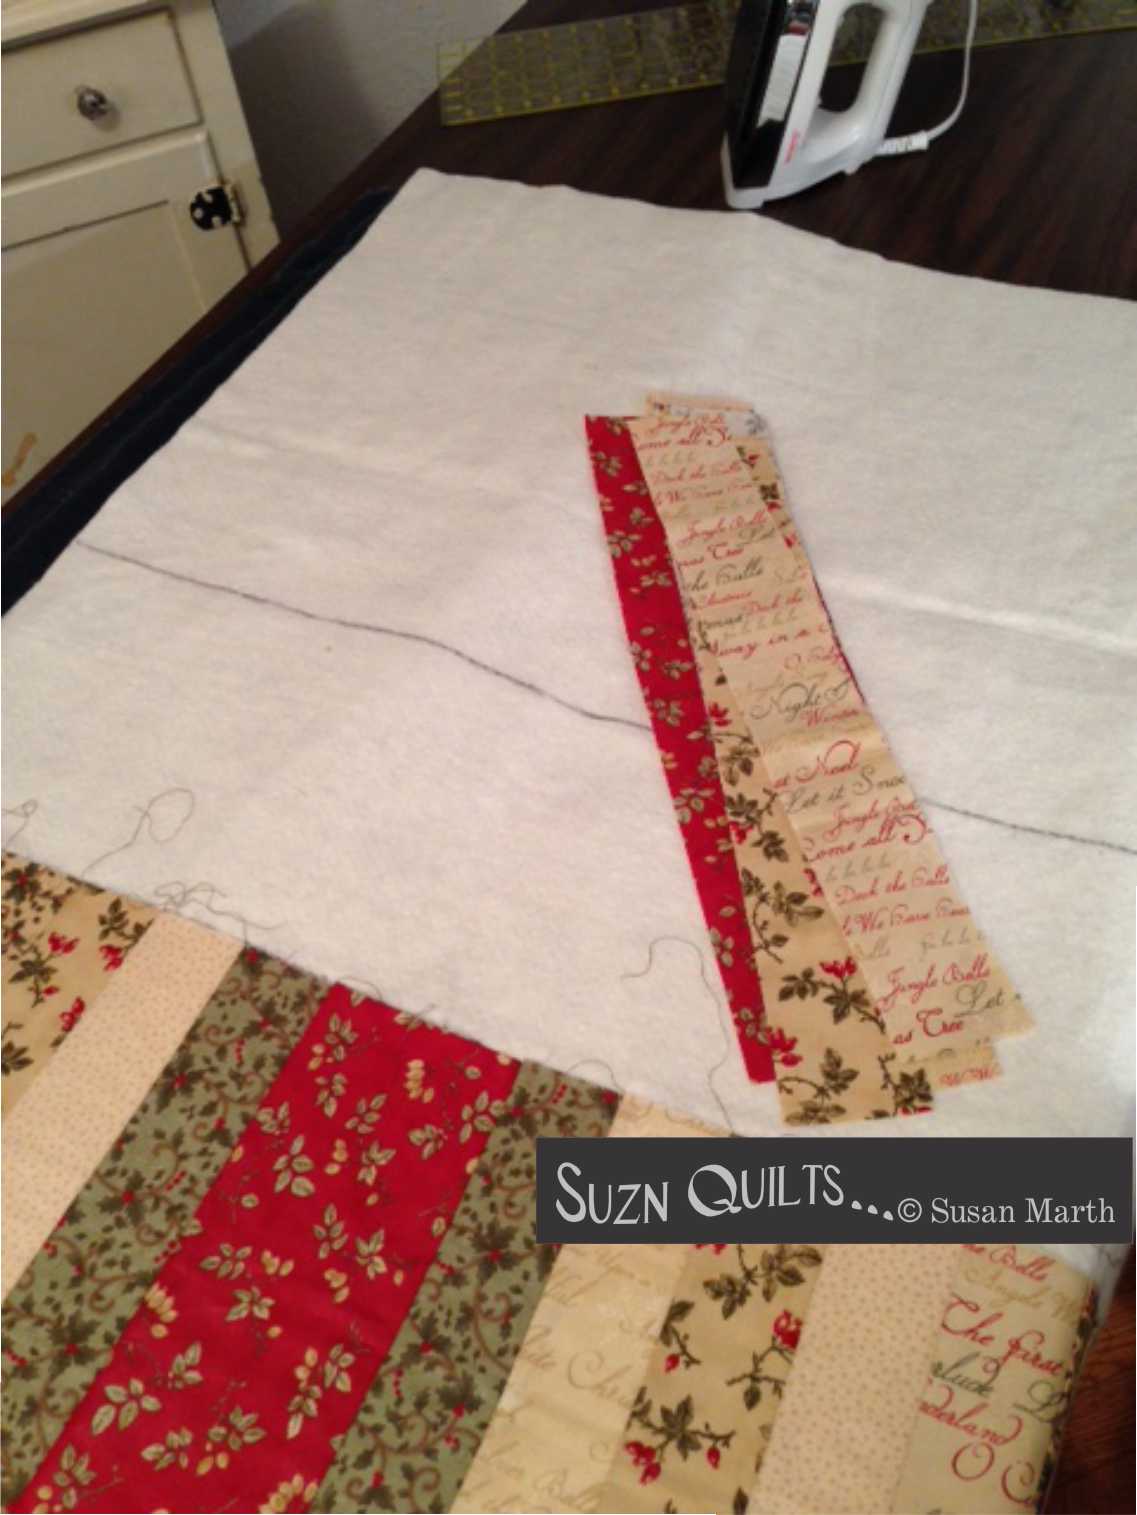
When I sew through the strips & foundation with a long stitch
(I’m quilting here, not just sewing two layers of cotton together)
 I get precisely the measurement of the two strips minus 1/2″ for the seam.
Now that your machine is ready,
follow any of my Quilt-as-you-go patterns to
cut the strips & make the foundation.
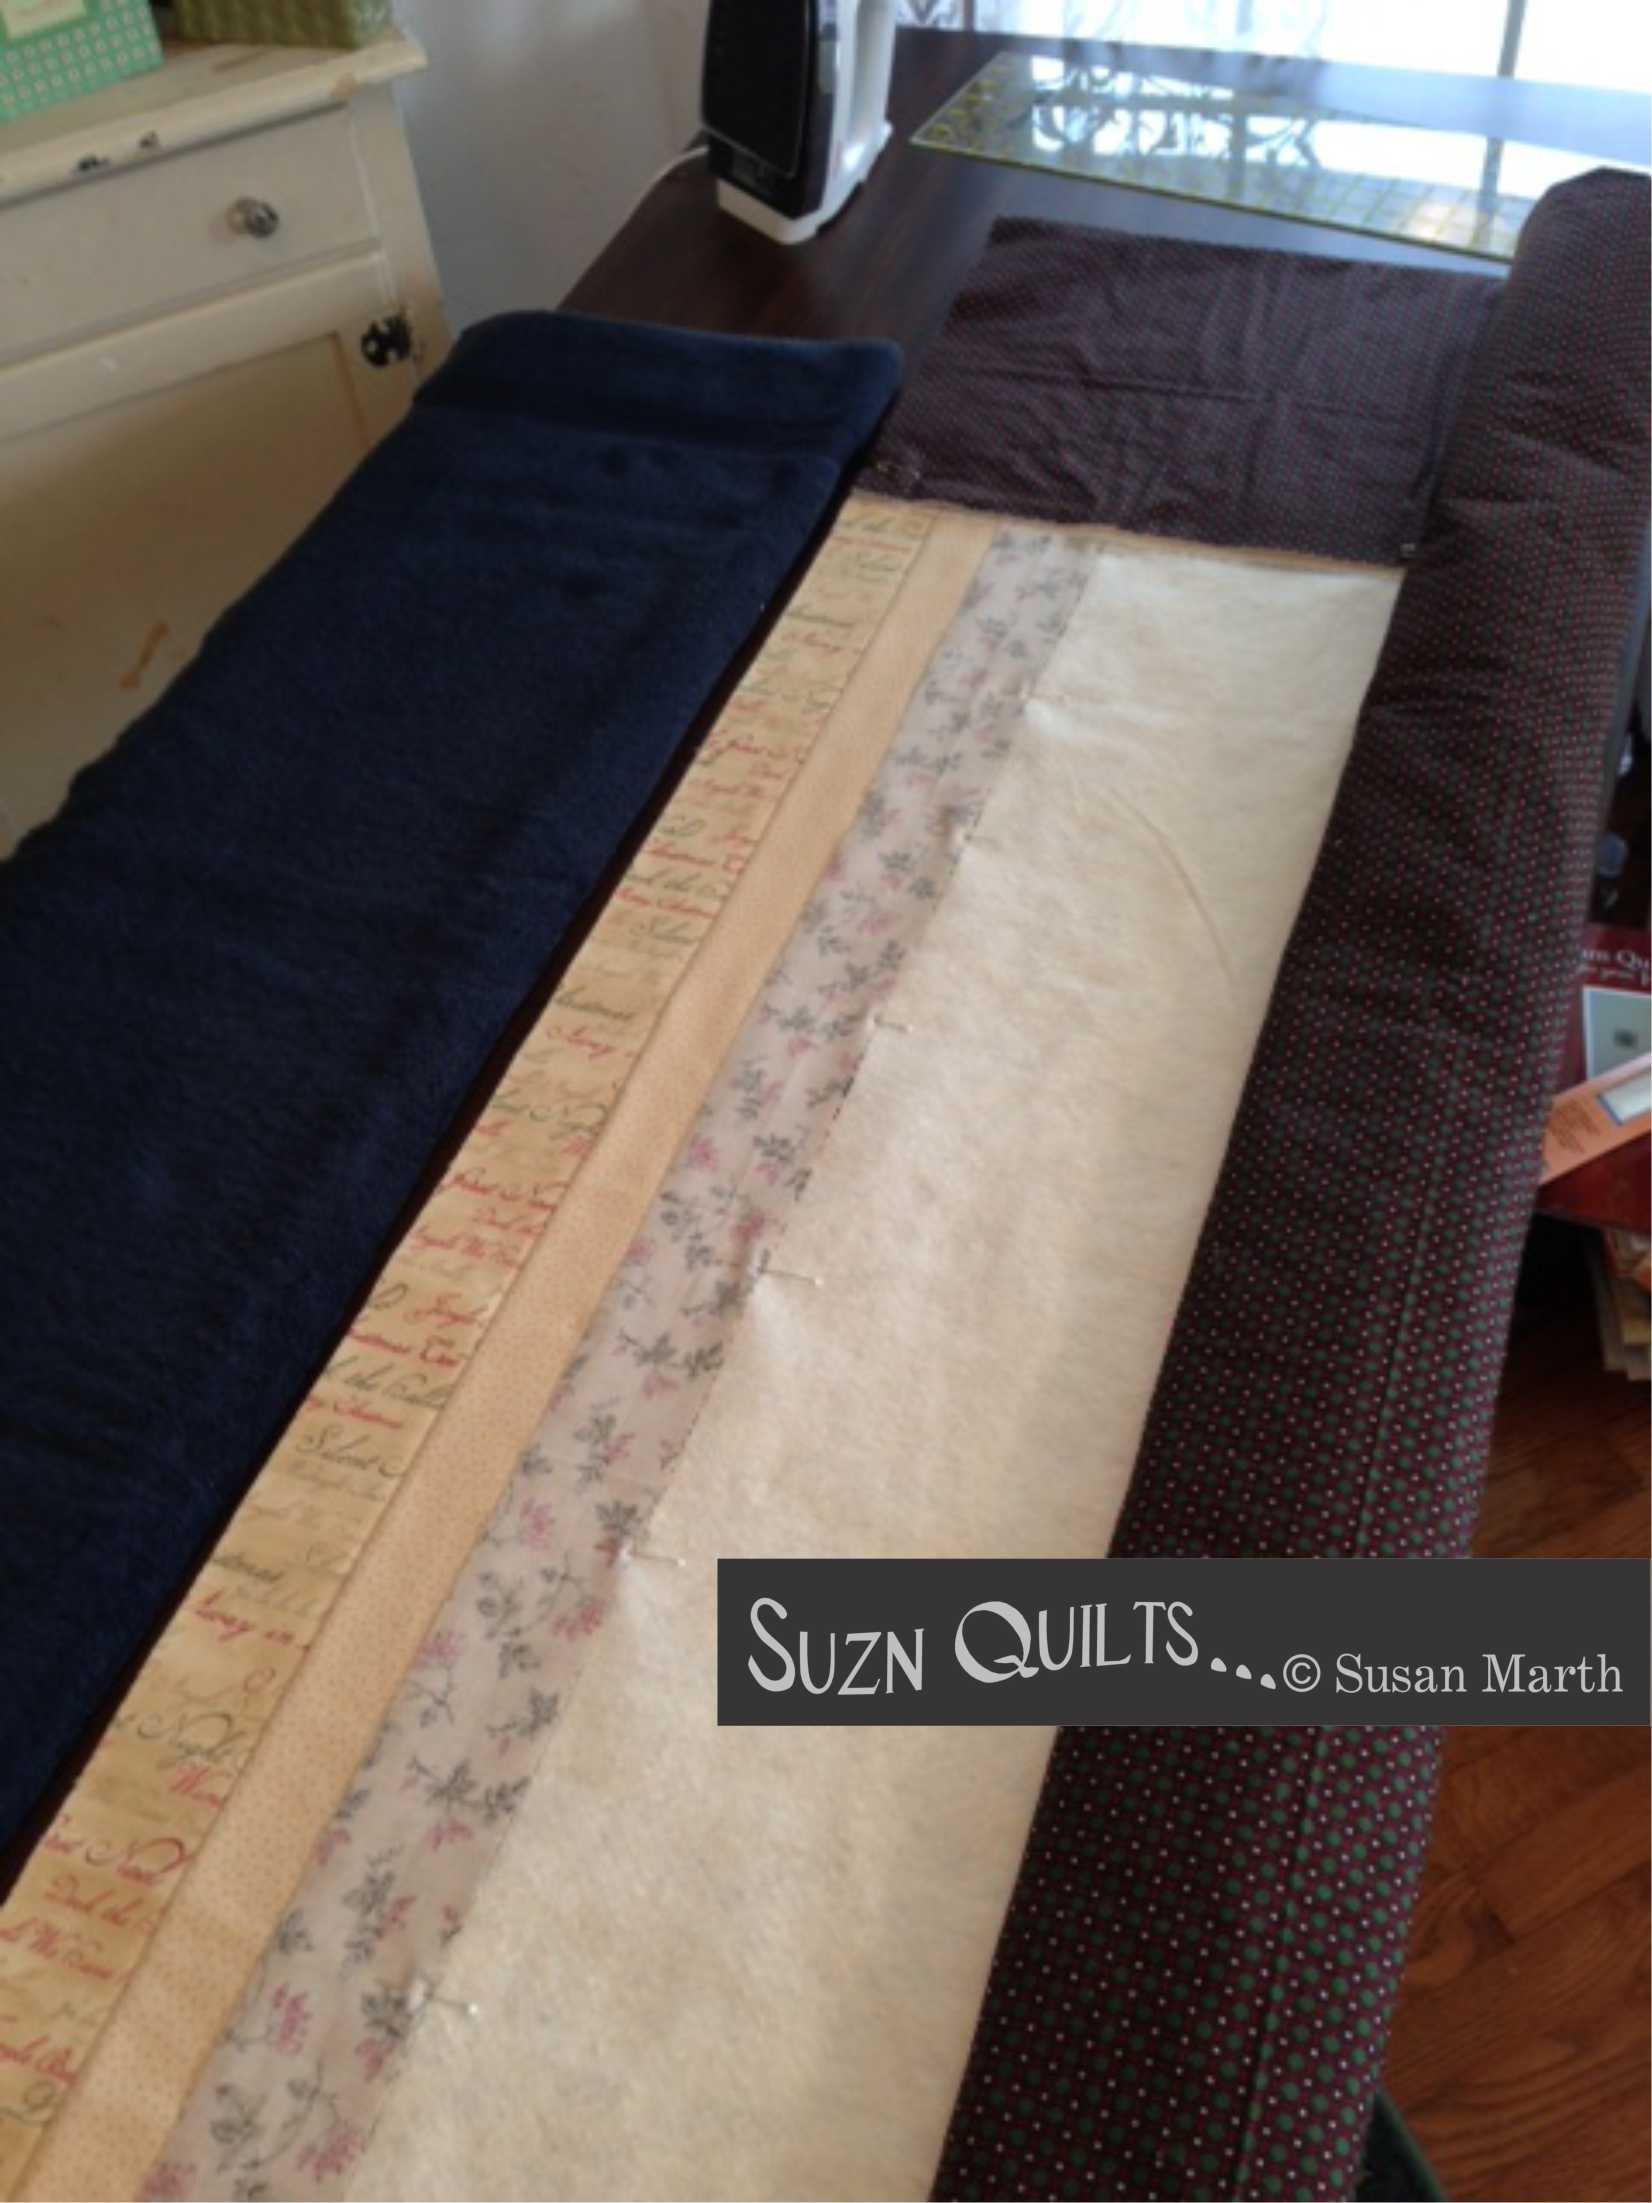
Start sewing your strips by lining them up with the foundation & pinning several times.

I ALWAYS use the very handy finger pincushion.
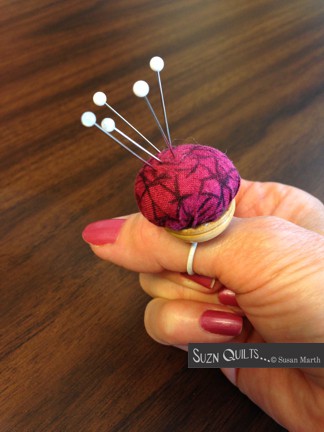
I pin the strips on at the table,
sew at my machine while removing pins, then press & pin the next strip back at the table.
The pins are always in my finger pincushion, not back at my machine.
It saves a LOT of time & AGGRAVATION!
Here is the next important step:
 Measure back!
& I don’t mean just after the first strip is added.
It’s in every one of my QAYG patterns.
 After every strip is added,
measure across in three places & make sure the measurement is the same.
When you’ve sewn farther than 24″, get a longer ruler!

If it’s not the same, you need to adjust it & make it the same
otherwise when you get to the last strip you may be out of foundation,
or you may be out of foundation before you’ve used all of your strips!
 Measure, measure, measure…
This is all in the pattern instructions, but I thought a few photos would maybe make things even clearer.
See how the last strip meets the edge of the foundation precisely?
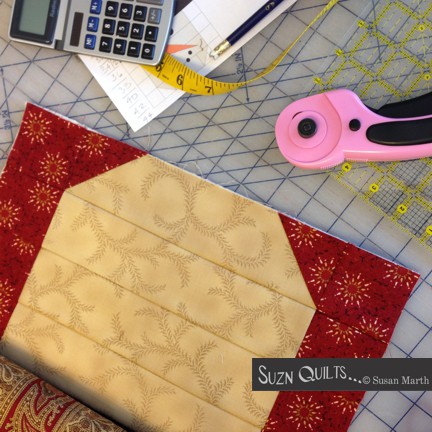 That’s because I use a scant 1/4″ seam & check myself with every strip added.
Who wants a snowman without a chin?

Especially when all his friends have one!!!
(No faces yet, but chins!)
They all have faces now, but I still need to finish the binding hand-work so I can get them photographed & ready for spring market.
Any questions???
Boy I can sure find lots of ways to avoid work!
Just keep sewing…
Susan