A Merry Christmas To You Quilt-Along

A Merry Christmas To You, Quilt-Along Week #12

Week # 12

We’re moving right along on our Christmas Quilt-Along.

I hope you had a nice Easter &

since last week’s sewing was minimal,

I also hope that you’re up to date on your quilt progress!

Remember last week that I mentioned the “hard work” was done?

I wasn’t kidding.

This week is “Star Block” week.

Refer to page 5 to make the cute little blocks.

The instructions are so simple that they only take half a page!

I made 9 red star blocks & 1 blue star block.

If you’re wondering why one blue star block,

the answer is “because!”

Don’t ask dumb questions.

It needed a blue star block right there!

Please keep posting your progress on our “Sewing With Susan” Facebook group.

I love seeing your progress.

Enjoy sewing stars.

Just Keep Sewing…

Susan


A Merry Christmas To You Quilt-Along

A Merry Christmas To You, Quilt-Along Week #11

Week # 11

We’re at the half way point this week, yay!

Week 11 of 22 for our Quilt-Along.

The quilt is more than half made & all the real “hard work” is done!

I hope you’ve been able to keep up each week,

but if not, this week is a good time to get caught up

because it’s a very small step!

Just 2 blue spools to make this week!

I thought it worked out perfectly this being holy week &

everyone having Easter celebrations to tend to this weekend.

Again, follow the “Spool Blocks” instructions on page 4.

Please keep posting your progress on our “Sewing With Susan” Facebook group.

I love seeing your progress.

Have fun making more spools!

Just Keep Sewing…

Susan


A Merry Christmas To You Quilt-Along

A Merry Christmas To You, Quilt-Along Week #10

Week # 10

I hope you are sewing my “A Merry Christmas To You” quilt with us.

Please keep posting your progress on our “Sewing With Susan” Facebook group.

I love seeing your progress.

I’m going to continue to be redundant here…

Keep spraying & pressing each & every fabric

with Mary Ellen’s Best Press!

We’re going to be making more spool blocks.

This week we’ll make just the green spool blocks.

Again, follow the “Spool Blocks” instructions on page 4

to make the 11 “green” spool blocks.

Especially if you’re changing the color in the spool blocks,

I highly recommend that you print & color in the blocks as you make them.

The color-in sheet is still on my website for you to download & print.

Have fun making more spools!

Just Keep Sewing…

Susan


A Merry Christmas To You Quilt-Along

A Merry Christmas To You, Quilt-Along Week #9

Week # 9

I hope you are sewing my “A Merry Christmas To You” quilt with us.

Please keep posting your progress on our “Sewing With Susan” Facebook group.

I love seeing your Tiny Dresden plates.

Hopefully you’ve been able to keep up with us

& all 18 Tiny Dresden plates are made.

I’m going to be a bit redundant here…

Keep spraying & pressing each & every fabric

with Mary Ellen’s Best Press!

We’re going to start making the spool blocks.

This week we’ll make just the red spool blocks.

Feel free to make them whatever color(s) you want to make them,

just know that the instructions are written for the spool blocks

that are red in my large cover quilt.

This way you know where they are in the quilt

when deciding what fabrics to use.

Follow the “Spool Blocks” instructions on page 4

to make the 10 red spool blocks.

I recommend cutting all of the fabrics for all of the spools now,

then all of the fabrics will be ready to use when you need them.

If you haven’t already printed off the free color-in sheet I offered earlier,

this would be a good time to do so to color in the spool blocks that you’ve made.

It’s still on my website for you to download & print.

Have fun making spools!

Just Keep Sewing…

Susan


A Merry Christmas To You Quilt-Along

A Merry Christmas To You, Quilt-Along Week #8

Week # 8

I hope you are sewing my “A Merry Christmas To You” quilt with us.

Please keep posting your progress on our “Sewing With Susan” Facebook group.

I love seeing your Tiny Dresden plates.

This is the last step that we’ll be making the Tiny Dresden plates.

Just 4 more again this week.

Keep

spraying & pressing each & every fabric

with Mary Ellen’s Best Press!

Choose the fabrics for the next 4 Tiny Dresden plates

including background fabrics.

Follow the instructions on page 3.

You’ll need 12 petals, 1 background square & 1 center for each block.

Hopefully you’ve already printed off the free color-in sheet I offered earlier.

If not, it’s on my website for you to download & print.

Just Keep Sewing…

Susan


A Merry Christmas To You Quilt-Along

A Merry Christmas To You, Quilt-Along Week #7

Week # 7

I hope you are sewing my “A Merry Christmas To You” quilt with us.

Please keep posting your progress on our “Sewing With Susan” Facebook group.

I love seeing your Tiny Dresden plates.

We’re more than half way done with making the Tiny Dresden plates.

Just 4 more this week.

Are you

spraying & pressing each & every fabric

with Mary Ellen’s Best Press?

It really makes a difference!

Choose the fabrics for the next 4 Tiny Dresden plates

including background fabrics.

Follow the instructions on page 3.

You’ll need 12 petals, 1 background square & 1 center for each block.

Hopefully you’ve already printed off the free color-in sheet I offered earlier.

If not, it’s on my website for you to download & print.

Just Keep Sewing…

Susan


A Merry Christmas To You Quilt-Along

A Merry Christmas To You, Quilt-Along Week #6

Week # 6

Are you sewing my “A Merry Christmas To You” quilt with us?

Thanks to those of you who joined “Sewing With Susan” Facebook group.

I’m loving seeing those Tiny Dresden plates.

We’re making more Tiny Dresden plates this week, yay!

5 more,

& don’t forget…

spray & press each & every fabric

with Mary Ellen’s Best Press.

Someone asked me yesterday if I use more Best Press during assembly

so I want to mention it to you here.

I spray & iron all of my fabrics with Best Press before I begin.

Then after each plate is completely sewn into the circle

I spray both sides with Best Press again

(with the single finger pump bottle because it sprays a much finer spray than the hand pump bottle. I use the hand pump bottle for spraying yardage.)

then I press the plate from the back side.

After the plate has completely dried

after removing the freezer paper template,

I spray it again,

front & back

then press it again from the back side.

This helps the plates lie nice & flat

when glued to the background square.

They’re not stiff, just flat!

When the plate is nice & flat it glues easily to the background square

which makes it easy to applique around, yay & yay!

No stress, just fun :)

Today you need to choose fabrics for the next 5 Tiny Dresden plates

including background fabrics.

Follow the instructions on page 3.

You’ll need 12 petals, 1 background square & 1 center for each block.

Hopefully you’ve already printed off the free color-in sheet I offered earlier.

If not, it’s on my website for you to download & print.

Just Keep Sewing…

Susan


A Merry Christmas To You Quilt-Along

A Merry Christmas To You, Quilt-Along Week #5

Week # 5

I’m glad you’re sewing my

“A Merry Christmas To You” quilt with us.

If you haven’t already, please join “Sewing With Susan” Facebook group

so you can see what others are doing

& to also show your progress.

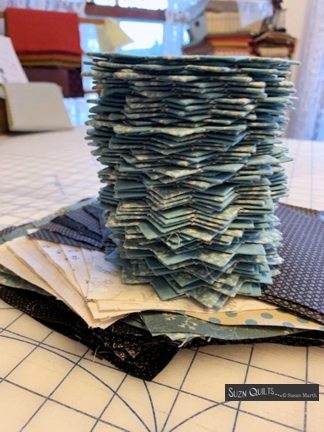
This week we will start the fun stuff;

making Tiny Dresden plates!

There are 18 Tiny Dresden plates scattered across this quilt

(or quilts if you’re making the 4 small quilts).

Since I don’t want you to be overwhelmed

I’ve decided we will concentrate on making just

5 Tiny Dresden plate blocks this week.

From here on out, it will be inferred that you

spray & press each & every fabric

with Mary Ellen’s Best Press.

Choose fabrics for the first 5 Tiny Dresden plates

including background fabrics.

Follow the instructions on page 3 to make

just 5 Tiny Dresden plate blocks.

You’ll need 12 petals, 1 background square & 1 center for each block.

To keep track of which blocks you’re making,

you can note them on the free color-in sheet I offered earlier.

It’s on my website for you to download & print.

Something else I want to point out is the Dresden sewing

accuracy sheet that I’ve designed since making this pattern.

If you don’t have it from my book, Dresden Quilt Workshop,

or a more recent Tiny Dresden plate pattern,

you can find & print it here.

It allows you to check your sewing accuracy to be sure your plates will lie flat.

Just print the page then place 2 sewn petal on top the illustration.

If your petals are larger than my illustration, your seam is too small.

If your petals are smaller than my illustration, your seam is too large.

Checking your sewing accuracy with the first 2 petals,

should ensure flat, round plates!

Just Keep Sewing…

Susan


A Merry Christmas To You Quilt-Along

A Merry Christmas To You, Quilt-Along Week #4

Week # 4

I’m glad you’re sewing my

“A Merry Christmas To You” quilt with us.

Thanks if you’ve joined “Sewing With Susan” Facebook group

so you can see what others are doing

& to also show your work of this project.

I enjoy seeing your stitched progress!

This week will be the final week for stitching the verses.

So once again grab your verse background fabric &

0.5 Micron pen with color matching the 12 wt. cotton thread (or perle cotton thread).

Trace “Hung with Care” found on the template sheet,

onto the fabric as shown in the diagram on page 1 of pattern.

Using the cotton thread,

stitch the verse with the same stitch that was used the previous 3 weeks.

It’s another short verse to stitch so if you’re a bit behind,

this is your chance to get caught up!

Please post your progress on my Sewing With Susan

FB group page for us all to see and be inspired.

Spoiler alert: next week will be the start of the fun stuff;

Tiny Dresden plates, yay!!!

Just Keep Sewing…

Susan


A Merry Christmas To You Quilt-Along

A Merry Christmas To You, Quilt-Along Week #3

Week # 3

Are you sewing my

“A Merry Christmas To You” quilt with us?

Have you joined “Sewing With Susan” Facebook group

so you can see what others are doing

& to also show your progress of this project?

This week we’ll again use the verse background fabric &

.05 Micron pen with color matching the 12 wt. cotton thread (or perle cotton thread).

This week trace “Joy to the World” found on the template sheet,

onto the fabric as shown in the diagram on page 1 of pattern.

Using the cotton thread,

stitch the verse with the same stitch that was used the previous 2 weeks.

It’s a great time of year to have hand work to do isn’t it?

No worries that you should be weeding the garden or

you’d rather by enjoying your deck!

A great evening project to do while watching TV

since around here it’s too cold to do anything else.

Just Keep Sewing…

Susan