My Life

12 Days of Christmas 2025, Oh Holy Night, Day 12

Welcome to Day 12, Epiphany!

I hope you’re sewing & for some reason just now showing because I can see all the downloads & Day 1 has been downloaded 833 times!

Where are your show & tells?

Please show your work even if it’s not daily on these 12 Days…

I hope I’m inspiring you to SEW!

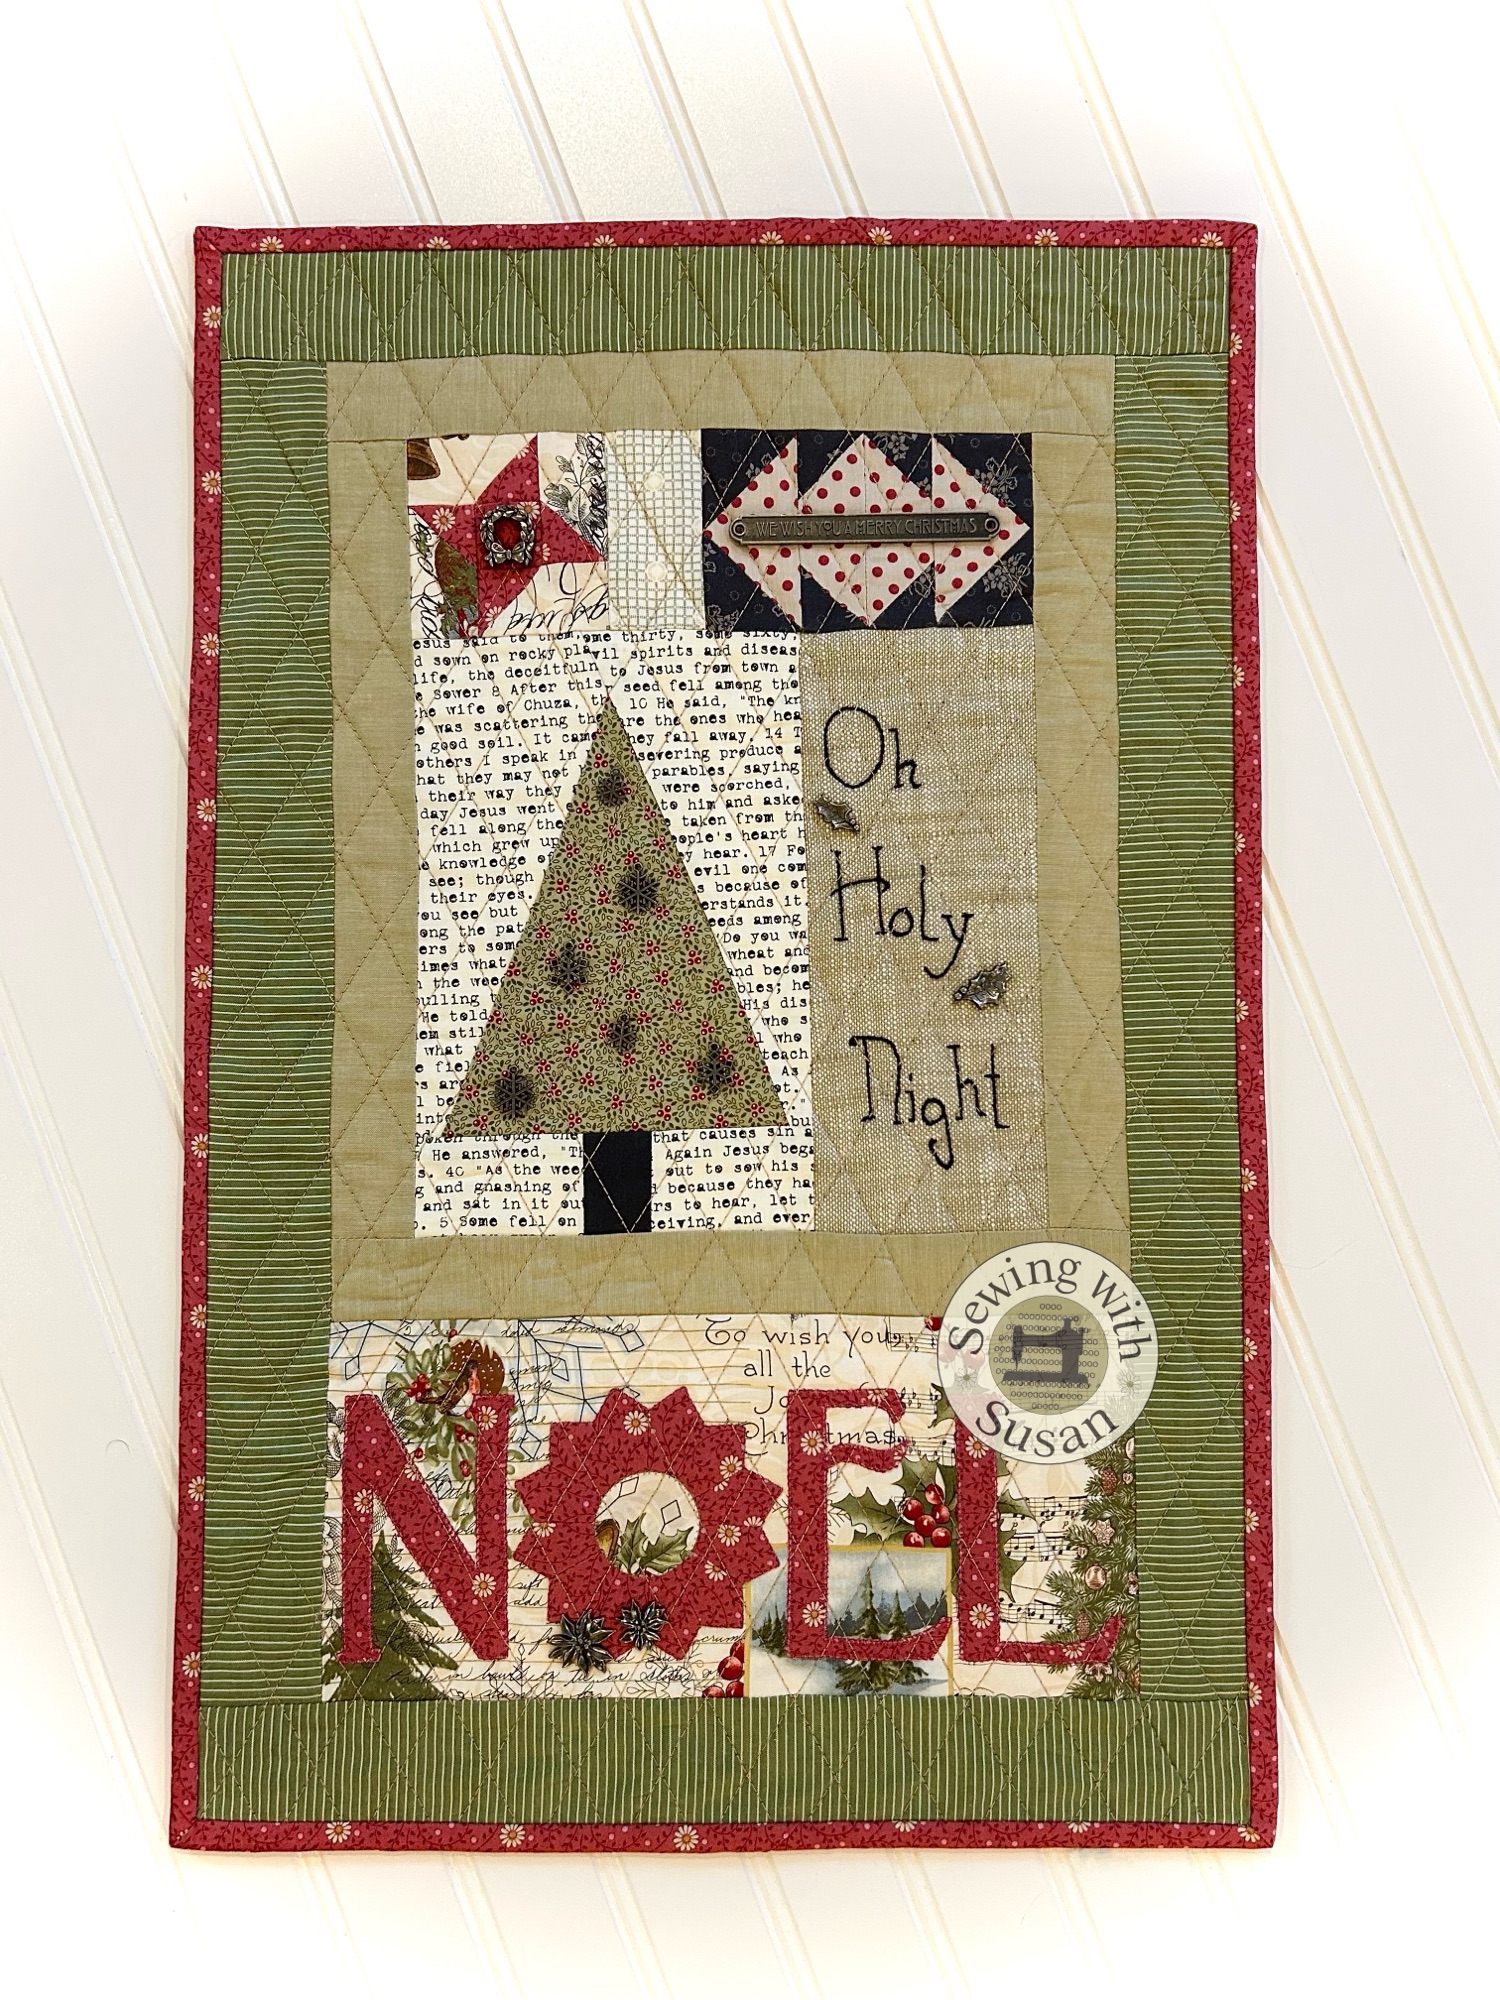
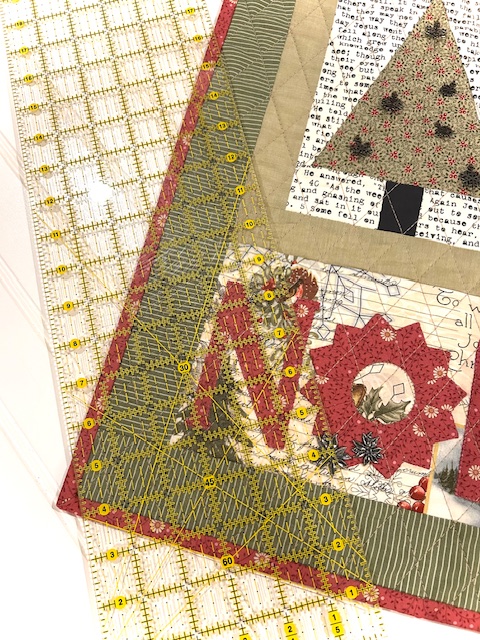
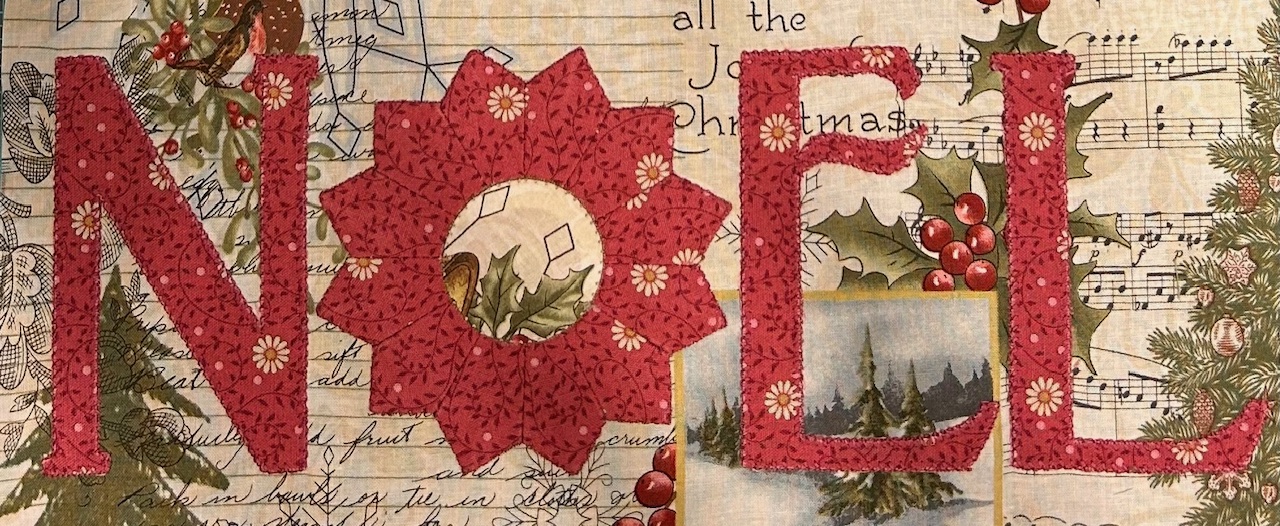
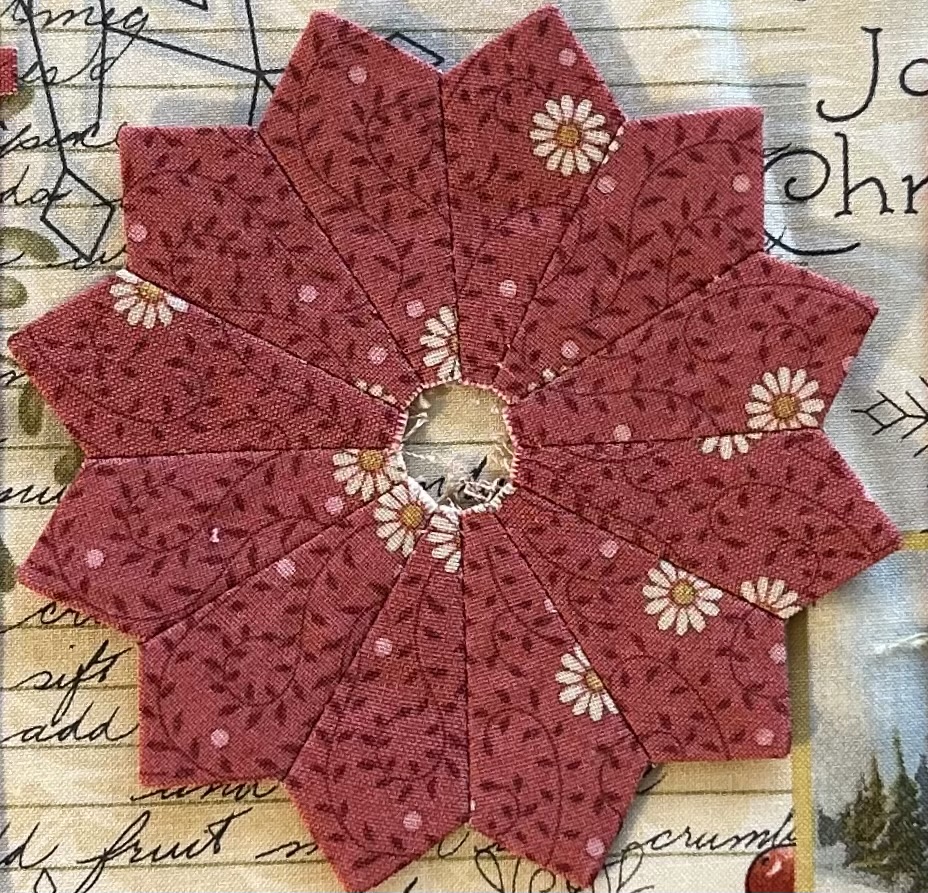
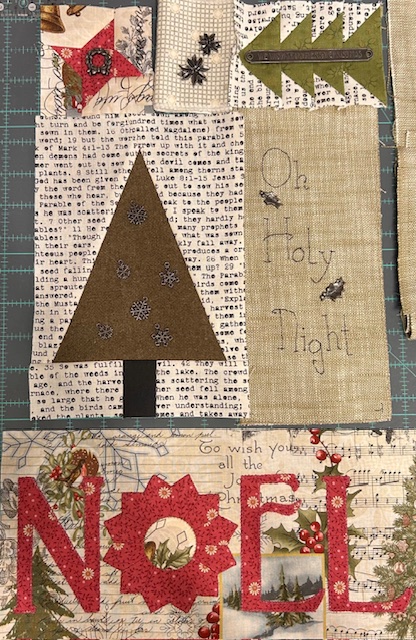
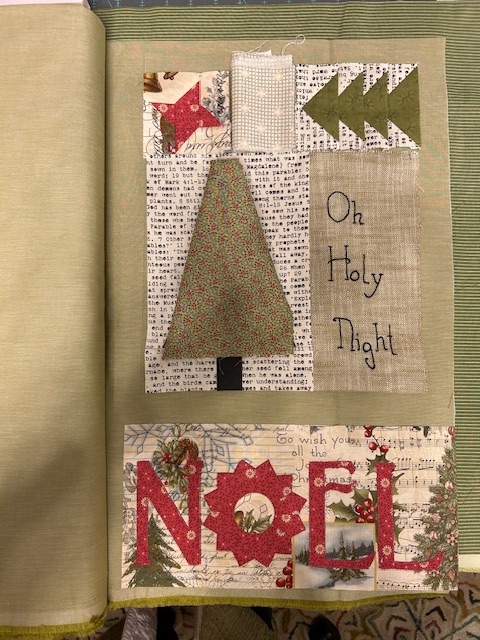
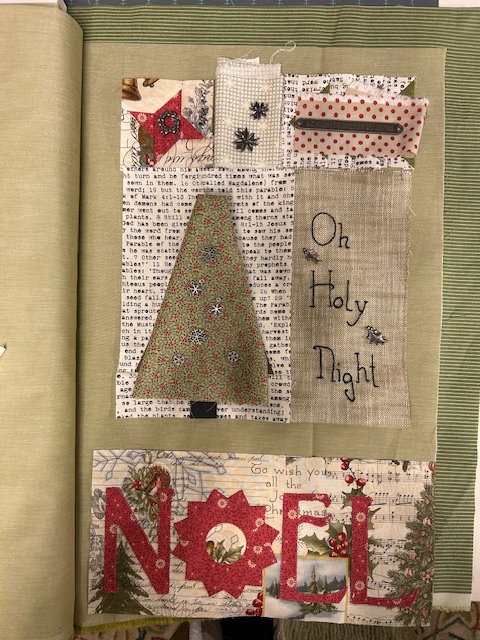
This 12th Day of Christmas it’s time to bind

& embellish your Oh Holy Night quilt.

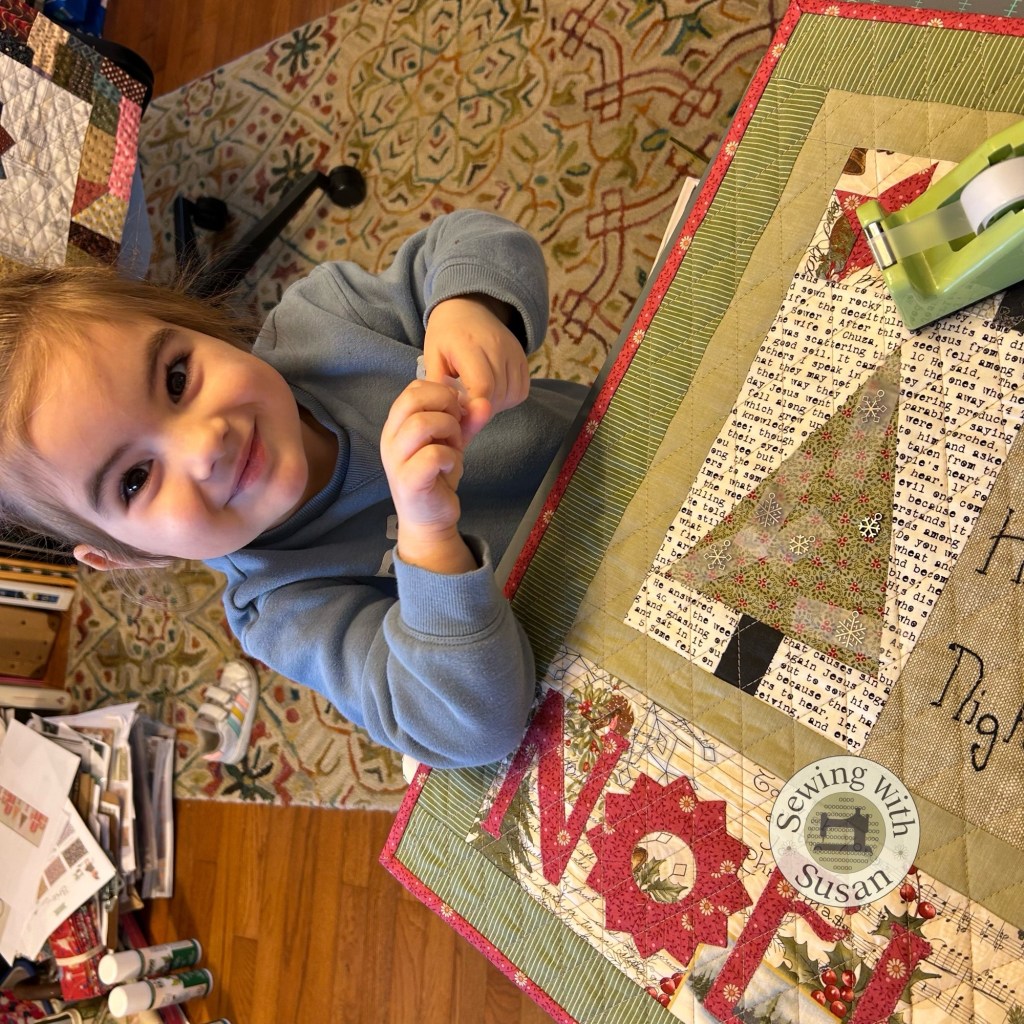
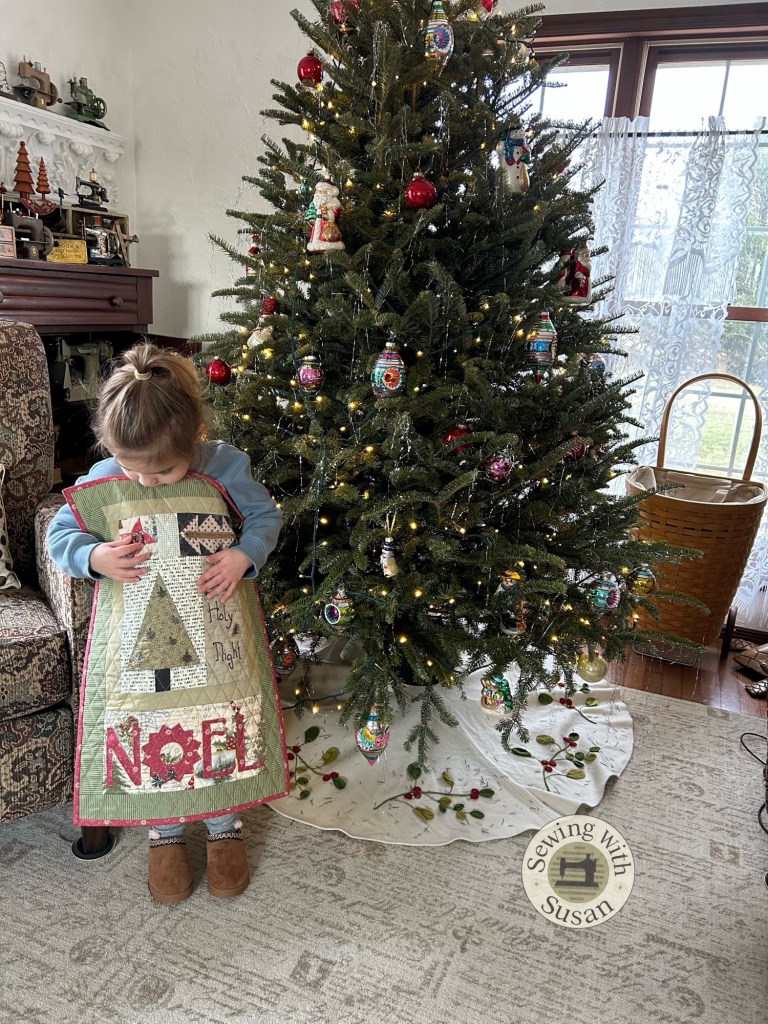
Since Emma is in school all day, every day we don’t get to sew much together.

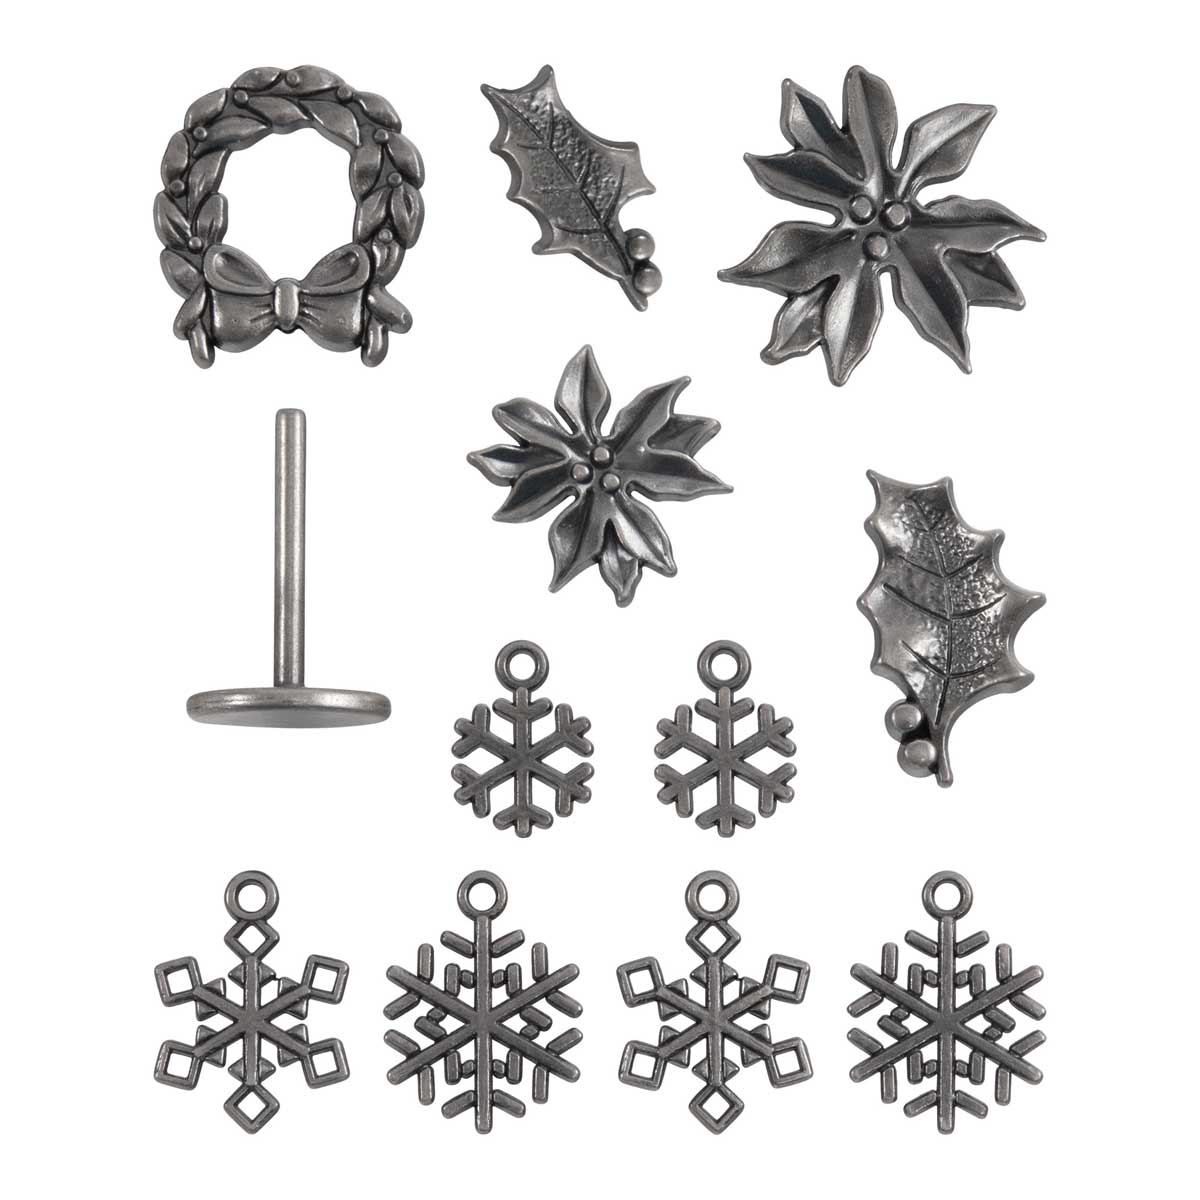
She was here for the day one day after Christmas & was excited to help me attach the Tim Holtz trinkets!

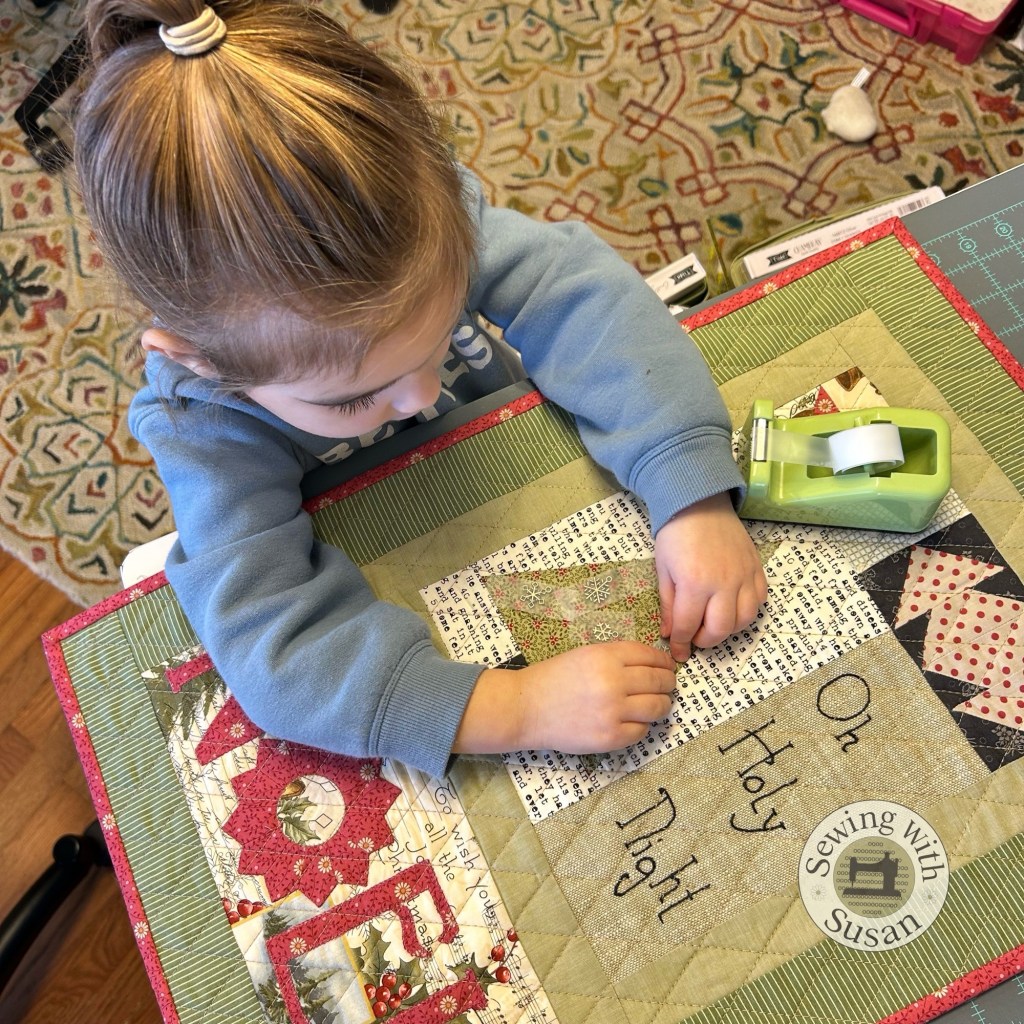
Emma taped the snowflakes in place.

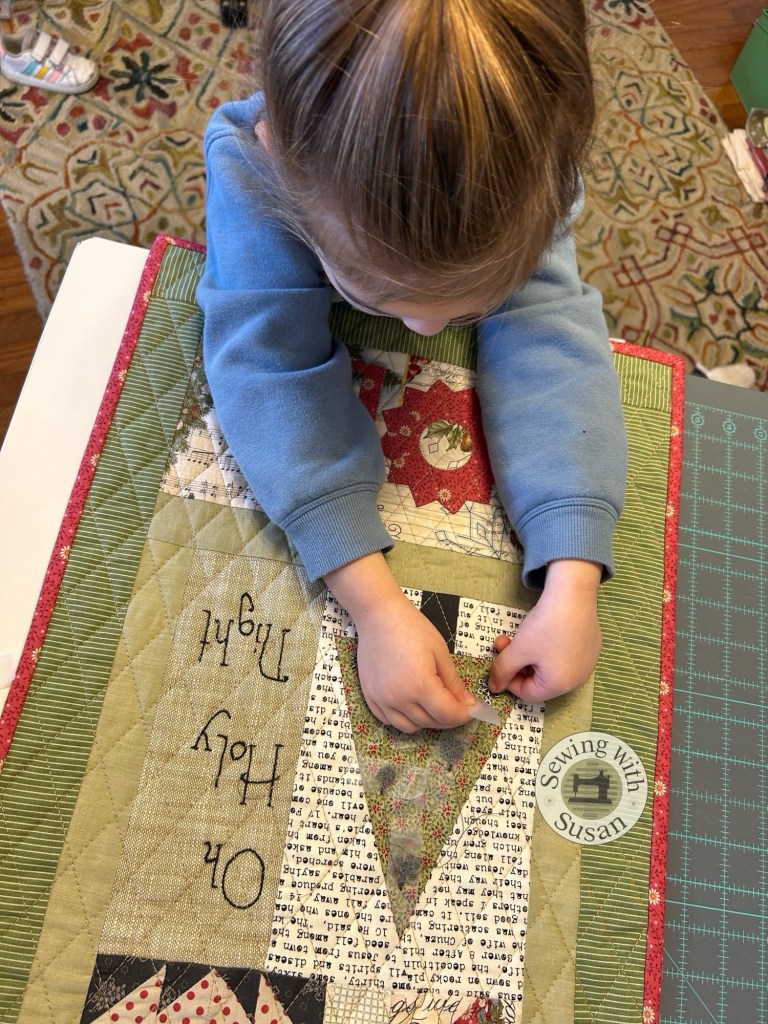
In just the right spots…

I then sewed them onto the quilt with my machine.

I guess I forgot or couldn’t get a pic of her in her sewing goggles, lol.

They hang on my light so when she sits on my lap when we sew she has eye protection.

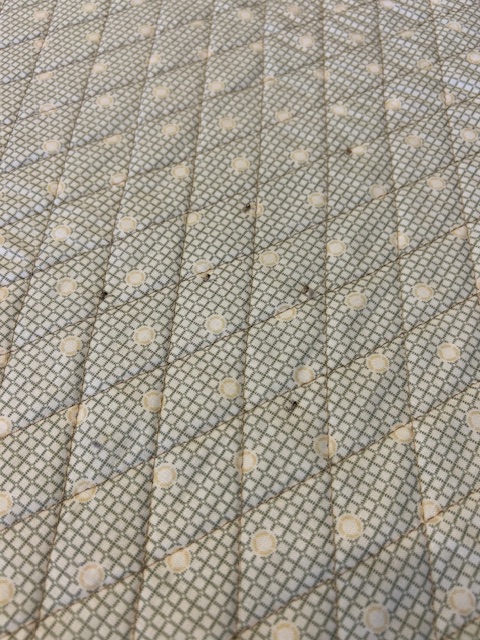
The back is petty too.

We next glued the pieces without holes onto the quilt.

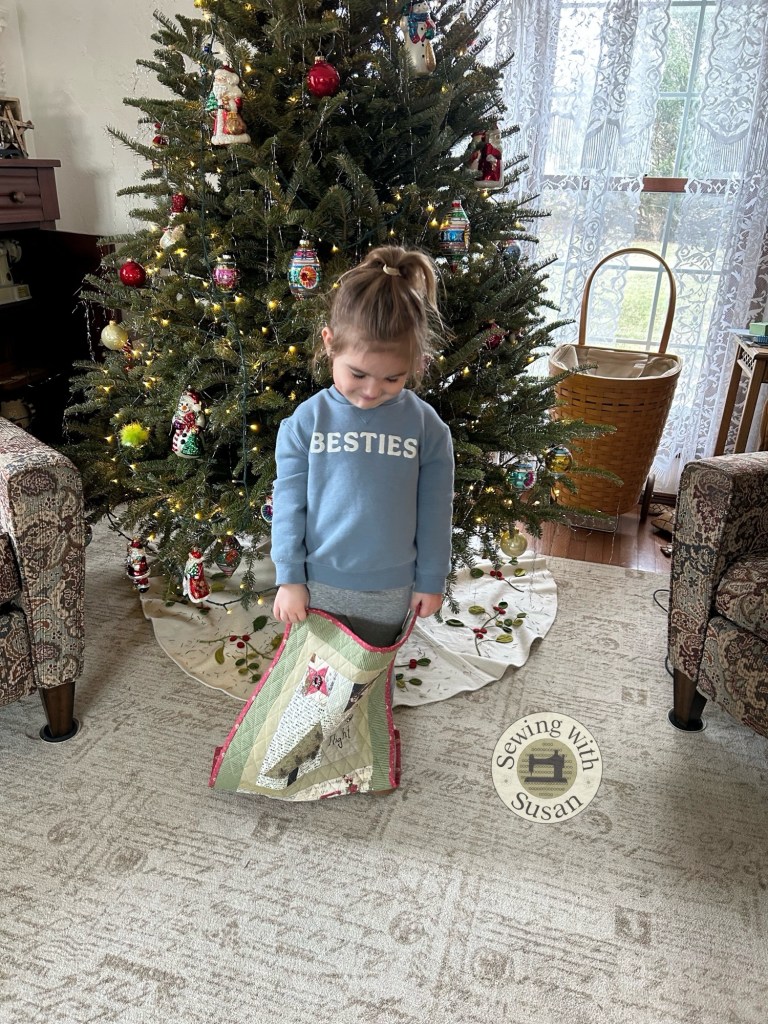
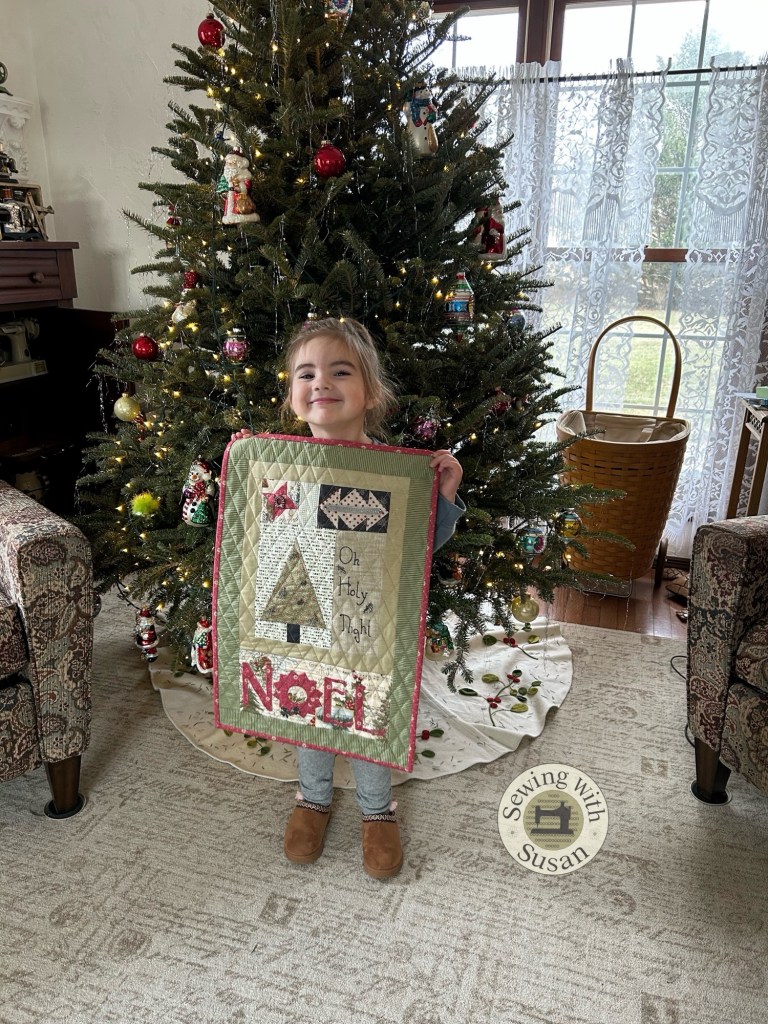
She then wanted to model the quilt for you all.

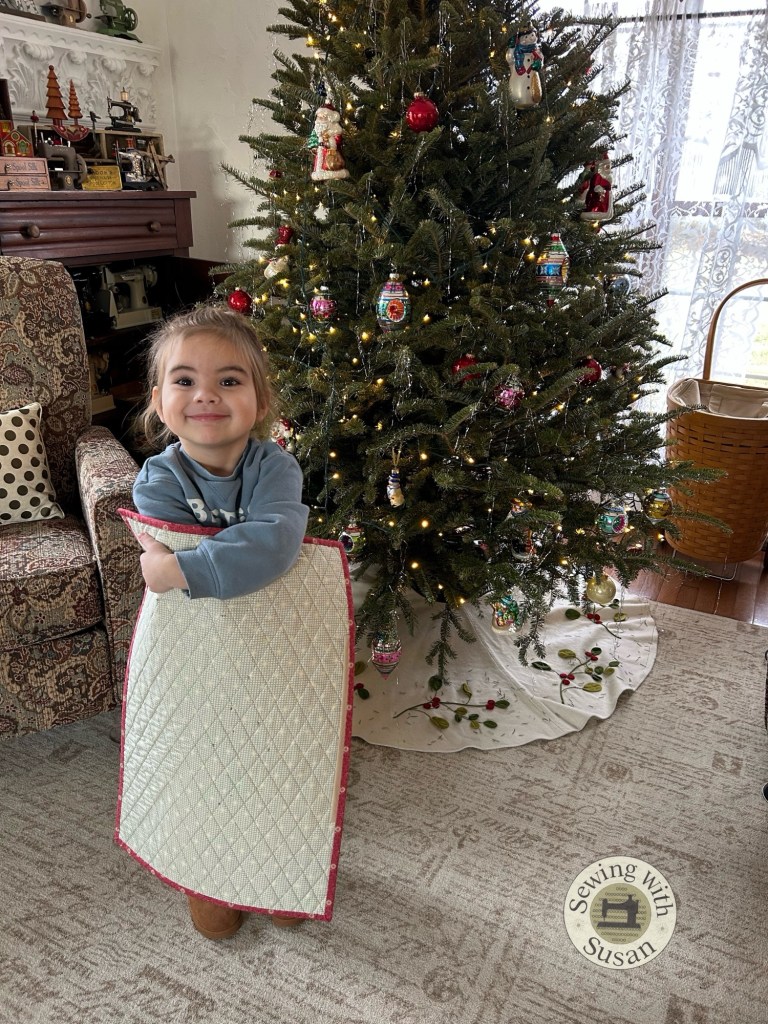
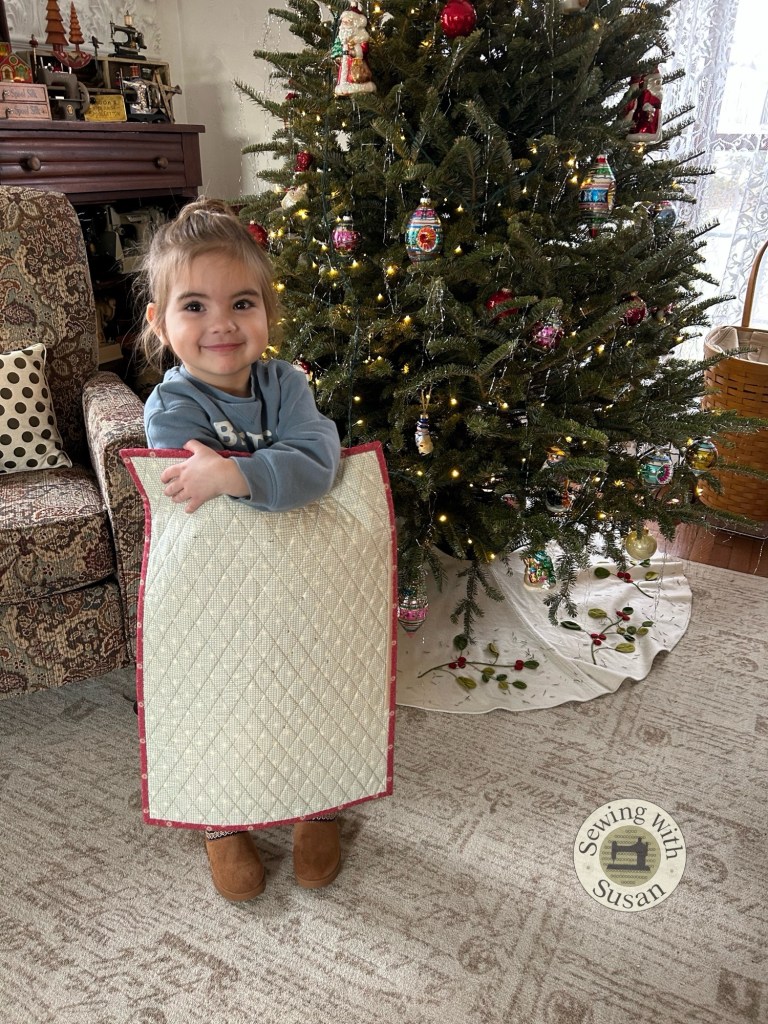
She likes the embellishments.

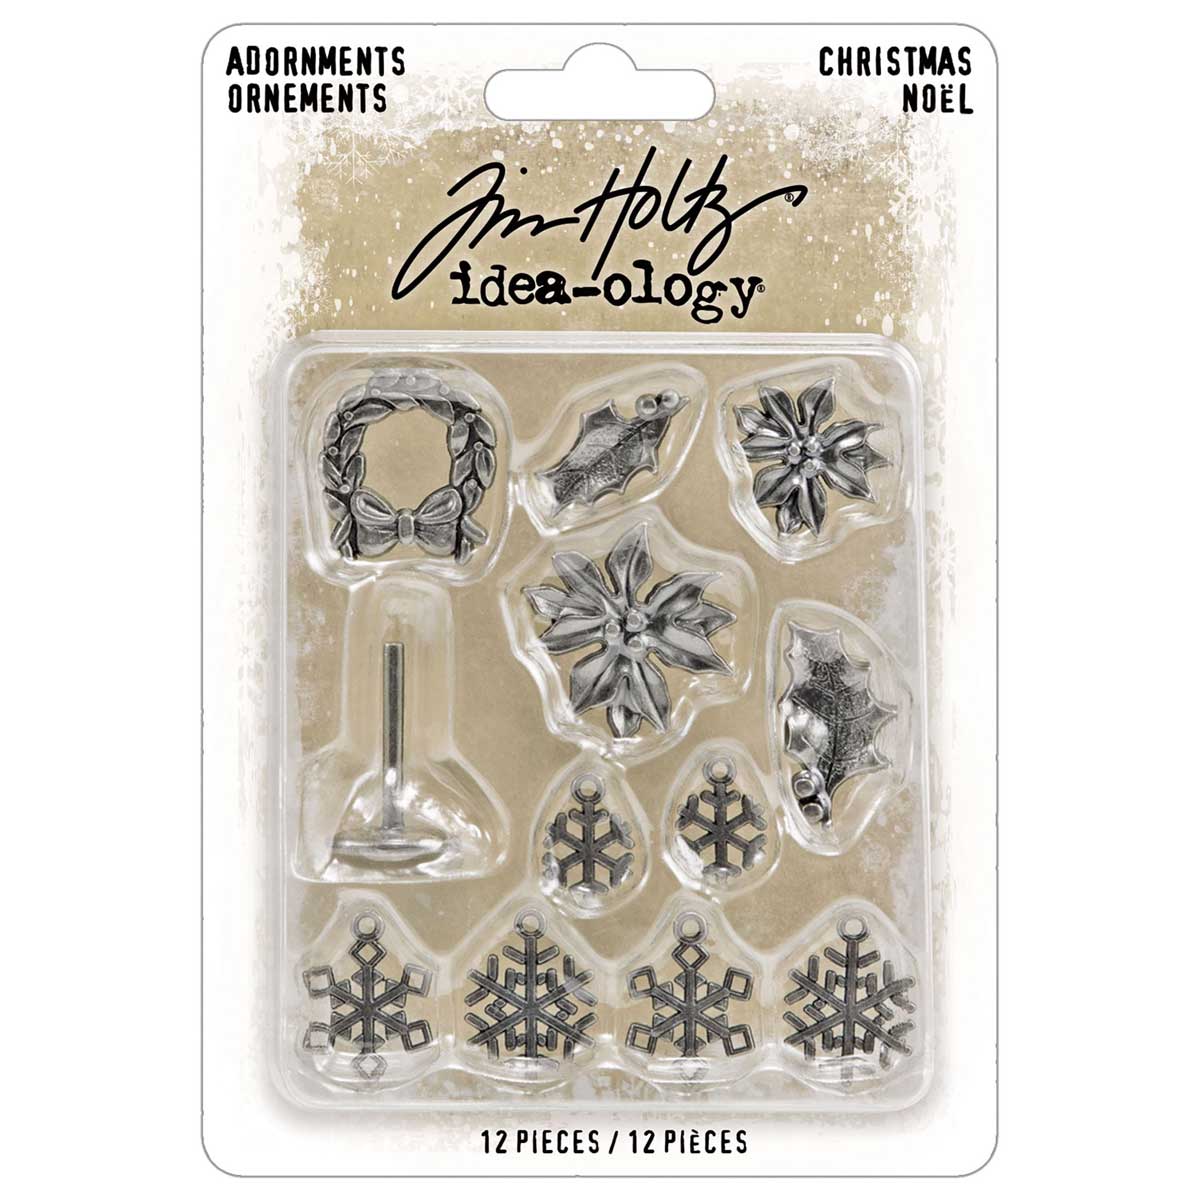
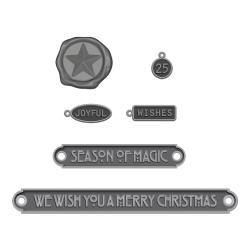
We used this whole package. They’re on my website here.

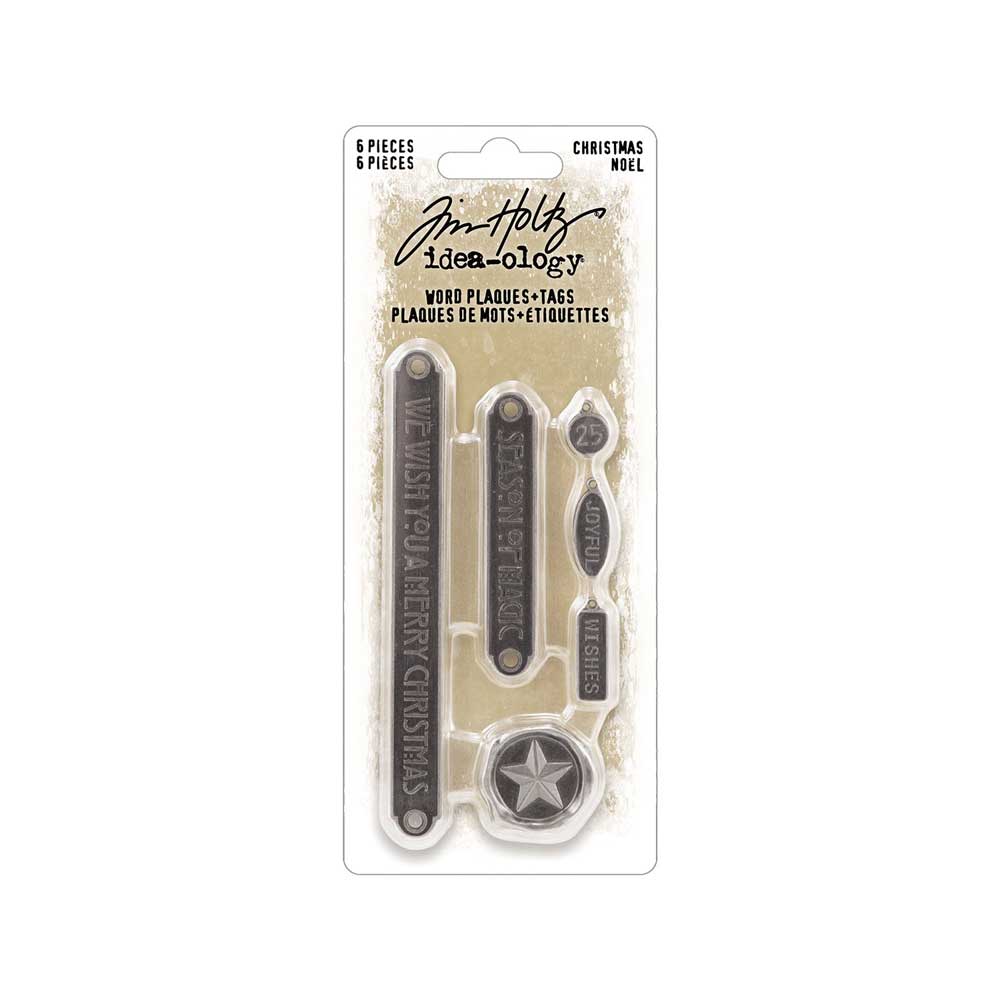
and the “We Wish You a Merry Christmas” banner.

They’re on my website here.

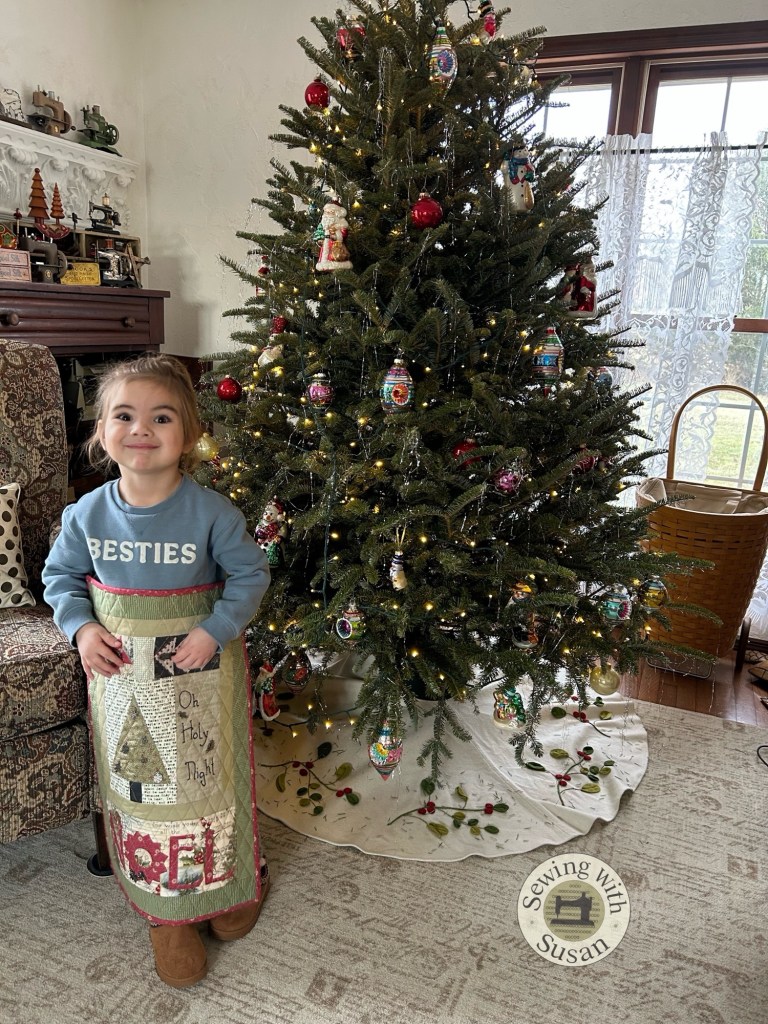
And she can’t be ornery without smiling…

& yes, it’s a live tree & yes, it’s tinsel! I love them!

I hope you have fun finishing your quilt too!

Show us your finished quilt on my Sewing With Susan FB page here: https://www.facebook.com/groups/SewingWithSusan

Just Keep Sewing…

Susan

My Life

12 Days of Christmas 2025, Oh Holy Night, Day 11

Welcome to Day 11!

It’s been fun seeing the finished tops you’re all showing!

Seeing your use of different fabrics is my favorite part!

Guess what today is?

Quilt it day!

I have to say that the actual “quilting” of a quilt is my least favorite part.

I’m a “quilt by checkbook” kind of quilter!

Since I didn’t have enough time to send this one out, I quilted it myself, & I didn’t hate it!

I’ll show you how I did it.

I started by basting it with basting spray.

It was easy since it’s so small.

The lines were “drawn” with a hera marker, using my 6″ x 24″ ruler to align the first line only.

Notice the 60 degree line on the ruler, aligned with the bottom of the quilt.

Then I used a hera marker to draw the line that I wanted to quilt. I have a few on my website that you can find by clicking here.

It really just makes a dent in the quilt sandwich, it leaves no permanent line to erase.

Version 1.0.0

I sewed that line, then slipped the guide into the back of the foot & used it to create the spacing between the quilting lines.

Again, no markings to erase!

I sewed a line of quilting in both directions through the middle of the quilt first, to help stabilize it, then I filled in the rest of the quilting in both directions.

Easy & fast too.

It probably took me 20 minutes to quilt the entire quilt!

Next, I trimmed it up & put on the binding,

but the binding is actually your work for tomorrow, the 12th Day of Christmas…

This could also be easily free-motion quilted. You decide!

Show us your finished top on my Sewing With Susan FB page here: https://www.facebook.com/groups/SewingWithSusan

Just Keep Sewing…

Susan

My Life

12 Days of Christmas 2025, Day 10

Welcome to Day 10!

I hope you’re enjoying these 12 Days of Christmas!

It’s time to put this cutie all together!

As per yesterday’s instructions, you should have

trimmed the appliqué block to 6″ x 12 1/2″.

It should fit perfectly below the top of the quilt.

Now to assemble the rest of the quilt.

Again, no templates on this PDF today, so no worries on print scale.

Show us your finished blocks on my Sewing With Susan FB page here: https://www.facebook.com/groups/SewingWithSusan

Just Keep Sewing…

Susan

My Life

12 Days of Christmas 2025, Oh Holy Night, Day 9

Welcome to Day 9!

It’s appliqué day!

& there’s just a tiny bit…

I know some of you hate appliqué, but I love it.

I assure you that if you use the right tools & techniques,

then practice… you can love it too.

I used my 6″ x 24″ ruler to align the letters before I fused them in place.

You may want to add a stabilizer before you stitch around letters.

Some machines draw up the fabric when not using a stabilizer. If you don’t know if your machine will do that, try a sample with scraps. (If you don’t a have stabilizer, you can even use a piece of printer paper lightly glued behind your rectangle. It’s easy to remove.)

Follow the diagram on the PDF for proper alignment.

Again, no templates on this PDF today, so no worries on print scale.

Show us your finished blocks on my Sewing With Susan FB page here: https://www.facebook.com/groups/SewingWithSusan

Just Keep Sewing…

Susan

My Life

12 Days of Christmas 2025, Oh Holy Night, Day 8

Welcome to Day 8!

I’m loving seeing the your Dresden plates.

Thanks for showing them on my Sewing with Susan FB group page.

Today we’re going to finish the letters in the NOEL block.

We already have the Tiny Dresden “O”, so it’s just an N, E & L.

I prefer Wonder Under fusible web.

I can iron with the iron set on Linen & not melt it away.

Waiting for an iron to cool down is not my thing!

I also like the way it feels in my quilts & the way it stitches!

My tips for fusible web: when I go to remove the paper, I score it first in the middle of the object, then peel the paper from there instead of trying it at the edge. That seems to make the edge fray. If the paper is being finicky about coming off, I put the fused piece in the freezer for a while & the moisture will help the paper release from the fabric.

You’ll want to be sure to print the instructions at “actual size” or 100% depending on your printer setting.

Show us your finished blocks on my Sewing With Susan FB page here: https://www.facebook.com/groups/SewingWithSusan

Just Keep Sewing…

Susan

My Life

12 Days of Christmas 2025, Oh Holy Night, Day 7

Happy New Year!

& Welcome to Day 7!

In case you want to sew before you go to bed tonight…

We’re half-way through these 12 Days of Christmas already!

It feels good to slow down with a bit of sewing each day, doesn’t it?

Do you know what today is, besides January 1st?

It’s perfect little circle day!

I LOVE making fabric circles.

But, only because I’ve found the perfect tools is it so easy.

Apliquick Bars are my favorite tool because they help me make perfectly round circles.

My happy place…
I use a tiny blind hem stitch with thread to match the circle fabric for nearly invisible stitches.

SUPPLIES FOR TODAY:

-Freezer Paper

Apliquick Bars– Highly recommended

Glue Pen for circle seam allowances

1 1/2″ Circle paper cutter – recommended only if you’ll make lots more later

 – Roxanne™ or other fabric glue to glue circles to plates & plates to blocks

-Thread(s) to match Dresden fabrics

I typically make 1″ circles for my Tiny Dresden plate centers, but I decided to use a bit bigger circle this time to make the Tiny Dresden plate look more like an “O”.

You’ll want to be sure to print the instructions at “actual size” or 100% depending on your printer setting.

Show us your finished blocks on my Sewing With Susan FB page here: https://www.facebook.com/groups/SewingWithSusan

Just Keep Sewing…

Susan

My Life

12 Days of Christmas 2025, Oh Holy Night, Day 6

Welcome to Day 6!

It’s one of my favorite days…

Tiny Dresden plate day!

Just one plate!

Notice it doesn’t even have a circle on it?

Tomorrow holds so much excitement and joy!

The reason I love to make Tiny Dresden plates is because my plates always turn out round & flat.

Want to know why???

Because I’ve had lots of practice, of course, but also because I’ve found the right tools.

#1, finding an accurate SCANT 1/4″ on my sewing machine, and being consistent with it!

I’m fortunate that I can use the open toe foot #20 on my Bernina sewing machine, click my needle position once to the right & use the edge of my presser foot as my guide. I also have to make sure to use the edge of my foot as the guide at all times, not just some of the time! lol

When teaching my Tiny Dresden plate workshops I always have at least one sewist who when after we get the machine all set up, forgets to watch the fabric go through their machine. It’s definitely an eyes-on-the-fabric-at-all-times sport.

#2, I spray all of my fabrics with Mary Ellen’s Best Press BEFORE I do any cutting. The petals are bias edges & the Best Press helps keep them from stretching as they slide through the machine over & over until the plate is finally stitched into place on the block.

#3, Apliquick Bars If I’d not had the pleasure of having Rosa, creator of the Apliquick Bars show me how to use her awesome tools, I probably would not have fallen head over heels into little Dresden plate land at all.

Perfect circles are key!

Tools make all the difference.

This is why I have the tools that I love & use on my website for you.

You can see with the links the tools that I stock for you.

SUPPLIES:

-Suzn Quilts’ Tiny Dresden Plate Template #216 –  highly recommended

-Mary Ellen’s Best Press™ in single finger pump bottle

Perfect Piecing Seam guide by Perkins Dry Goods – highly recommended

Dritz Mighty Steam Ironhighly recommended

 –That Purple Thang point turner

SUPPLIES FOR TOMORROW:

-Freezer Paper

Apliquick BarsHighly recommended

Glue Pen for circle seam allowances

1 1/2″ Circle paper cutterrecommended only if you’ll make lots more later

 – Roxanne™ or other fabric glue to glue circles to plates & plates to blocks

-Thread(s) to match Dresden fabrics

If you don’t have my awesome Tiny Dresden Plastic Template #216,

you’ll want to be sure to print the instructions at “actual size” or 100% depending on your printer setting.

Show us your finished blocks on my Sewing With Susan FB page here: https://www.facebook.com/groups/SewingWithSusan

Just Keep Sewing…

Susan

My Life

12 Days of Christmas 2025, Oh Holy Night, Day 5

Welcome to Day 5!

Thanks to Cynthia Holman, Bonnie Slanker Wilson, Rita Gastaldo Herzberger, Janet Baker Smith & Nicole Sender for sewing & sharing their first 3 Days of Christmas sewing with us on my Sewing With Susan FB group. They will each receive a free Suzn Quilts PDF pattern of their choice! (Even more blocks were shared yesterday!)

The steps have all been quick & easy, haven’t they?

Today is more of the same.

It’s time to sew together the units you’ve made so far & sew the inner border on too.

Do you ever struggle with fabric choices?

Sometimes I do…

Would you like to see some of them & how I conquered the fabric fear?

I started by wondering if I could piece a wool tree with my Mini Tree template set & guess what?

YES, I CAN!

AND DID!

But I really wanted to use these pretty Christmas doodads & the doodads didn’t show up on the green wool I’d chosen.

The cute doodads can be found here on my website.

So, I decided to change out my tree fabric.

Keep in mind this was December 18th. I needed to be shopping, wrapping, cleaning…

Ahh, much better! And the inner border was a no-brainer…

Then the outer border… a snap!

But then my flying geese were looking too much like a tree

& I only wanted 1 tree…

Much better with the Tilda red polka dots in the corner! & by turning some of the flying geese, it made a home for the little “We Wish You A Merry Christmas” plaque.

You can find them here on my website.

This was what my brain wanted!

Sorry for that tiny glimpse inside my head…

I really like how it turned out.

Again, no templates on this PDF today, so no worries on print scale.

Show us your finished blocks on my Sewing With Susan FB page here: https://www.facebook.com/groups/SewingWithSusan

Just Keep Sewing…

Susan

My Life

12 Days of Christmas 2025, Oh Holy Night, Day 4

Welcome to Day 4!

I’m enjoying this sew-along & hope you are too.

There is always so much to do before Christmas & I always felt I wanted to sew while in the season, but was always too busy with all the activities leading up to Christmas Day. A few years ago I realized it was still the Christmas season until Epiphany, December 6th, so why not keep enjoying the season? And why not share what I’m doing with my quilting friends with a sew-along?

Today you’ll need to make just 1 tiny friendship star block.

See, it’s relaxing & fun!

Again, no need to fret over print size because there are no templates.

Show us your finished blocks on my Sewing With Susan FB page here: https://www.facebook.com/groups/SewingWithSusan

Just Keep Sewing…

Susan

My Life

12 Days of Christmas 2025, Oh Holy Night, Day 3

Welcome to Day 3!

Are you having fun sewing these 12 Days of Christmas?

(I’m still getting asked if I have kits available- yes! Here’s the link: https://sewingwithsusan.com/collections/whats-new/products/oh-holy-night-fabric-kit-limited-supply )

I’m enjoying seeing your progress.

Today we’re going to make some easy flying geese.

I have my own “Lazy Susan” method that you’ll see in the PDF.

They’re quick & easy, with no extra thinking…

It doesn’t matter what size you print this file. There are no templates today.

Show us your finished blocks on my Sewing With Susan FB page here: https://www.facebook.com/groups/SewingWithSusan

If today you show all 3 of the first 3 Days of Christmas blocks

on my Sewing With Susan FB group, you’ll be eligible to win a prize!

Just Keep Sewing…

Susan