A Quilt Along, My Life

1-A-Day, 3″ Blocks — Squared Chain

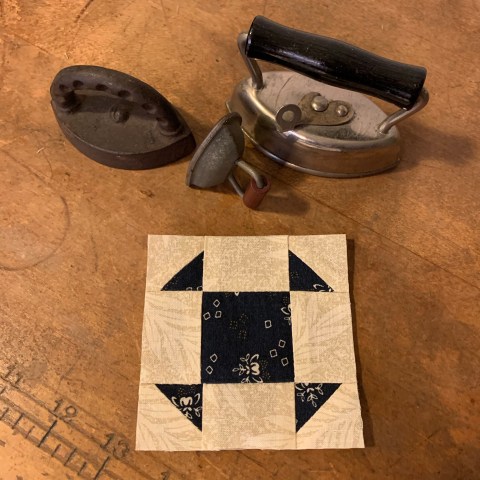
  Squared Chain Block

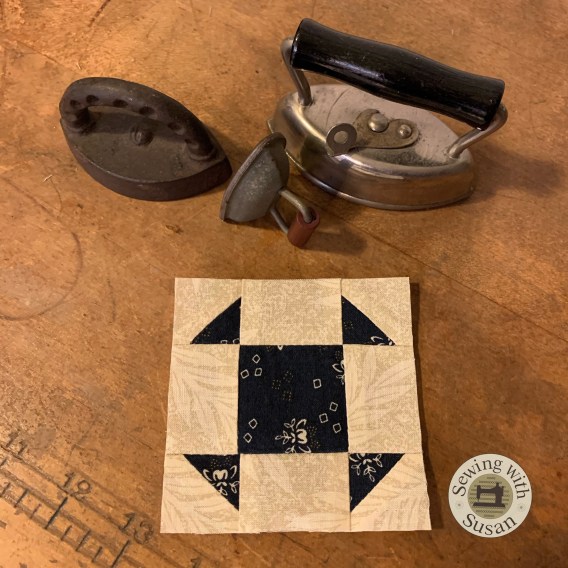
Today we’ll make this cutie.
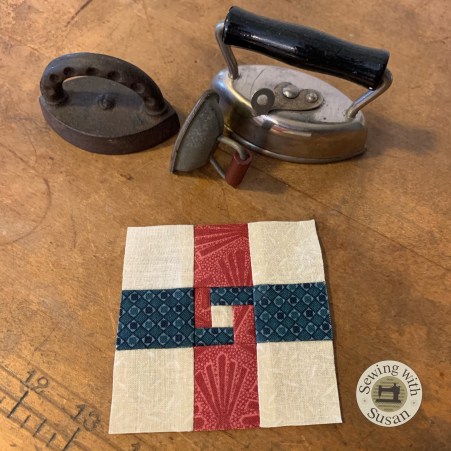
I know what you’re going to say…

“hells no!”

but wait….

It’s really not bad!

Let me show you.

Had lots more fun going through my scrap basket!

~~~~~~~~~~~~~~~~~~~~~~~~~~~~~~~~~~~~

Don’t forget the Mary Ellen’s Best Press…

Cut:

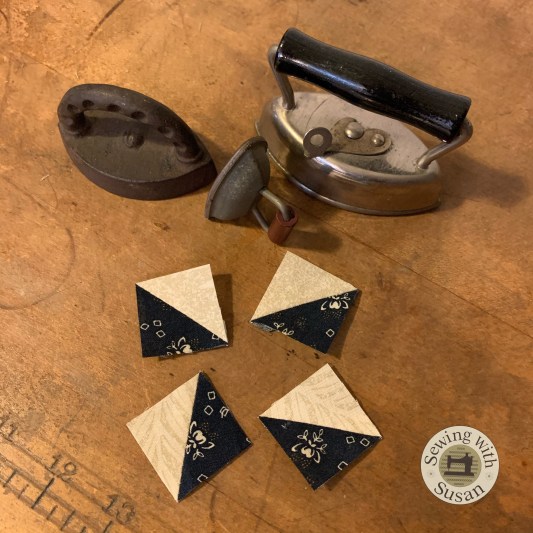
  • 4 cream sq’s. 1  1/2″
  • 1 cream sq. 7/8″ (yes 1/8″ less than 1″!)
  • 2 blue sqs. 1  1/2″
  • 2 blue recs. 7/8″ x 1  1/4″
  • 2 pink sqs. 1  1/2″
  • 2 pink recs. 7/8″ x 1  1/4″


We’ll start with a partial (not “y”) seam.

Sew a pink rectangle onto the center 7/8″ square.

Sew all but the last 1/4″.


Finger press seam away from the cream square.

Next sew a blue rectangle onto the center square.

 My first block is a bit rough around the edges

but it’s going to be trimmed in the end so it’s OK.

I did up-size the rectangles to 1 1/4″ for you.

Finger press all of these seams.

Continue around the center square.
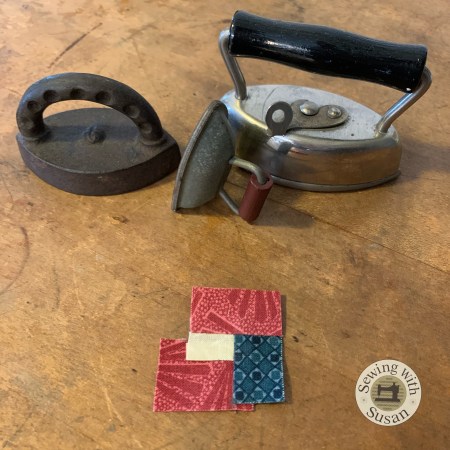
Finger press each seam away from the cream square.

For the last seam I folded down the first seam allowance

to get it out of the way.

Then lined up the last rectangle.

It should fit perfectly.

Sew that seam.

Lastly pin then sew the rest of that first (partial) seam.

(After writing this post I made 3 more blocks

so I added some pertinent details for you.)

To more easily finish the partial seam,

first even up the edge of the tiny block then pin it.

Next put another pin a little further in from the edge.

Put the needle down in the last stitch of the partial seam then finish that seam.

I put my finger on the fabric & it acts like a guide

to hold the fabric where I want it

as the feed dogs pull the fabric through the machine.

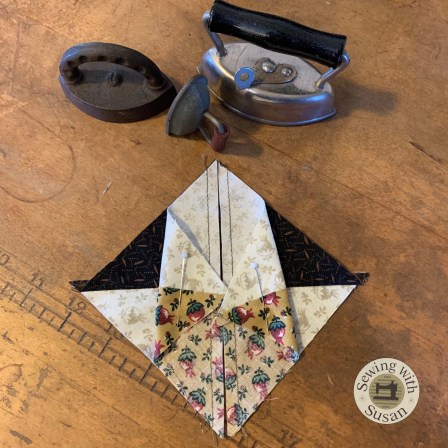
This is the back of the center of block #5 before any trimming.
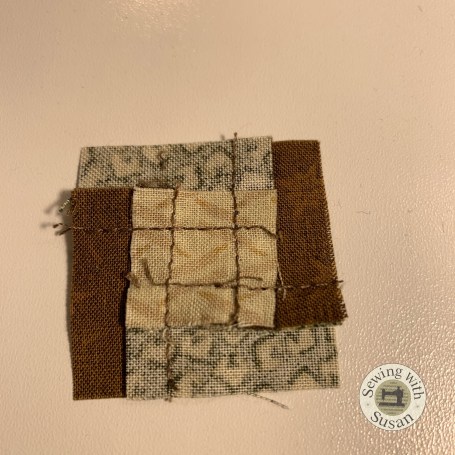
These are #5 & 6 before trimming.


They keep getting better. Before today I’d not made this block either!


Trim the tiny block to 1 1/2″.

This little 4  1/2″Creative Grids ruler is the perfect little square up ruler!
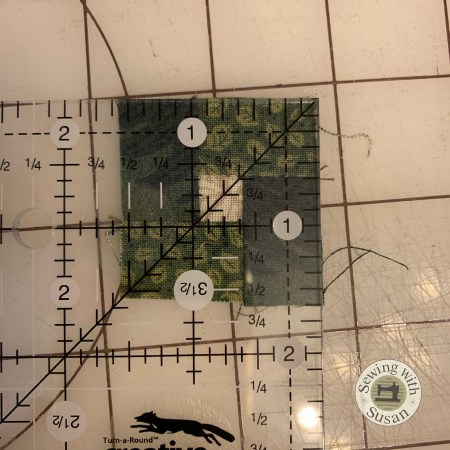
It grips the little fabric block & has the perfect markings

to easily center the block before trimming it.

Block #1

and blocks #5 & 6.

Here’s the back of my second block center.

I learned a bit from the first one.
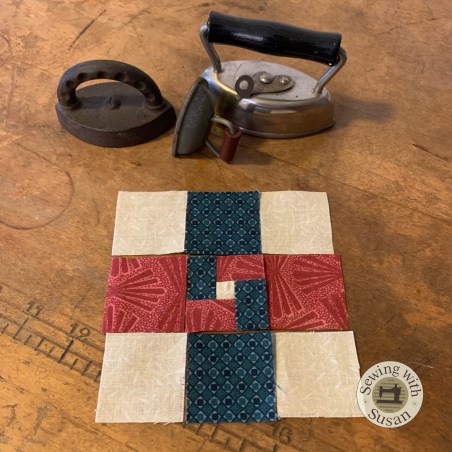
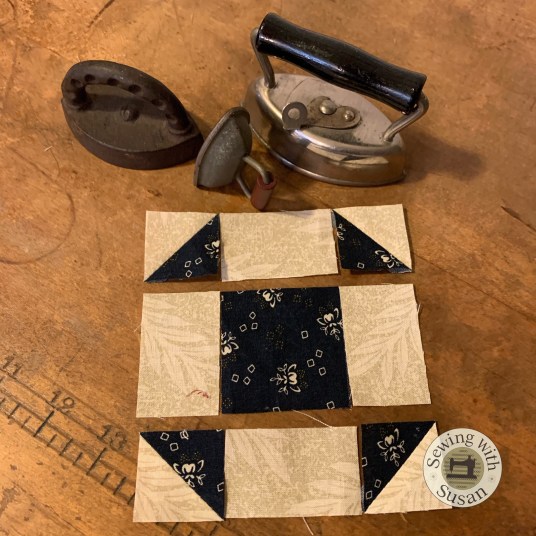
Arrange then sew the pieces.

A bit more Best Press to finish it off!

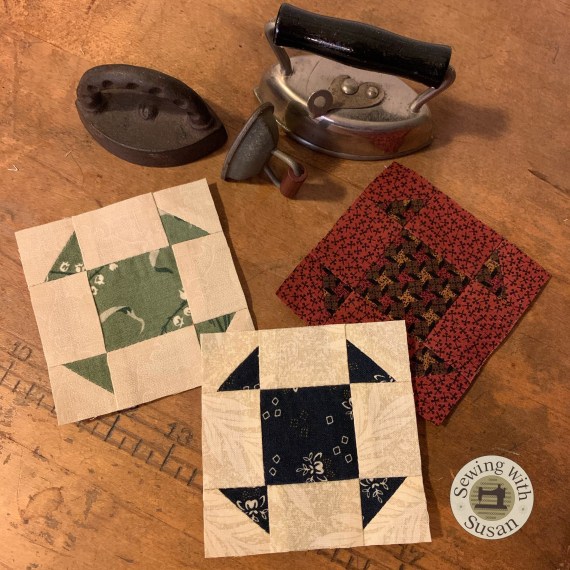
The second two were more fun!

I love a good challenge!

So I made 3 more!
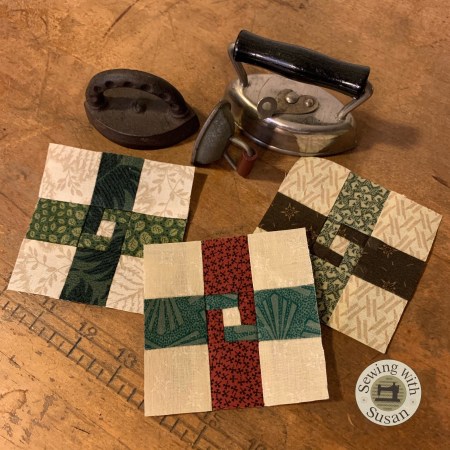
This would make an awesome block of any size.


Show us your blocks at my Sewing With Susan FB Group.

We want to see your progress too!

https://www.facebook.com/groups/SewingWithSusan/

Just Keep Sewing…

Susan

A Quilt Along, My Life

1-A-Day, 3″ Blocks — Bear’s Paw

  Bear’s Paw Block

Today we’ll make this cutie.

I used more yardage today instead of going through my scrap basket!

 ~~~~~~~~~~~~~~~~~~~~~~~~~~~~~~~~~~~~

Cut:

  • 1 green sq 2  1/2″
  • 2 green sqs 1  7/8″ (for hst’s)
  • 1 cream sq 1  1/2″
  • 2 cream sqs 1  7/8″ (for hst’s).


If using Thangles, you’ll need 4 for 1″ finished.

Use your favorite method.


I pressed these seams open.

They should measure 1  1/2″ sq.

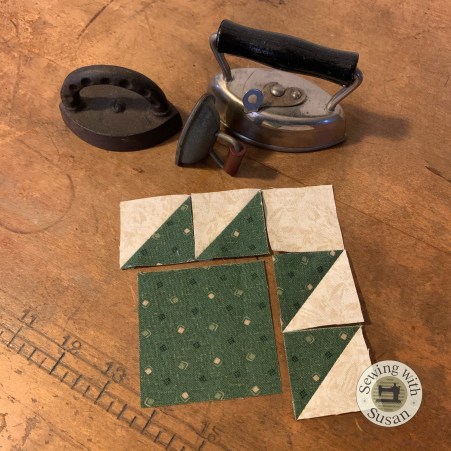
Arrange all the pieces then sew the block together.

I made all green blocks today.

I guess I should have made them on Earth Day a couple of days ago.

Show us your blocks at my Sewing With Susan FB Group.

We want to see your progress too!

https://www.facebook.com/groups/SewingWithSusan/

Just Keep Sewing…

Susan

A Quilt Along, My Life

1-A-Day, 3″ Blocks — Katherine Wheels

  Katherine Wheels Block

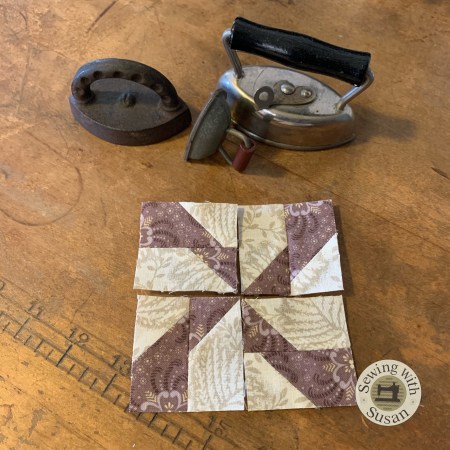
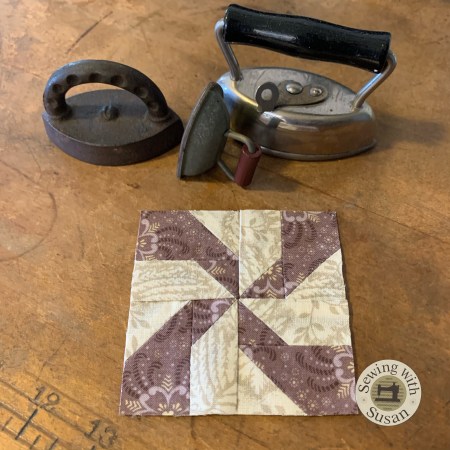
Today we’ll make this cutie.

Instead of going through my scrap basket today

I decided to cut yardage of some newly gifted Thimbleberries!

 ~~~~~~~~~~~~~~~~~~~~~~~~~~~~~~~~~~~~

Cut:

  • 4 cream sqs. 1  1/4″
  • 4 cream recs. 1  1/4″ x 2″
  • 4 purple sqs. 1  1/4″
  • 4 purple recs. 1  1/4″ x 2″

Not sure where my pic went of the fabric pieces…

You’ll have to imagine them!

I used my “Lazy Susan” technique for the half flying geese units.

I pressed these seams open.

Arrange the pieces then sew the quarter blocks.

Be sure you see a tiny pinwheel in the center

of the block before you sew it together.

I pressed the last seam open &

also removed the couple of stitches within the seam allowance

of the last seam to make it lie flatter as usual.

I made a couple more!

Show us your blocks at my Sewing With Susan FB Group.

We want to see your progress too!

https://www.facebook.com/groups/SewingWithSusan/

Just Keep Sewing…

Susan
A Quilt Along, My Life

1-A-Day, 3″ Blocks — Hour Glass

  Hour Glass Block

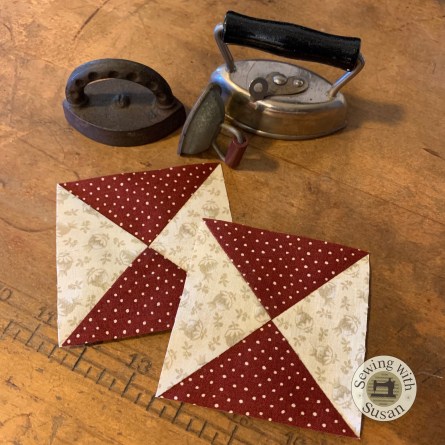
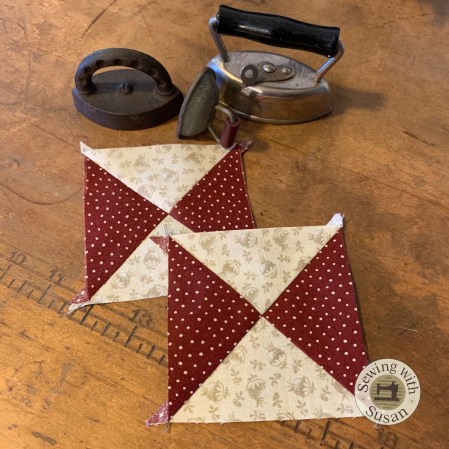
Today we’ll make these cuties.

I say cuties plural because you make 2 at once.

I had a lot more fun going through my scrap basket!

I had to find scraps at least 4 1/2″ sq.

 ~~~~~~~~~~~~~~~~~~~~~~~~~~~~~~~~~~~~

Cut:

  • 2 different fabric sq’s. 4 1/2″

2

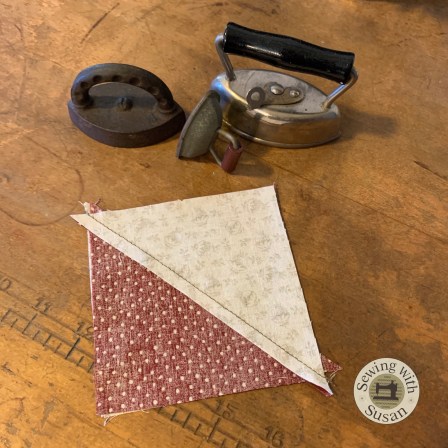
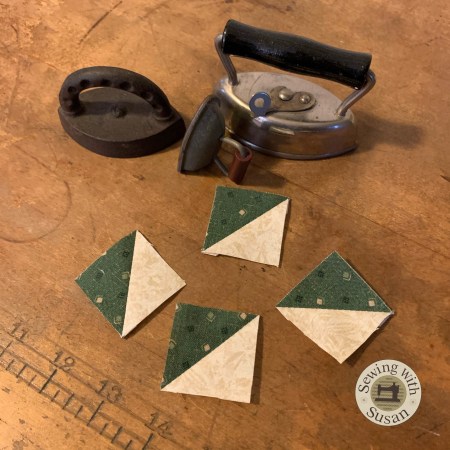
Put the squares right sides together.

If you’re a “lazy Susan” like I am,

cut the pair of squares diagonally

then sew the triangle pairs right sides together.

Press them both toward darker fabric.

Put the half-square triangles right sides together

with opposite fabrics lined up to nest the seams.

This will ensure perfect centers.

Again, cut the pair of squares diagonally

then sew the scant 1/4″ seams…

Press as sewn then press the seams to one side.


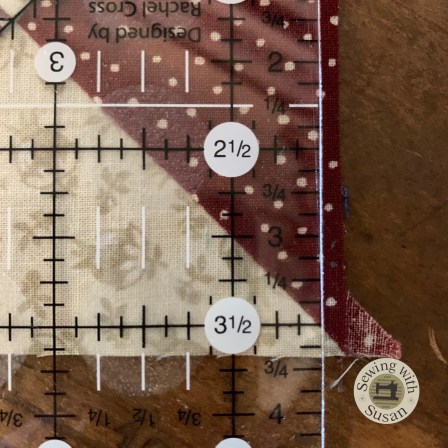
Trim blocks to 3 1/2″ square.

This Creative Grids ruler is perfect for this task!

Look how the lines on the ruler make it so easy.

First align the diagonal line of the ruler on a seam.

The 3 1/2″ marks then align at the corners

 to trim the block precisely 3 1/2″.

Top left…

and bottom right.

So easy to trim perfectly!

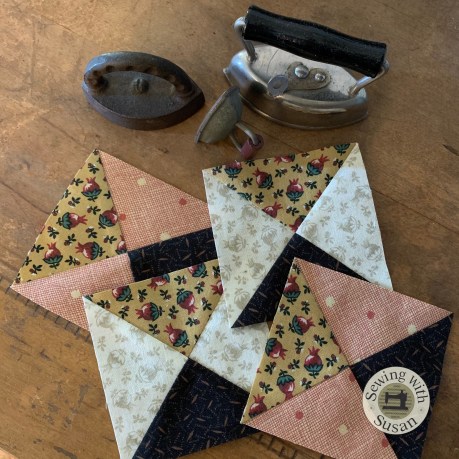
I decided to mix it up a bit & next made 4 at once!

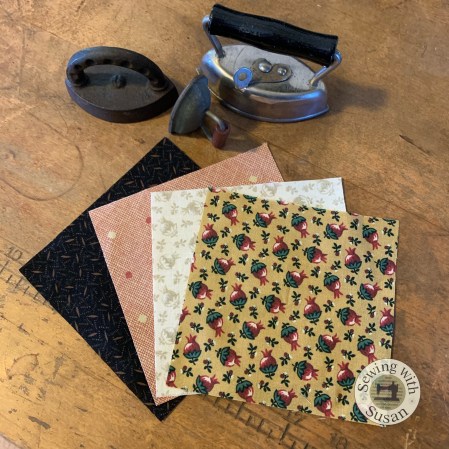
I started with 4 different fabric squares.

I swapped the pairs so they were each different.

I paired each of these up with a different triangle set.

6 blocks in a snap!

Show us your blocks at my Sewing With Susan FB Group.

We want to see your progress too!

https://www.facebook.com/groups/SewingWithSusan/

Just Keep Sewing…

Susan
A Giveaway!, My Life

Primitive Quilts & Projects Winner!

Thank all of you for your kind comments!


Summer 2020

The winner of the

Summer 2020

Primitive Quilts & Projects issue

is

Theresa K

She said: Do we have to pick a favorite? I have made several of your patterns: just finished God’s Peace and in the middle of your Christmas Joy to the World, with Dresden Heaven and Dresden Sundaes waiting the wings. This is my favorite block and will have to try your new flower too. Thank you

Email me your snail mail address Theresa

so I can send you the beautiful magazine.

I can’t wait for you to share what you make from the issue.

Summer 2020

Just Keep Sewing…

Susan

A Quilt Along, My Life

1-A-Day, 3″ Blocks — Rail Fence

 Rail Fence Block

Today we’ll make this cutie.

Had lots more fun going through my scrap basket!

 ~~~~~~~~~~~~~~~~~~~~~~~~~~~~~~~~~~~~

Cut:

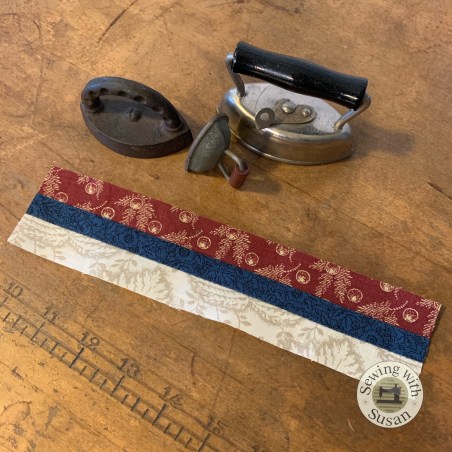
  • 1 rectangle 1″ x 9″ of 3 different fabrics

Sew them together being sure

to press each seam flat as sewn,

then to one side so the seam stays straight.


Check to be sure the strip set is straight by laying a ruler over it.


If it’s not perfectly straight,

take & press it again.

If you sewed straight seams,

you should be able to straighten it out.

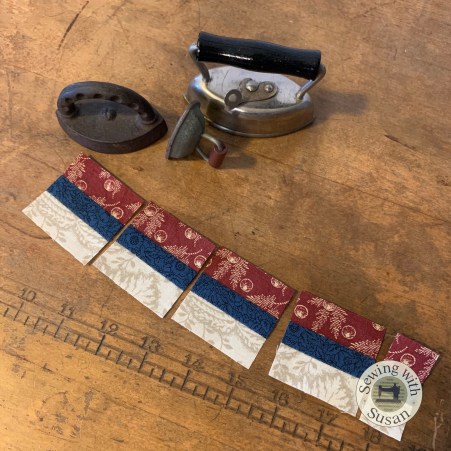
Cut strip set into 4 segments 2″ long.


Arrange then sew the block.

Press as shown below.

Remove stitches in center seam allowance.

Make a couple or few a more!


Show us your blocks at my Sewing With Susan FB Group.

We want to see your progress too!

https://www.facebook.com/groups/SewingWithSusan/

Just Keep Sewing…

Susan

A Giveaway!, My Life

Primitive Quilts & Projects Give-Away Reminder…

Reminder: If you want to be included in the chance to win

the new Summer 2020

Primitive Quilts & Projects

Summer 2020

you must comment on my blog post here:

https://suznquilts.wordpress.com/2020/04/19/beautiful-dreamer-in-primitive-quilts-projects/

You could be making my latest quilt, Beautiful Dreamer,

Summer 2020

or another one of the beautiful quilts in this issue.

Good luck!

Just Keep Sewing…

Susan

A Quilt Along, My Life

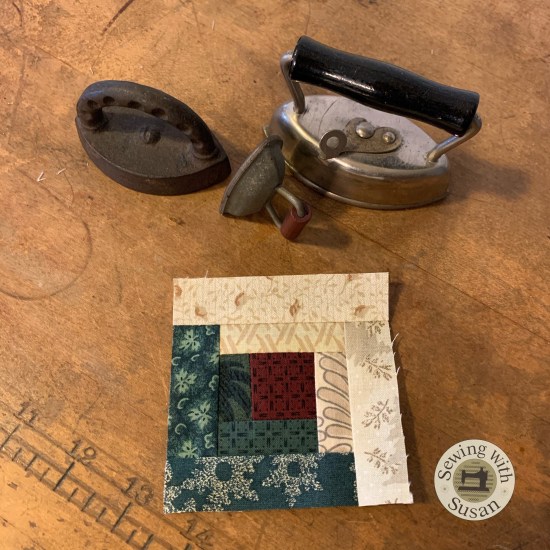
1-A-Day, 3″ Blocks — Log Cabin

  Log Cabin Block

Today we’ll make this classic cutie.


Had lots more fun going through my scrap basket!


 ~~~~~~~~~~~~~~~~~~~~~~~~~~~~~~~~~~~~

Cut:

  • 1 red square 1 1/2″


  • 1 green rectangle 1″ x 1  1 /2″
  • 1 green rectangle 1″ x 2″
  • 1 green rectangle 1″ x 2  1/2″
  • 1 green rectangle 1″ x 3″


  • 1 cream rectangle 1″ x 2″
  • 1 cream rectangle 1″ x 2  1/2″
  • 1 cream rectangle 1″ x 3″
  • 1 cream rectangle 1″ x 3  1/2″


Start by sewing the 1″ x 1  1/2″ green rectangle

onto the left side of the red square.

Press as sewn, then away from the square.


Next, sew the 1″ x 2″ green rectangle onto the bottom.

Press.


Sew the 1″ x 2″ & 1″ x 1  1/2″ cream rectangles

to the right side & top.

Sew the 1″ x 2  1/2″ & 1″ x 3″ green rectangles to the side & bottom.


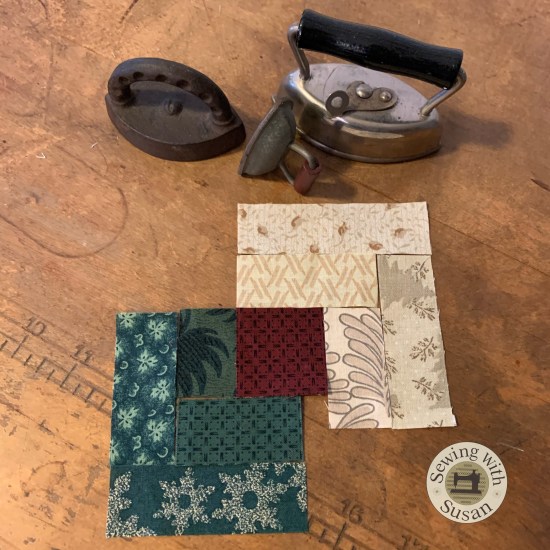
Sew the remaining cream rectangles

as shown to complete the block.

Be sure to press after each rectangle is added.


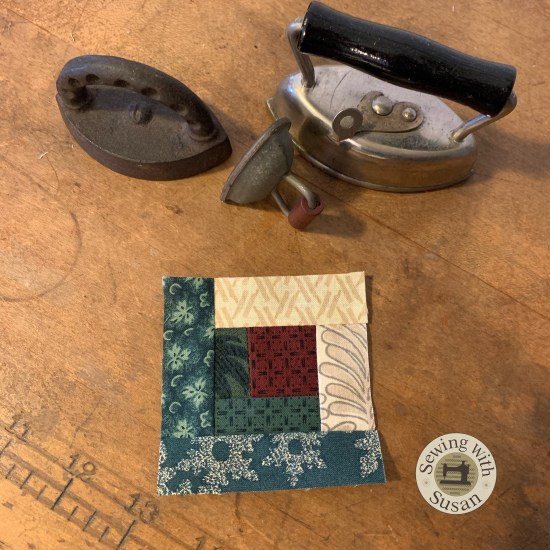
I had fun playing with fabric combinations in a couple more.


Show us your blocks at my Sewing With Susan FB Group.

We want to see your progress too!

https://www.facebook.com/groups/SewingWithSusan/

Just Keep Sewing…

Susan

A Giveaway!, My Life, New Magazine Quilt

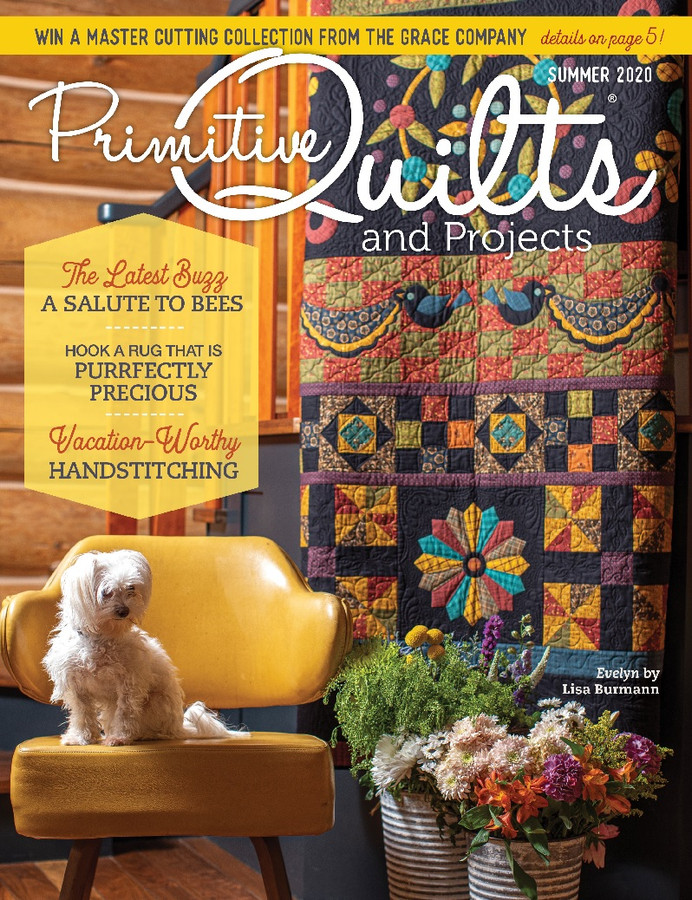
Beautiful Dreamer in Primitive Quilts & Projects & A Give-Away

Do you subscribe to

Primitive Quilts & Projects Magazine?

Summer 2020

If so, you’ve probably already seen my

Beautiful Dreamer

on page 36.

I got my copy yesterday!

Summer 2020

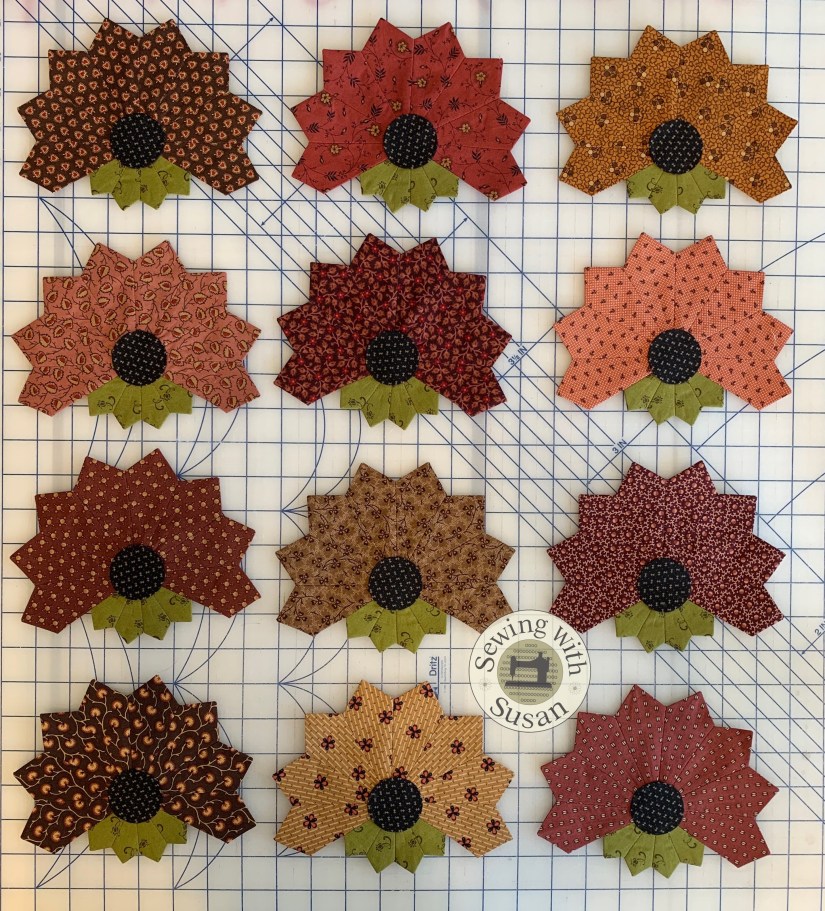
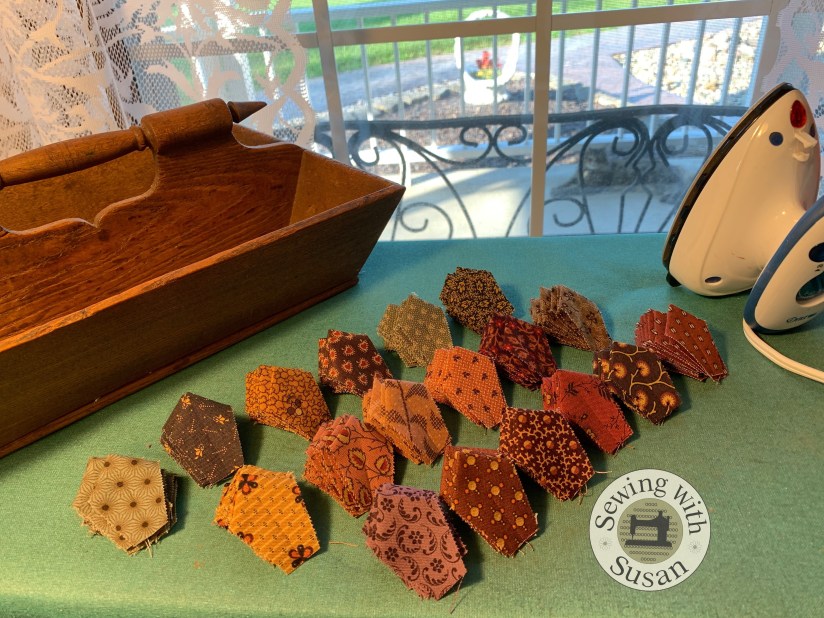
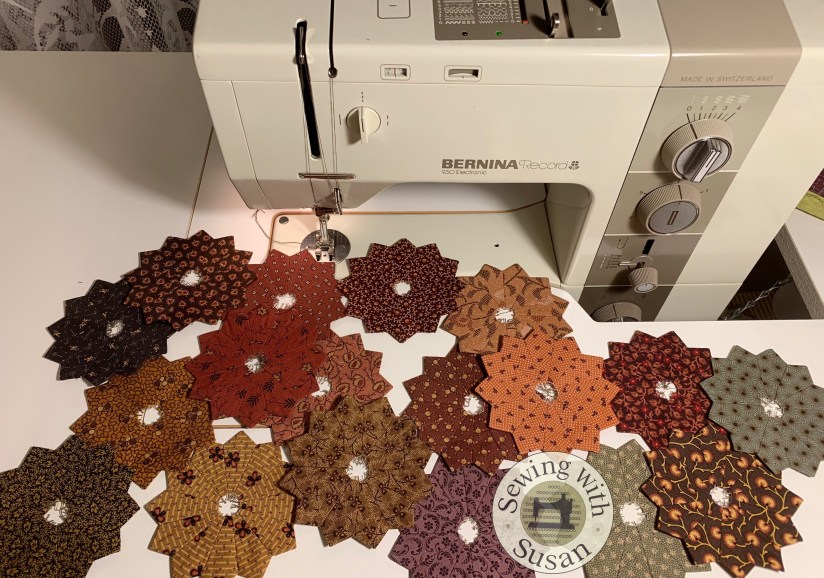
I designed a new “flower” with my 2 templates;

Tiny Dresden Plate


& Mini Dresden Plate.


I think it’s my favorite of all the plates that I’ve created.

It doesn’t hurt that I used a lot of my favorite

Barbara Brackman & Jo Morton prints.


The flowers came first,

then the Tiny Dresden pile of petals.


This is my favorite antique cutlery tray.

I have a few…

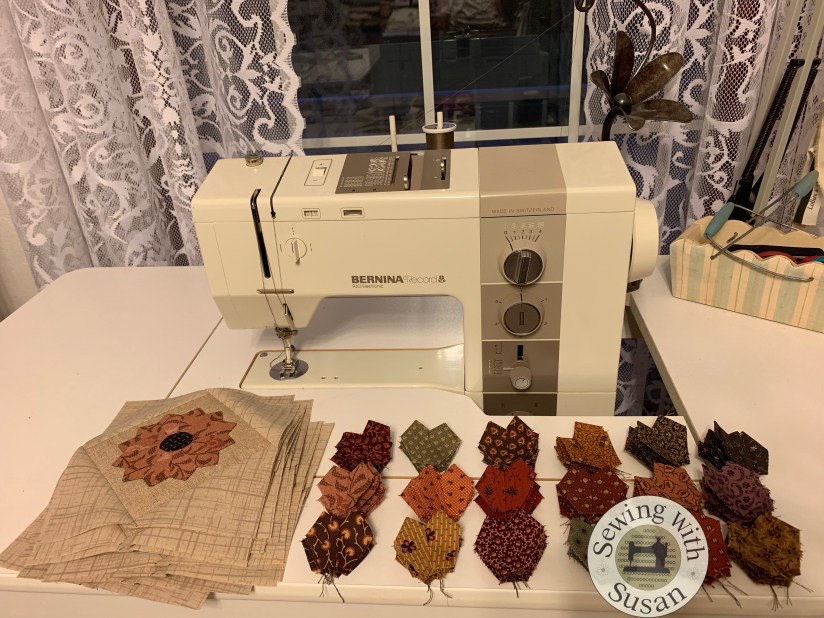
It helps ALL of my little petals

get transported from my cutting table

to my ironing board,

to my sewing machine

& back again

without getting lost!


Lots of fun steps involved

but the most important step for making flat plates

is finding the scant 1/4″ seam on your sewing machine.

If you’re unsure,

the Perfect Piecing Seam Guide by Perkins Dry Goods is great.

You can find them on my notions page.

Aren’t the Tiny plates lovely???

BTW, I travel to teach all of my tips & techniques for perfect little plates.


See my workshop/lecture page on my website for pricing, etc.


Making the center circles is a snap with these tools:

  • Apliquick Bars
  • Roxanne Glue-Baste-It or Bohin glue pen
  • freezer paper
  • circle paper cutter
  • Clover’s Bordeaux scissors
  • my Classic Metal Signs plastic coated brochure…


They all help me to succeed with making perfectly round centers!


Let’s not forget the tiny blind hem stitch on my machine

that makes the applique look like it’s done by hand,

except I can do it on my machine in a snap instead of a lifetime!


I have to say making fabric choices

is probably the toughest part of this quilt!

I  always worry about how the fabrics will photograph.


You can purchase a copy of the magazine at

Primitive Quilts & Projects for just $9.99.

Summer 2020

There are a lot of cute quilts in there besides mine!

Want to win a copy???

Leave me a message

(at the top of this post)

telling me:

  1. your favorite of my little Dresden quilt patterns on my website
  2. & also if you’ve ever made a Dresden plate

Can’t wait to hear from you for a chance to win!

Just Keep Sewing…

Susan


A Quilt Along, My Life

1-A-Day, 3″ Blocks — Puss In The Corner

  Puss In The Corner Block

Today we’ll make this cutie.


Had lots more fun going through my scrap basket!

 ~~~~~~~~~~~~~~~~~~~~~~~~~~~~~~~~~~~~

Cut:

  • 1 blue sq. 2″
  • 2 blue sq’s. 1  3/4″
  • 2 cream sq’s. 1  3/4″
  • 4 cream rec’s. 1  1/4″ x 2″

I didn’t use Thangles this time, just made the hst’s from squares.

Use your favorite method.

I pressed these seams open.

Trim the hst’s to 1  1/4″.

Arrange the pieces.


Sew them together.

I pressed the last seams open & removed the stitched in the seam allowances.

Sound familiar???


Make some more!


Show us your blocks at my Sewing With Susan FB Group.

We want to see your progress too!

https://www.facebook.com/groups/SewingWithSusan/

Just Keep Sewing…

Susan