A Giveaway!, Dresden Quilt Workshop Quilt-Along

Are You Gathering Supplies For Dresden Quilt Workshop Quilt-Along Challenge?

It’s less than 3 weeks until the start of my

Dresden Quilt Workshop Quilt-Along

…..Challenge…..

Are you getting ready?

I have some friends that are anxious to start.

Are you?

If you already have your fabrics you could start now by spraying

& ironing all of them with Mary Ellen’s Best Press.

If you look in Dresden Quilt Workshop, pages 9 & 12,

you’ll see why I love it & how I use it.

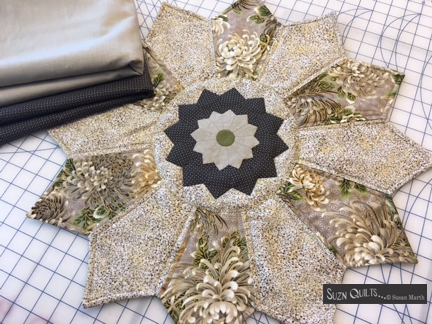
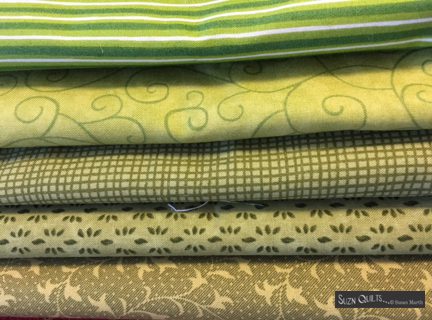
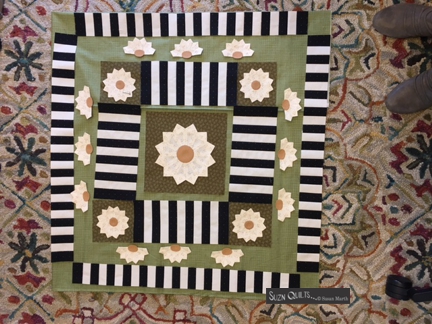
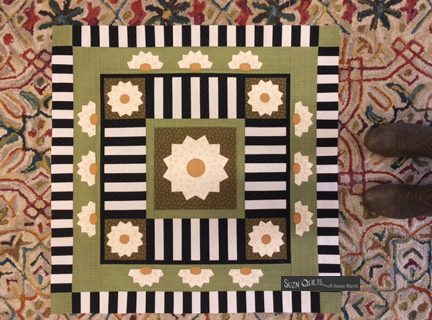
Next, if you’re using the same fabrics as I did, Jen Kingwell’s Circulus & Lollies Sweet,

(I still have a limited number of fabric kits available on my website)

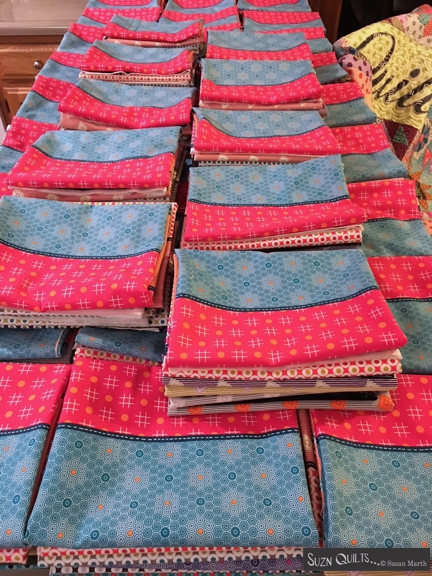
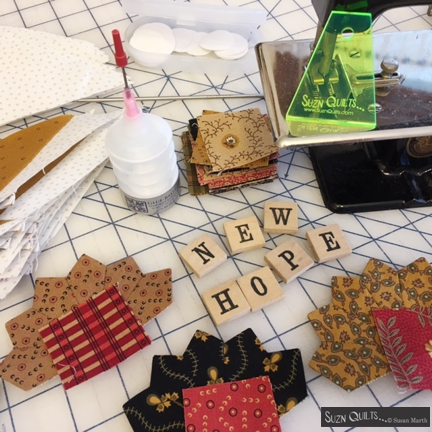
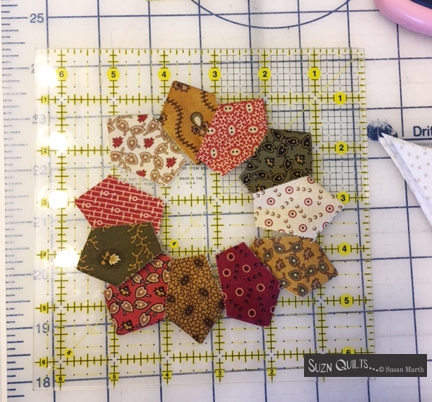
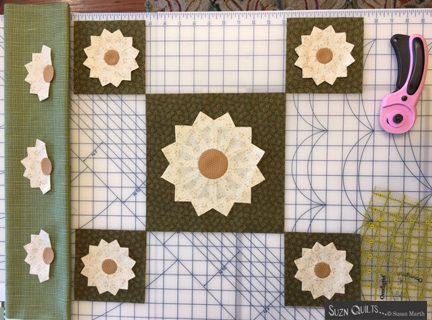
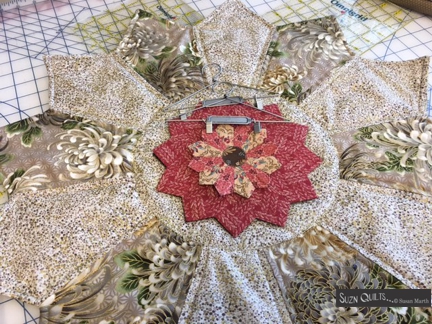
I suggest you cut a 3″ strip of each of the stripe fabrics.

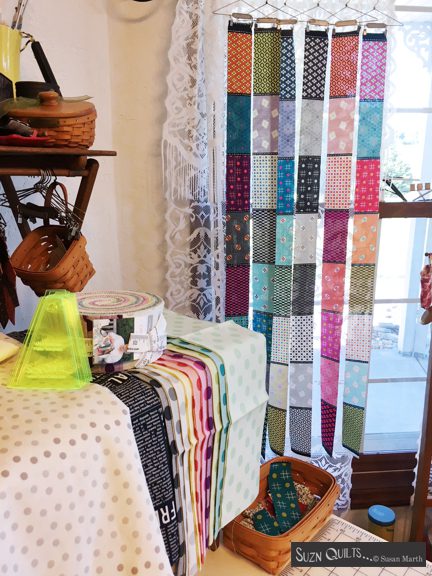
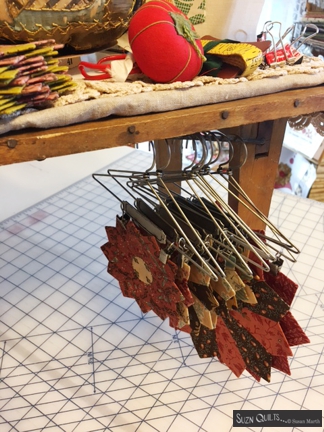
I did this when I started my quilt and then hung each of them by a tiny hanger so that I could see each of the stripe prints.

I didn’t want to keep using the same print over & over and neglect others.

There are 48 different stripes!

I just happen to have these tiny hangers on the notions page of my website.

I’m all about having fun while I quilt… and a little bit of organization goes a long way!

That should keep you busy for a while

& you’ll become more familiar with all of your fabrics too.

And, you’ll be able to use the 3″ strips in your final border,

so don’t think it’s a waste of fabric.

It’s a win-win!!! Trust me!

And now, would you like to participate in a give-away?

A fabric give-away?

A Moda Fabric give-away?

These are fat 1/8’s (9″ x  22″).

The very talented Lissa Alexander of Moda sent these for me to share with you!

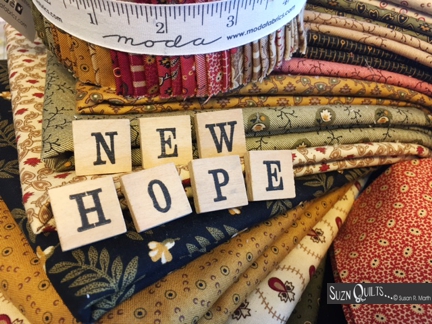
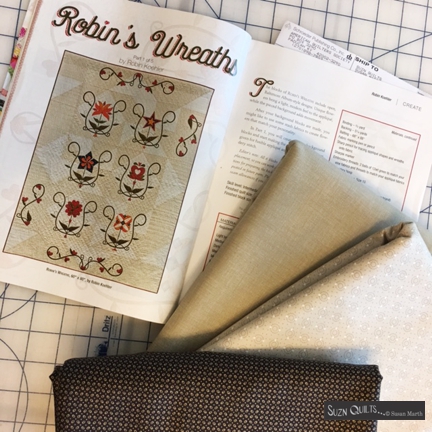
It’s Jen Kingwell’s newest line, Looking Forward, by Moda Fabrics.

Perhaps you’d like to add to this bundle & make a Dresden Quilt Workshop sampler with us?

To be eligible for a chance to win the fat 1/8 bundle,

go to the top of this page

& leave a comment answering one of the reasons or ways that I use Mary Ellen’s Best Press.

(Remember I mentioned above that the info is on pages 9 & 12 in Dresden Quilt Workshop.)

If you don’t have a copy of the book, go get one!

They’re on my website if you local shop doesn’t have them.

I will give you time to comment

at the top of this page!

The drawing will be next week, Wednesday morning.

Go gather!

Just Keep Sewing…

Susan


A Quilt Along, Dresden Plate Quilt, new fabric collection, New quilt pattern, Tiny Dresden quilts

Coming Soon… Dresden Quilt Workshop Sampler…Quilt-Along!

For months I’ve been harboring these.

Patiently they’ve been waiting since early December of last year.

Life even gets in the way of bolts & bolts of beautiful fabric sometimes.

But now they’ve been opened

& united with their intended.

Hanging out in good company.

They’ve been cut, readying to find new homes

in hope to also one day be sewn into pretty little Dresden plate quilts.

Meet Dresden Quilt Workshop Sampler:

My very first Quilt-Along!

I designed this quilt using a bit of

each of the 13 quilts featured in my new book,

Dresden Quilt Workshop.

Do you have yours yet?

If not, it’s time to head to your favorite quilt shop & get your copy today

(or tomorrow).

Stay posted for all the details right here.

If your local shop isn’t selling the books you can find them

along with my Tiny & Mini Dresden Templates

& now the exclusive Dresden Quilt Workshop Sampler fabric kits too

all right here on my website!

Get ready to

Just Keep Sewing…

Susan


Dresden Plates, New quilt pattern, Tiny Dresden quilts

New Patterns Spring 2018, #14

New Pattern #14

is Dresden LOVE.

I L-O-V-E this quilt!

I’ve been enjoying this quilt hanging in my atelier for quite some time…

3 years according to my camera roll

& now I’m sharing it in pattern form so that you can make & enjoy your own!

I had absolutely no indecision on this one.

I saw it in my head,

knew just the right fabrics for it

& got to sewing.

This is my original Tiny Dresden “O” quilt.

The black fabric is from my very own “Vintage Play” fabric line

that I designed with Red Rooster Fabrics a few years ago.

I added the alternating red little half-square triangles & that was it.

Now you can make & enjoy your own!

Meet Dresden LOVE.

I hope you’ve enjoyed seeing a bit of the process that I use to create my pattern quilts.

All 14 new patterns, the little Dresden templates,

& the notions that I use & love are available on my website.

Just Keep Sewing…

Susan


Dresden Plate Quilt, New quilt pattern, Tiny Dresden quilts

New Patterns Spring 2018, #13

New Pattern #13

is God Bless This HOME.

I started with some green fabric, some perle cotton thread & a Tiny Dresden plate.

With so many options though

come so many opportunities to second guess myself!

& third guess…

When photographing a finished quilt for a pattern cover it makes all the difference in the world sometimes.

As I started stitching I knew the thread color wasn’t right.

What looks good in person, doesn’t always show well in a photograph,

that’s why I’m constantly taking pics to discern my progress.

But maybe the addition of the fused letters would help?

I finished the embroidery even though I was pretty sure this wasn’t “it”.

Maybe changing the Tiny Dresden plate fabric would help.

Or not.

The letters needed to be darker, so I started with my pigma pen.

It helped the letters, but not enough to suit me.

Perhaps another Tiny Dresden plate color would help?

Nope!

I started over using black perle cotton thread.

Much better!

At this point I wasn’t sure if the orphaned Tiny Dresden plate was “it”

or if I just thought it was so I wouldn’t have to make another…

It was “it”.

This one is just too dark.

I don’t remember why, but I made a new plate.

I think I toyed with the idea of making the center dark instead of cream.

And then there were half-square triangles.

Just right!

Meet God Bless This HOME.

Such a long story for not so big a quilt

which by the way is available on my website.

Just 1 more new quilt pattern to show you.

Just Keep Sewing…

Susan


Dresden Plate Quilt, New quilt pattern, Tiny Dresden quilts

New Patterns Spring 2018, #8

New Pattern #8

is Dresden Sundaes.

It’s my favorite new pattern.

It uses my Tiny Dresden Template.

You’ve seen bits of it here & there on my blog.

It uses Jo Morton’s New Hope Collection by Moda.

It started with my challenge to cut & sew as many Tiny Dresden petals as possible from a jelly roll.

That was fun, but not necessary for the pattern!

After I made all of the petals, I sewed them into half plates

I worked on a lot of this quilt while on a quilt retreat.

Aren’t these scrumdiddlyumptious?

Who knew that was a real word??? Look it up!

Next, I went to work to design the bottom of the blocks.

First I needed to decide on a background fabric.

Ultimately the decision was made to go outside the collection to use a lighter fabric so the baskets would show up much better.

Choosing a center for each half plate was fun.

I have even more fun photographing them.

Can you tell?

I called these baskets from the start of the design.

HOWEVER… my sewing “Friends” (they look in-the-know, huh?)

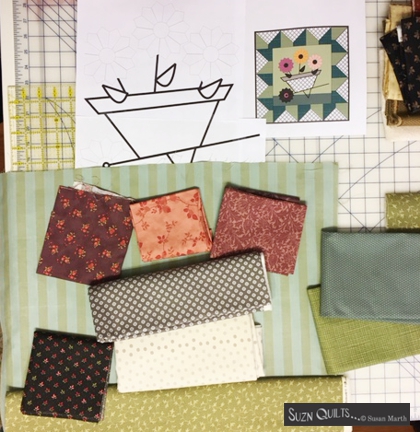
told me they weren’t baskets, but instead sundae cups.

I got a lot done that weekend.

And so my sundaes grew…

Soon all of the “sundae” blocks were complete.

At this point I thought it needed one more element.

Since there were a few leftover petals…

I put a little bazinga in the corner.

I sewed the rows together.

If you’ve never pieced a quilt “on point”,

it’s just as easy to sew blocks together on point as in horizontal rows.

You just sew the triangles on like they’re another block.

And I always over-size the triangles a bit

so that you can trim them down after they’re sew onto the quilt.

When I finished the top I took if for show & tell at my guild.

Everyone there also saw sundaes so I named it Dresden Sundaes.

Meet Dresden Sundaes.

I’ll have you know that this was my best-selling pattern at spring market.

I’ll also have you know that almost every quilt shop owner that bought the pattern called it my “basket” quilt! Peer pressure…

There are instructions for scalloping the edge of the quilt

& also how to make and sew the bias binding.

Don’t let that scare you.

You can make the edges straight if you prefer.

I also designed this smaller, 8 block version for my pattern tester, Chris.

Perhaps it’s more appealing to you?

All the same pieces to cut & sew, just a lot fewer of them!

 Dresden Sundaes is available on my website.

Just Keep Sewing…

Susan


Mini Dresden Patterns, New quilt pattern, Tiny Dresden quilts

New Patterns Spring 2018, #5

New pattern #5 is

“Dresden Daisies”.

This is the only new pattern that uses both my Tiny Dresden and Mini Dresden templates.

I designed this quilt a while back.

I guess was waiting for just the right fabrics to put it together with.

The darker green fabric is from Jo Morton’s “New Hope” collection by Moda.

I’ve used plenty of half Dresden plates in my quilts, but for this one, since it’s going to be appliqued on top of the border and not sewn into it, I had to first press and glue the seam allowances under before adding the center.

To do this, I drew intersecting straight lines on my ironing board cover with an ultra fine Sharpie marker.

This allowed me to place the seam allowance on the vertical line, then press the seam allowances up to the horizontal line.

I’ve done this before with another quilt I was working on that had a lot of 6 1/2″ blocks. It’s a good way to quickly check accuracy before moving on.
Ironing board covers are not permanent.

For instance the one pictured is long gone!

Next I made the centers.

I only appliqued the full plates’ centers.

Since the edge of the half plates’ centers overhang the petals,

they would need to be appliqued down after they were on the border.

Before long, my daisy garden was complete!

Aren’t they sweet???

This is why I quilt.

I love the process!

Next step was to double check my green fabrics.

Then see if my piano key borders were working…

I noticed shadowing of the darker green fabric coming though my daisy petals, so I had to fix that by making a lining for each one.

That was easily done with my Olfa circle cutter and some plain white fabric.

(Instructions in the pattern)

Shadowing all gone!

Now to assemble the quilt.

Positioning, gluing & stitching the half Dresden plate daisies.

Adding the last border.

Putting it on the “to be quilted” pile I noticed how it lined up with the edge of “With All My Heart” and wondered if it needed another border…

“No!” I’m going small & less complicated!!!

But I liked that idea…

Meet Dresden Daisies.

Just 31 1/2″ x 31 1/2″!

Uncomplicated & cute…

They’re now available on my website.

Just Keep Sewing…

Susan

New quilt pattern, Tiny Dresden quilts

New Patterns Spring 2018, #4

New pattern #4 is Loads of Lollies.

This quilt makes me smile every time I see it.

Perhaps it’s the brighter than usual fabrics.

I typically photograph the different stages of the design process to get a feel of how the fabrics will look for the cover photo.

Wheelbarrow too dark…

Black fabric too colorful…

It reminds me of the fairy godmothers in Sleeping Beauty fighting over the color of the gown. Blue! No, Pink! No, blue…

Liking this…

Ooh & I like those for a border…

Black rick rack was the obvious choice for the lines of the wheelbarrow.

Unfortunately this is too big.

I had to go find the baby black rick rack!

This is much better suited to the scale of the quilt.

It’s just so cheery, don’t you think?

Meet Loads of Lollies.

Just 4 cute Tiny Dresden plates.

Yup! It’s available on my website!

Just Keep Sewing…

Susan

Applique quilt projects, My Life

Robin’s Wreaths, An AQS 5 Part Quilt Series, Part 1

I’m so excited I received my copy of AQS’s American Quilter magazine this week!

My very good friend, Robin Koehler has a stunning 5 part quilt series included!!!

Of course I have to make my own.

Today I made fabric selections 

then set to cutting & sewing.

Robin mentioned earlier in the week how the templates for the applique placement needs to be enlarged 200% because the size of the blocks is bigger than the magazine page and wouldn’t it be cool to make them the size of the printed page instead and then reduce the size of the whole quilt???

Robin mentioned it in her Facebook group today too… so….

That’s what I decided to do.

This afternoon I set to Best Pressing all of my fabrics and started cutting & sewing.

Soon I had all of the half-square triangle blocks made.

12 light/medium & 12 medium/light, Bazinga!

They’re all the same!

I just made 2 piles admiring beautiful fabrics & the precision of my blocks.

I know stupid quilter humor…

Then I made them into the pinwheel & square in square blocks.

Next, I made the tiny bias tubing.

I had a Clover 1/4″ bias tape maker,

but I literally had to wipe the dust off the package because I’d never used it!

It’s just as easy to use as the bigger sizes that I’ve made many times.

You just start with smaller size bias strips.

Don’t worry,

I’m only making mine this small to challenge myself &

to try something new,

the pattern actually uses the 1/2″ size bias tube maker.

Next, I copied the placement page & cut through it with my baby rotary cutter so I could draw through it with a pencil to mark the placement of the vines on each block.

I think it’s easier than using a light box to trace the design.

My Apliquick tool came in handy for turning & gluing the raw edge of the tube under before gluing it in place.

Before long I had all 6 blocks stitched!

Having precise instructions, nice fabrics & the right tools made this super easy & precise.

Perhaps you should make one too!

BTW, Robin has a FB group started for everyone interested in making the quilt along with her.

Just Keep Sewing…

Susan


My Life, Suzn Quilts

It’s Flag Day, So Make A Flag Quilt

It’s June 14th, Flag Day.

If you start now you could easily have a flag made by July 4th.

I just happen to have some suggestions for flag quilt patterns:

Or a quilt that is reminiscent of a flag…

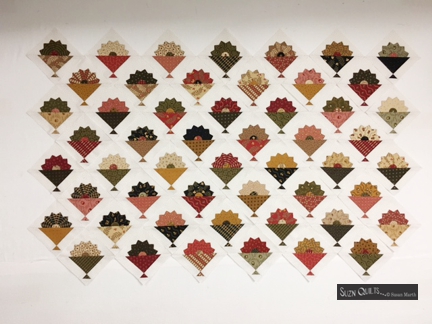
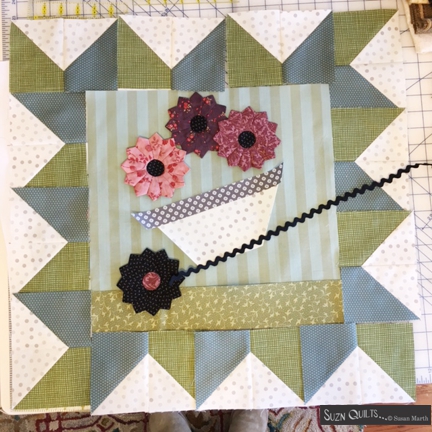
Perhaps you prefer a quilt that has ready-made flags on it?

Patterns for a little bit of everything don’t you think?

These all just happen to be available on my website ;)

SuznQuilts.com

Look on the

“Quilts”,  “Seasonal Series”, “Tiny Dresden” & “Quilt-as-you-go” pages.

Oh, just check out the entire website.

You might find something else you need too!

Happy Flag Day, &

Just Keep Sewing…flags!

Susan


Dresden Plates, My Life

Bedazzling Another Pretty Quilt…

As I mentioned before… I see Dresden plates… where there are none!

Unfortunately you’ll have to take my word for it because I totally forgot to take a before pic.

This will have to do, sorry.

I picked up the lovely completed (or so Jody thought) quilt last week along with the gorgeous coordinating fabric. I had to buy the fabric to complete this project. Big ideas come with big pieces of fabric. You NEVER know just how much fabric a project may take, so you better get plenty so you don’t run out, REALLY!

I’ve been preoccupied with lots of things since purchasing this last Friday, one those things was having friends over for lunch today.

Well, you know how friends can sometimes be, well, opinionated? (What I have to say about opinions, “They’re like elbows, everyone has at least two!”) so the opinion today as they looked at my sewing table was that I shouldn’t put a Mini Dresden plate in the center of this seemingly complete quilt, but instead a Mini Dresden AND a Tiny Dresden!

They even demonstrated their idea.

I just happen to keep some orphan plates hanging in my sewing room.

They may be know-it-alls, but I agreed!

So after our lunch and a trek back to the same shop (criminals frequently return to the scene of the crime…) what can I say… I forgot these Friday!

And one might say, “Is that blue?” yes, temporary insanity? I don’t know why I bought a blue fabric. I never buy blue unless it’s for a patriotic quilt. But it caught my eye and it was on the $5 sale table. Actually it was all on sale.

Unfortunately, Mini Mall in Staunton is going out of business. Jody is retiring  :(

Anyway, I set to cutting.

I first made the Mini Dresden plate.

Then I cut and sewed the Tiny Dresden petals.

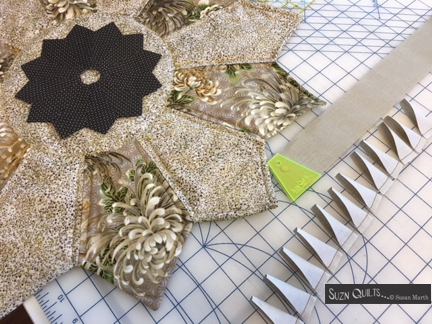
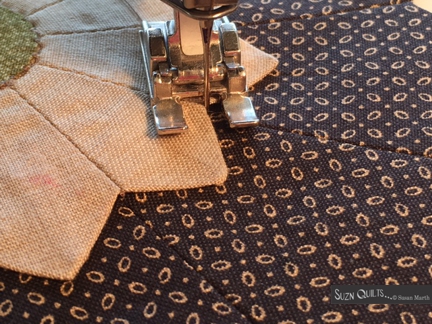
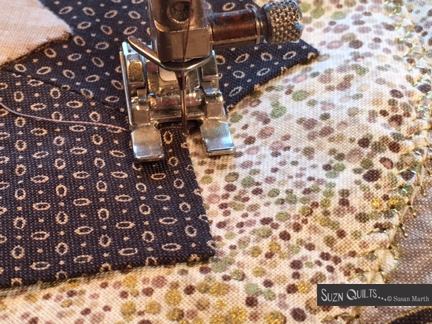
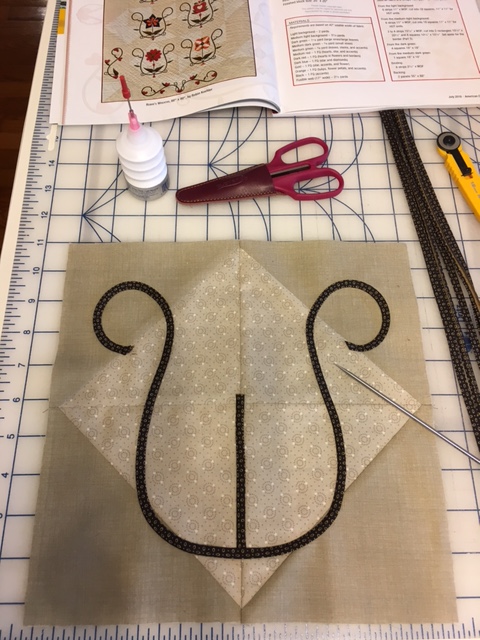
 It sure saves a lot of time to trim the seam allowance with a rotary cutter!

Before long I had the Tiny Dresden plate finished.

Then I made the center with a pretty green fabric.

I glued then stitched the center to the Tiny Dresden plate.

I got it wet to release the glue on the template so I could remove it.

Next I pressed it nice & flat again with Mary Ellen’s Best Press and glued it to the center of the Mini Dresden plate and stitched it down.

Then I glued that to the completed quilt & started to stitch it down.

This is where I remembered that I hadn’t taken a pic of the original quilt!

I sure miss my memory!

And isn’t it pretty?

Now you see what I kind of saw when I first laid eyes on the pretty quilt for sale.

Careful, you may just catch whatever I have!

Just Keep Sewing… Dresden plates!

Susan