A Quilt Along, Applique quilt projects, Dresden Plate Quilt, Halloween quilts, Mini Dresden Patterns, New quilt pattern

Candy Corn Sampler Quilt-Along Step 1, Candy Corn Blocks

Hello from Emma, my little pumpkin spice baby, & me!

Welcome long-time followers & all of my new followers

to Step 1 of making your Candy Corn Sampler!

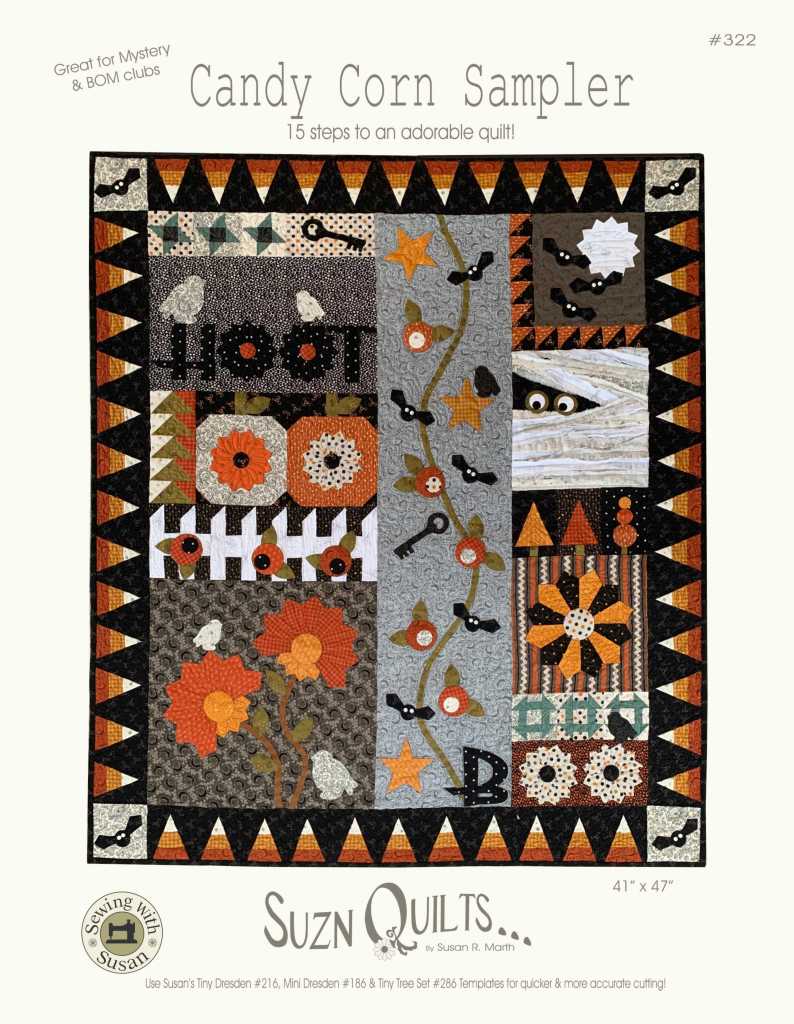
I’m glad you’re taking this sewing journey with us to make my newest favorite quilt.

Hopefully you’ve made at least a few fabric decisions…

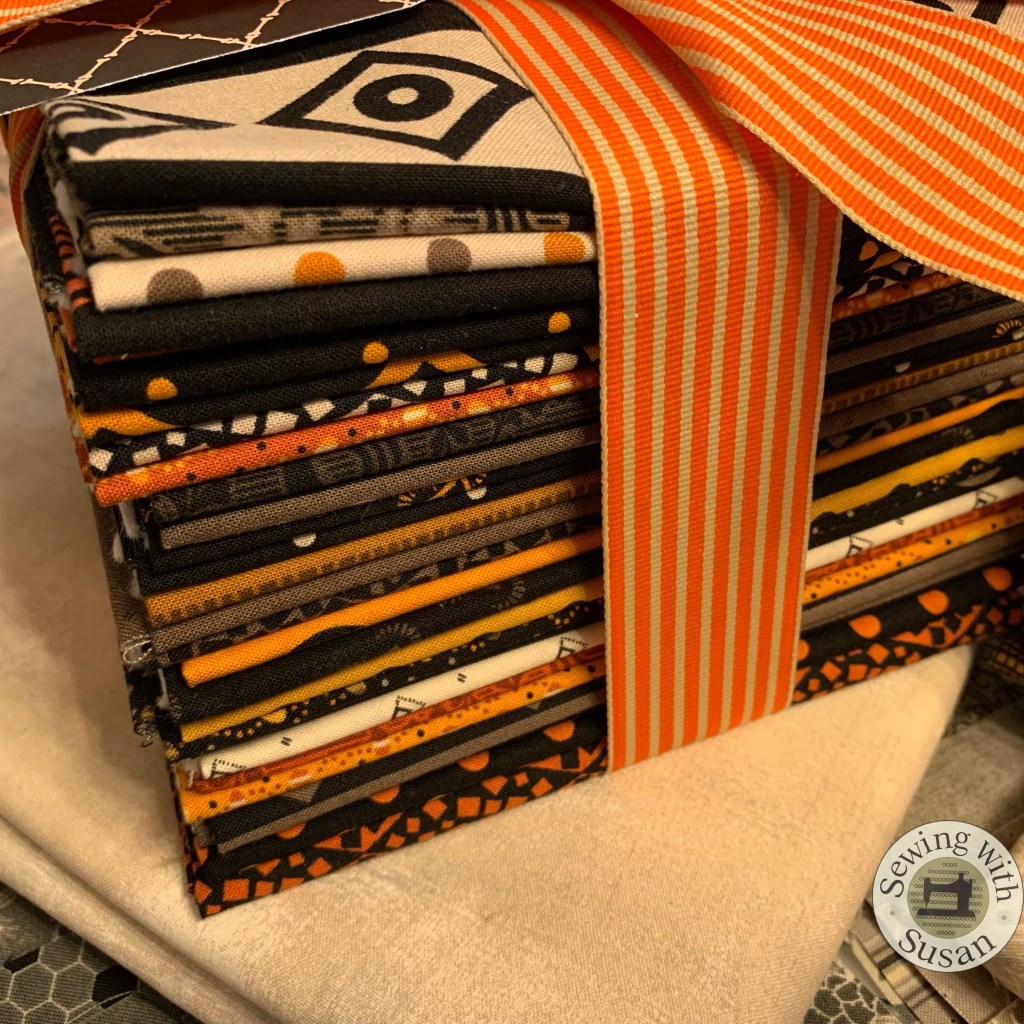
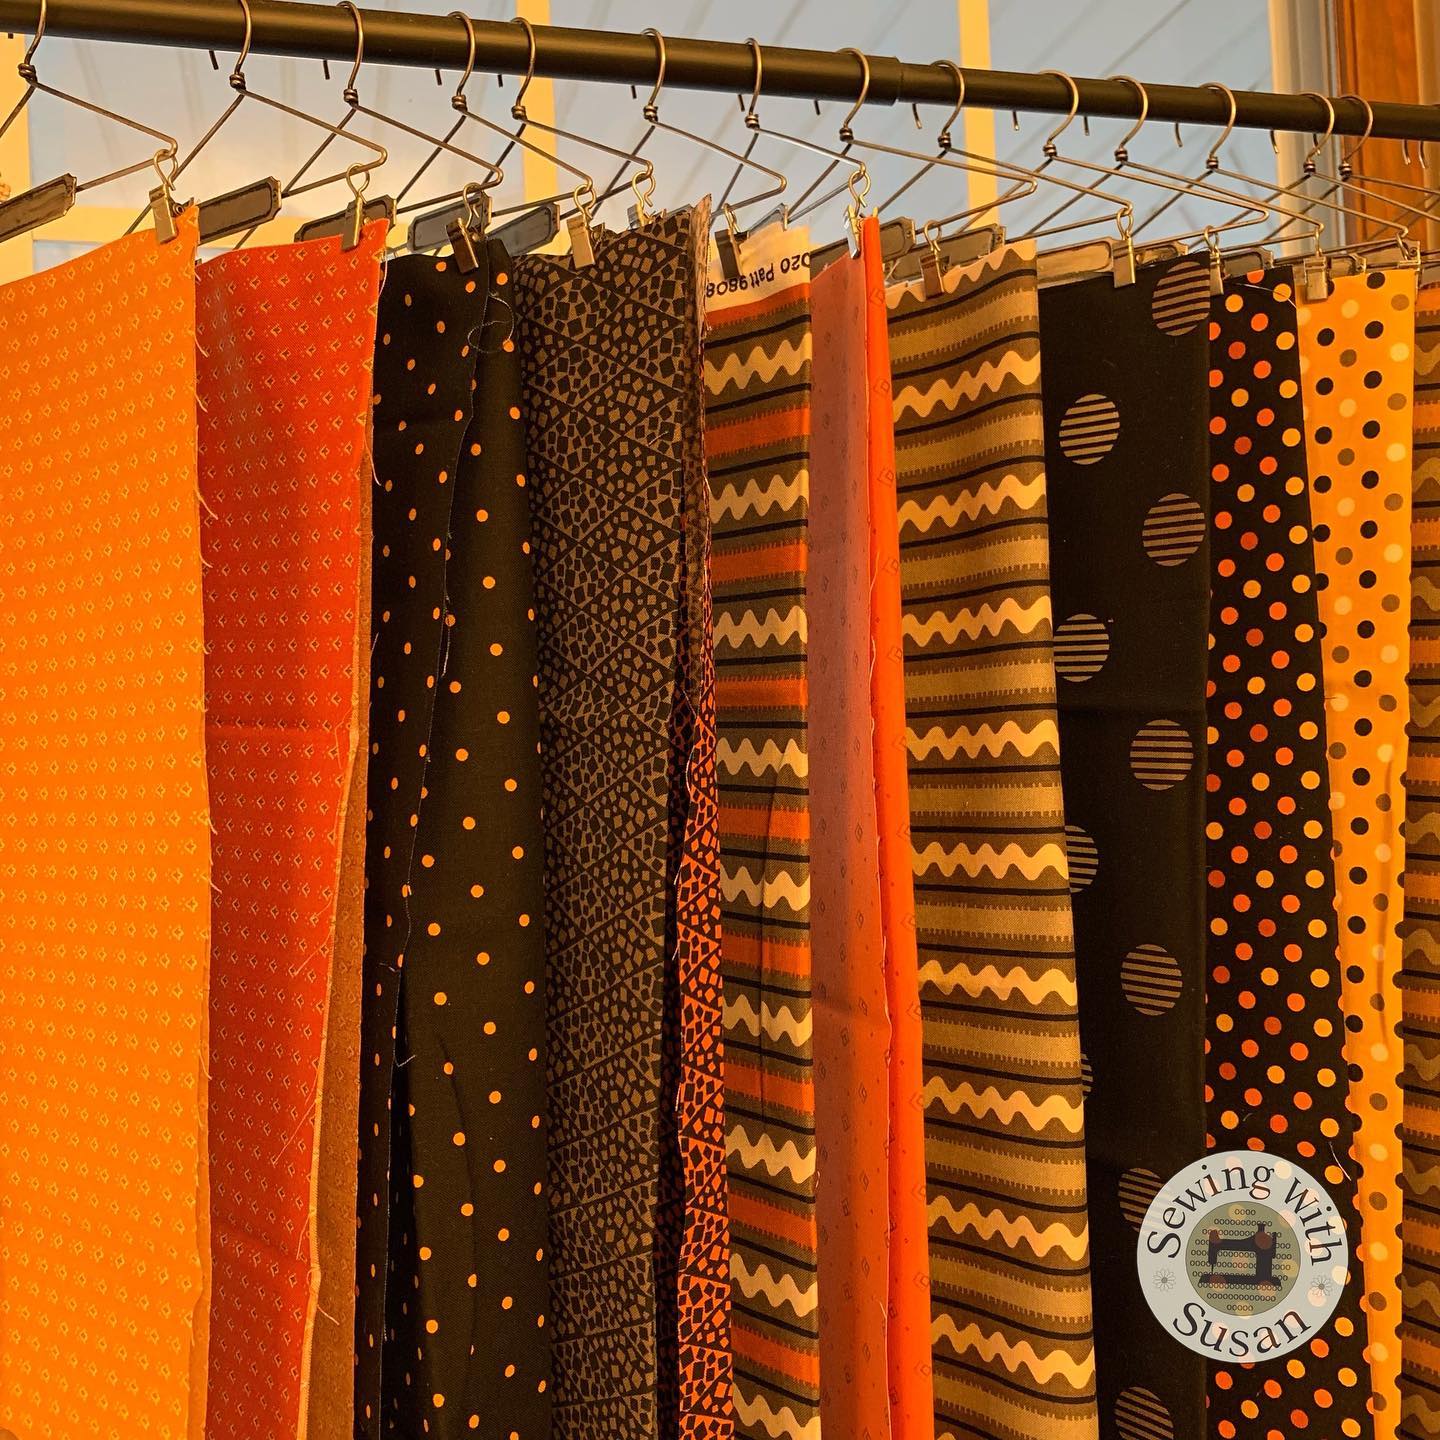
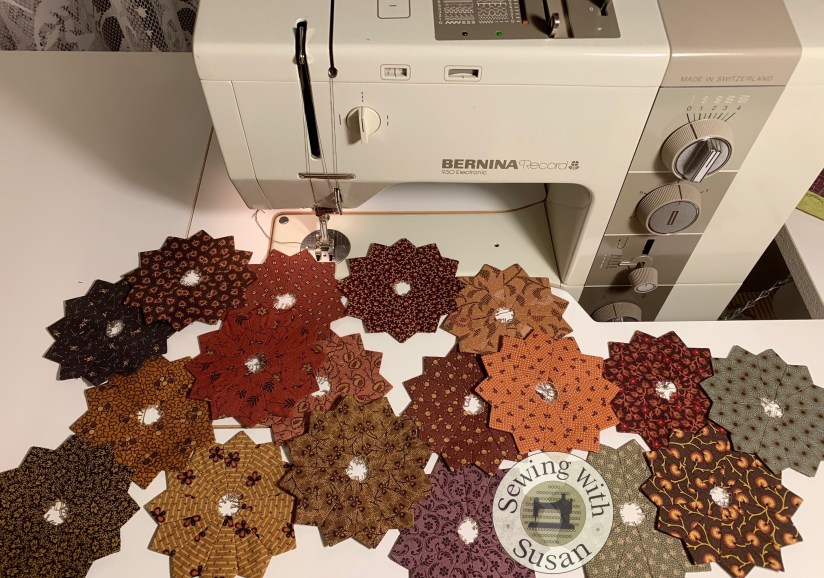
This Hootenanny fat 1/4 pack was a large part of my inspiration for this Candy Corn Sampler Quilt. It looks nice with this Grunge piece, don’t you think? I didn’t end up using it but Grunge goes with almost everything!

If you’re still undecided on your fabrics you can order your Candy Corn Sampler kit today from Need’l Love by clicking here.

Let’s start with Step 1!

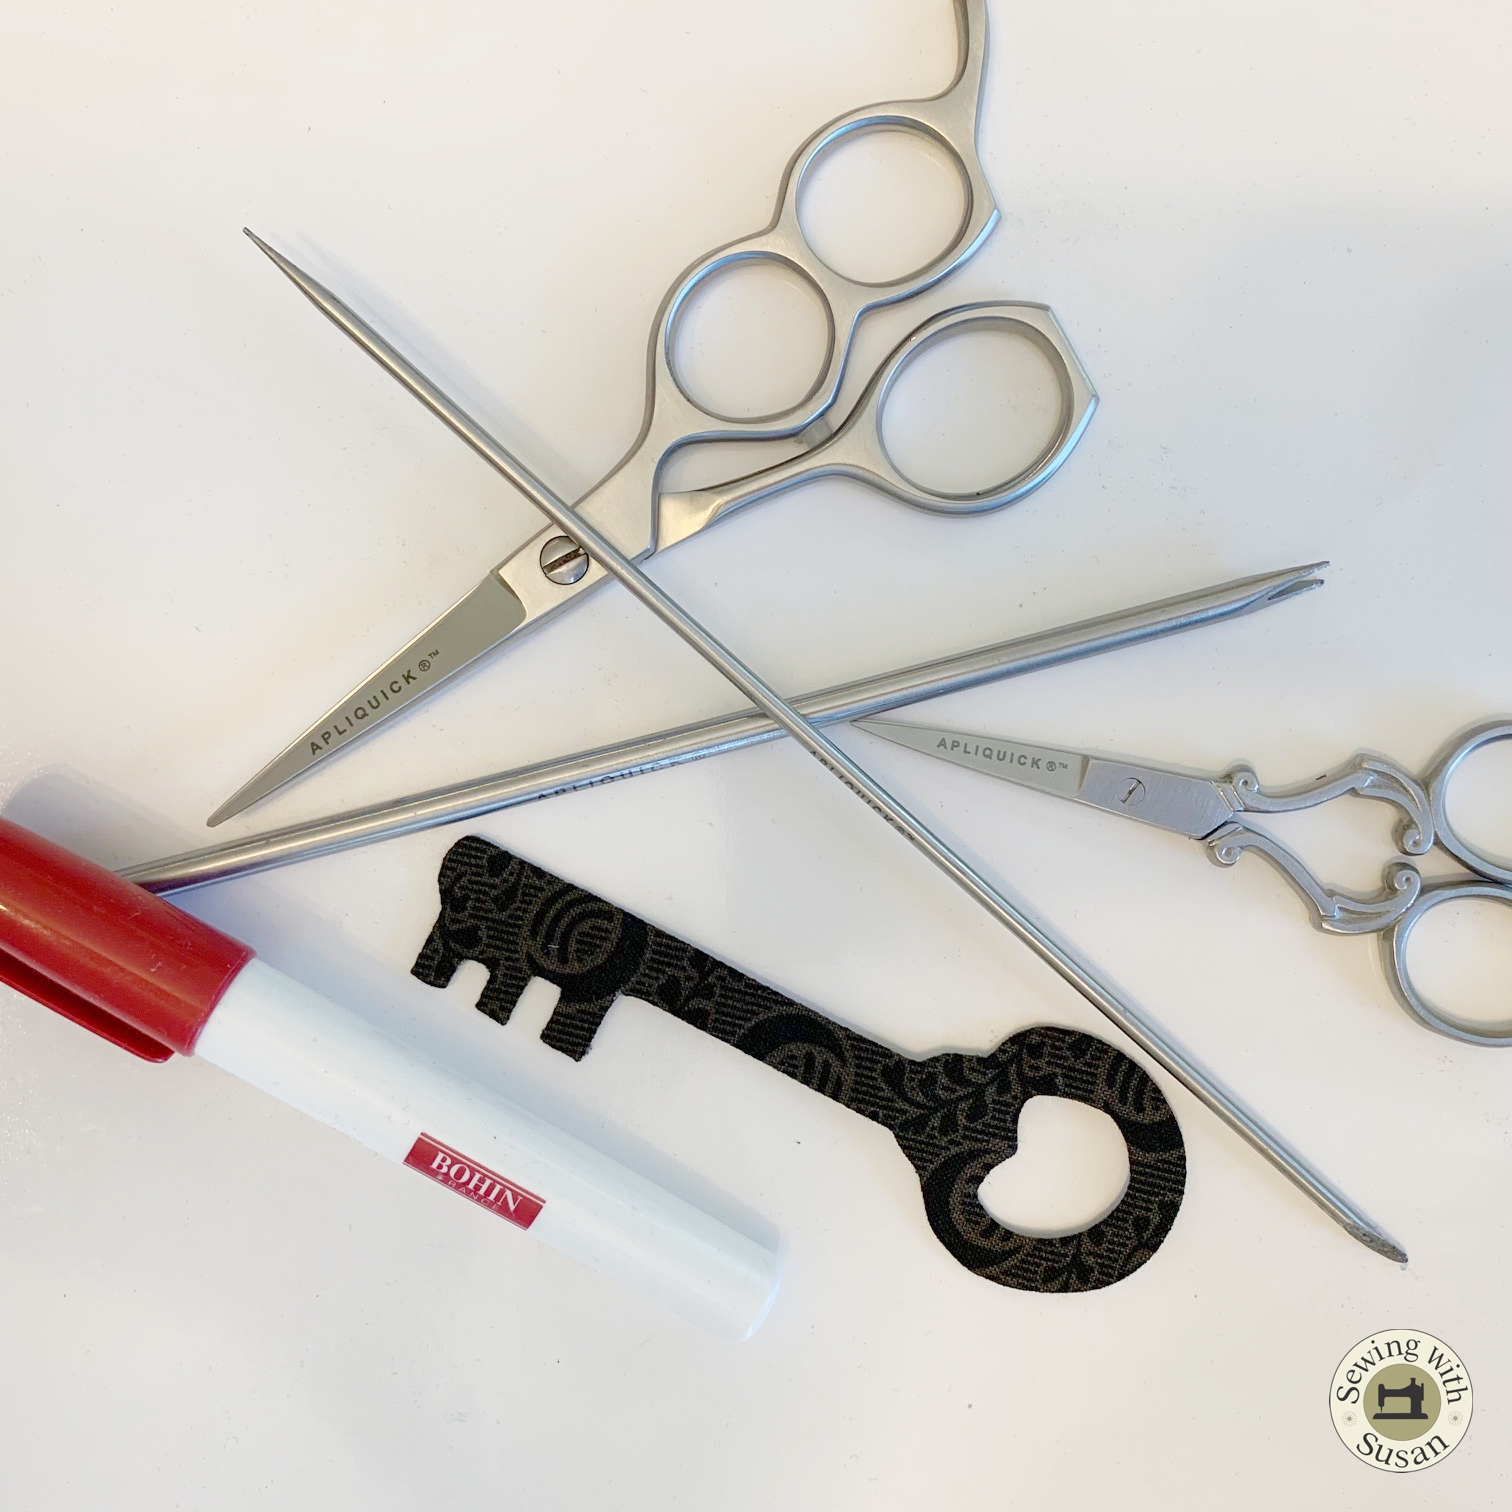
My first step with any quilting these days is to spray & iron all of my fabrics with Mary Ellen’s Best Press. It doesn’t make the fabric stiff like starch does. It gives it more body & helps it press flatter which is really helpful especially when working with little pieces of fabric. I’ve also noticed that if I need to reposition something & press it again the first creases will press out unlike the results of using regular starch.

I use the hand pump bottle when spraying yardage & the finger pump bottle when I’m spraying my finished plates or blocks. Its spray is really fine & won’t super saturate the small pieces & make them go wonky.

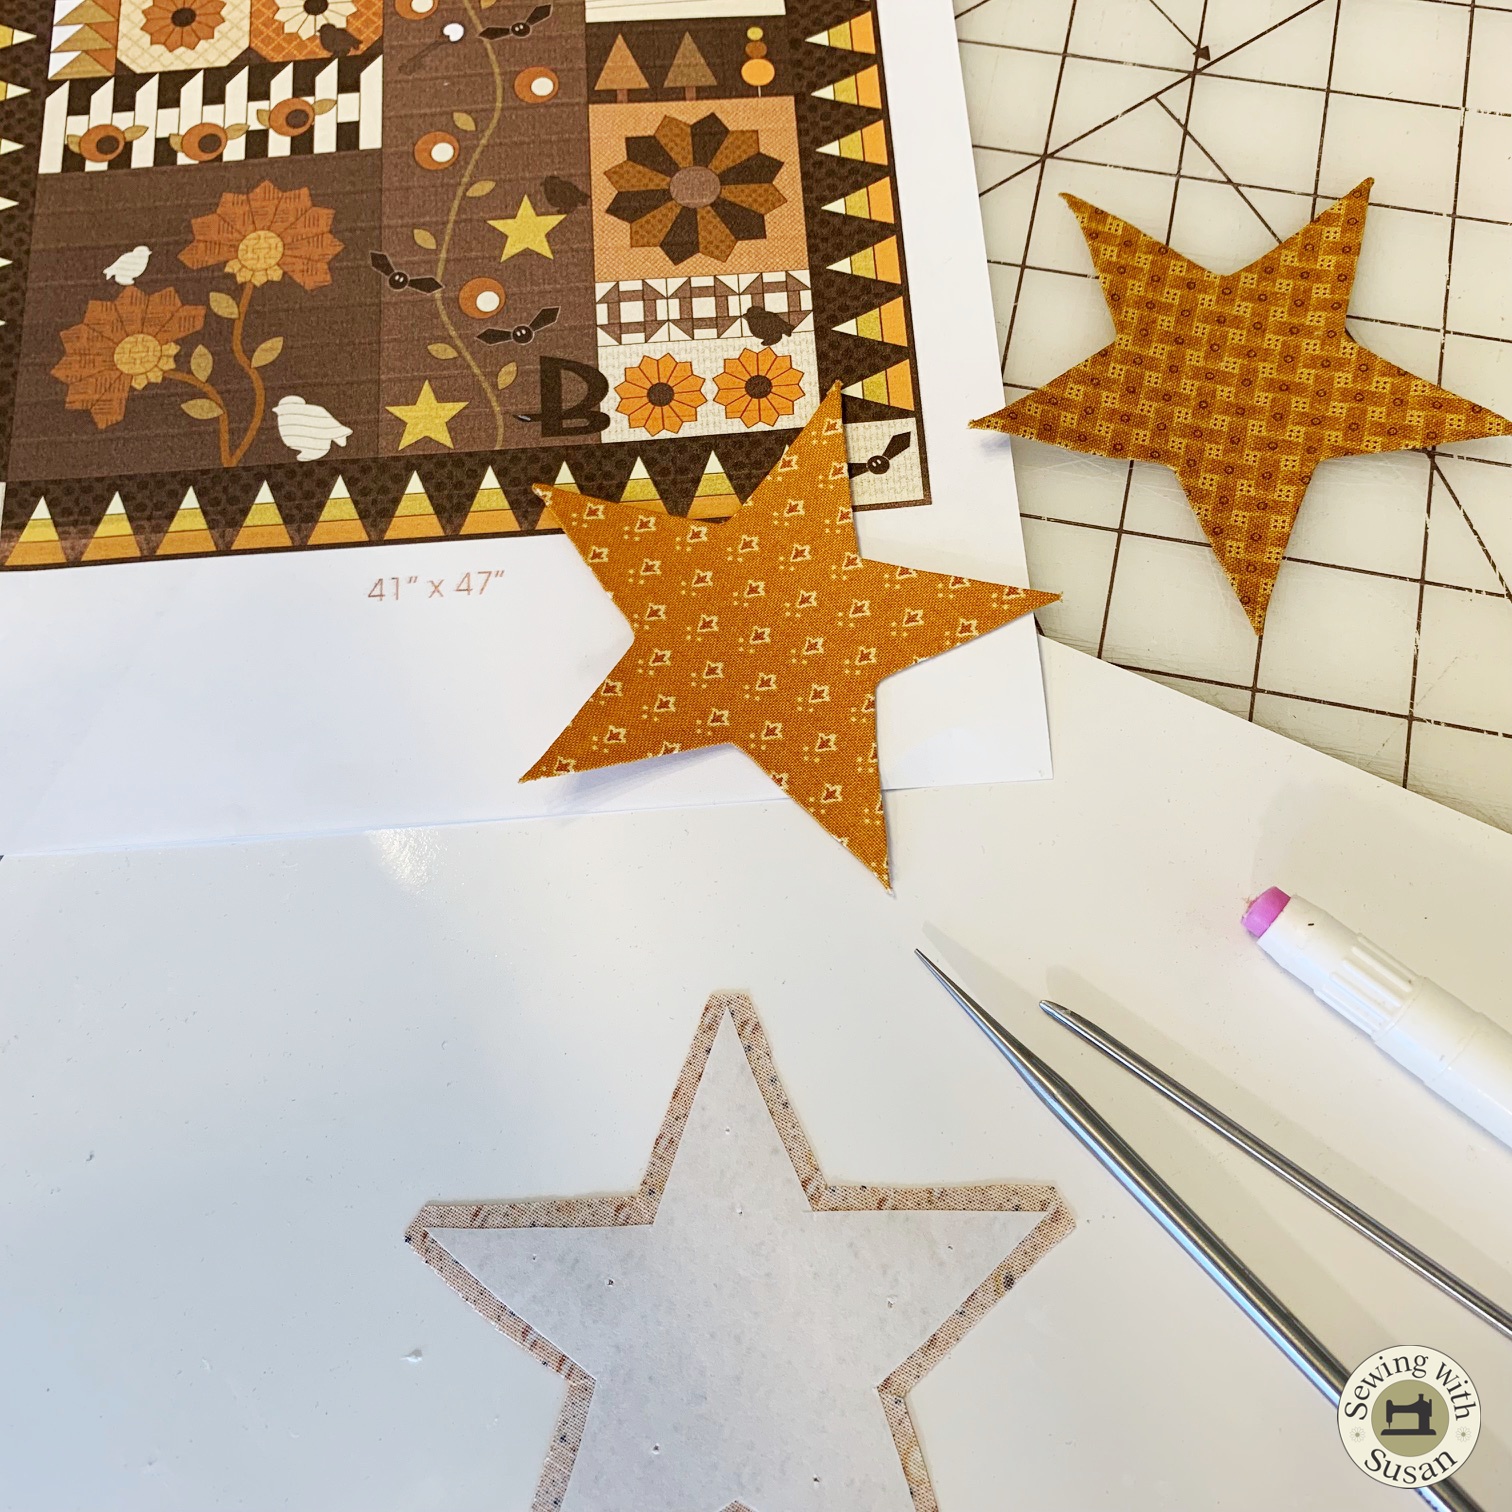
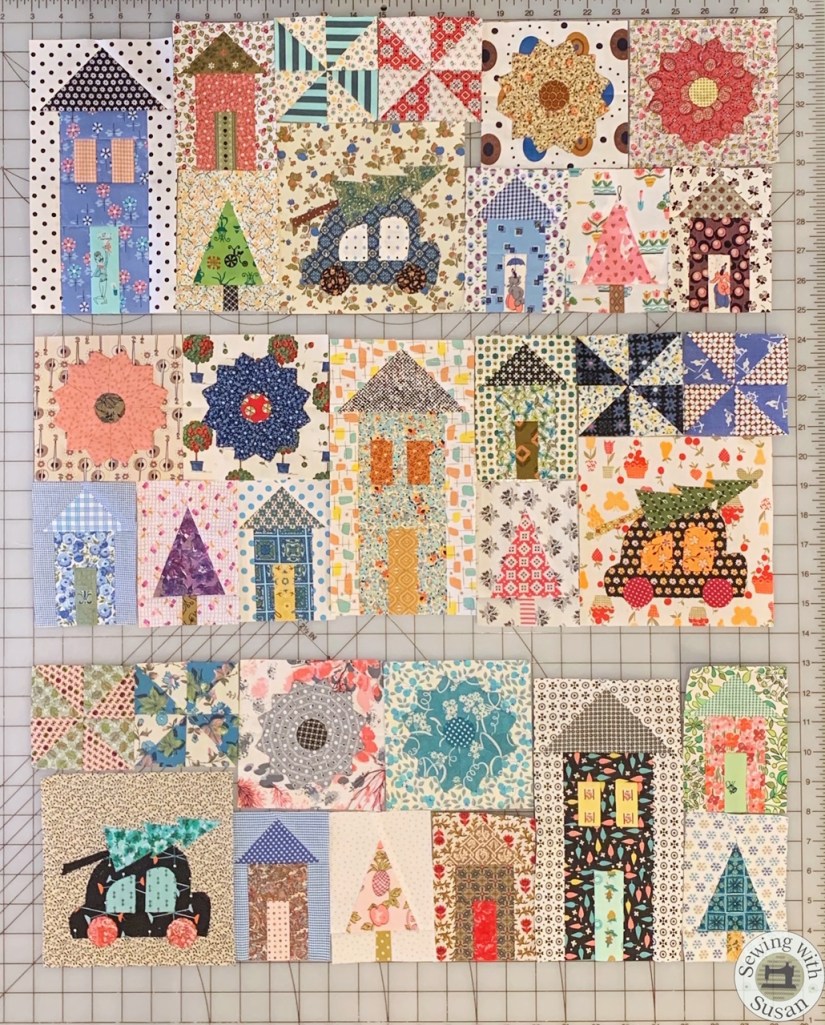
The next task is to start cutting & making candy corns!

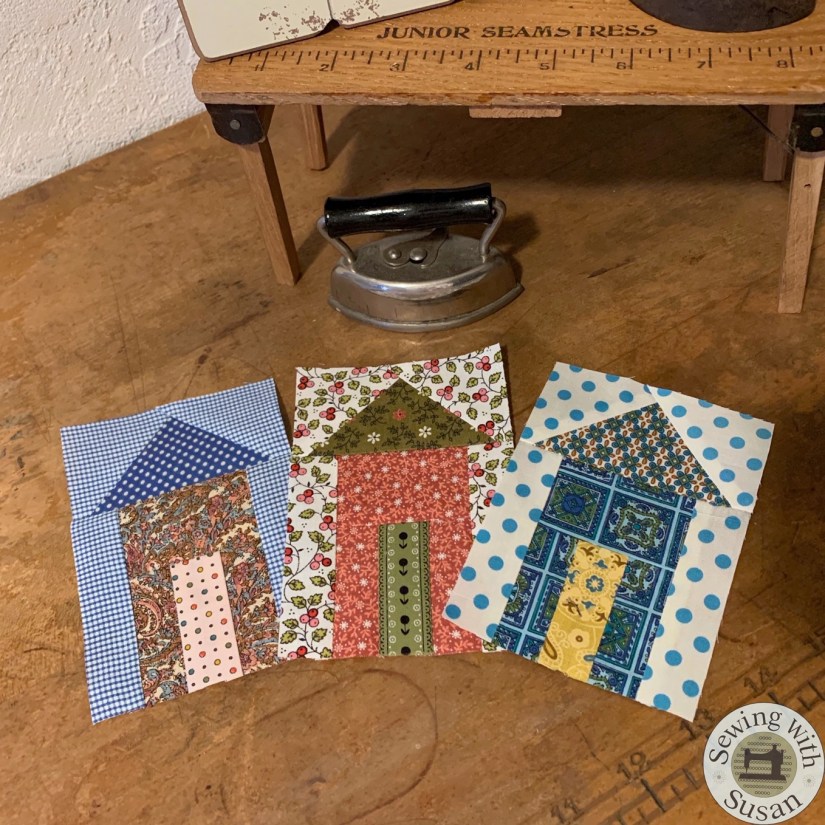
Refer to page 4, “Candy Corn Blocks” & “Cutting” to cut the strips then sew the strip sets together. Next, refer to the cutting diagram to cut the “trees”.

NOTE: Do not rotate the template to cut the candy corns or half of your candy corns will be upside down!

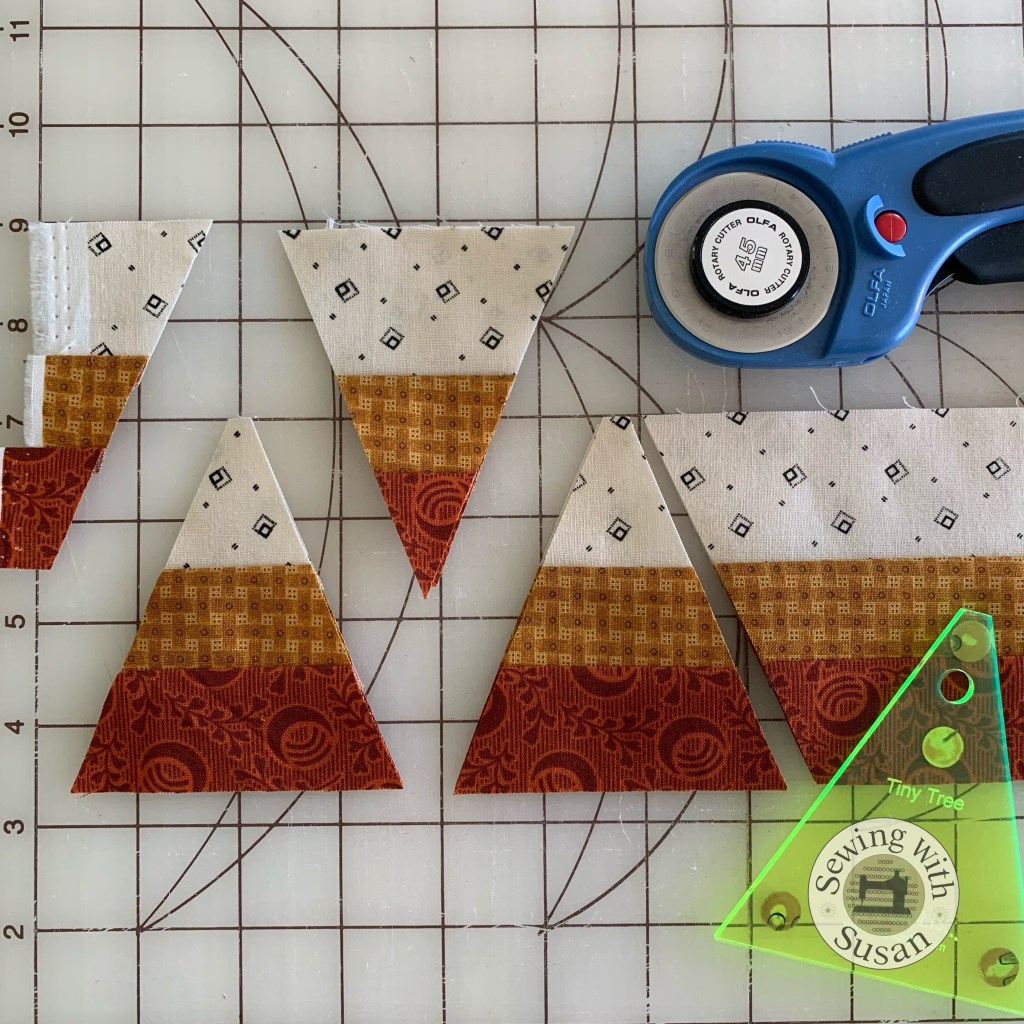
The in-between triangles will be discarded or if you’re like me, put away for another day…

Follow assembly instructions, page 4, to make the blocks. I sewed these blocks on my featherweight machine. That was fun!

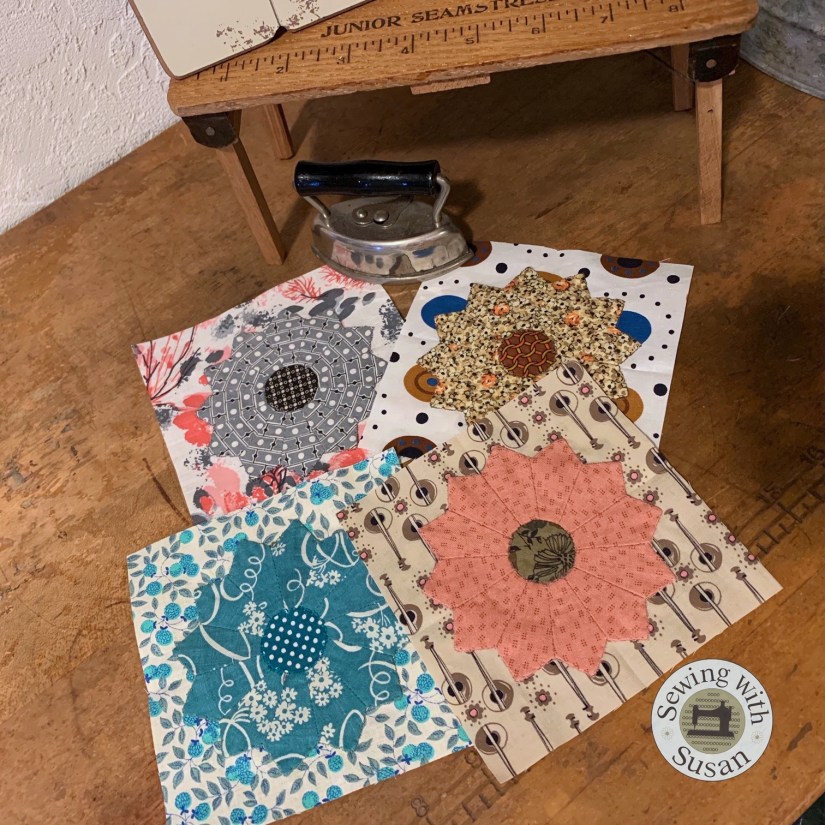
In case you noticed, “real” candy corn has orange in the middle, but I prefer my fabric candy corn to have the orange on the outside.

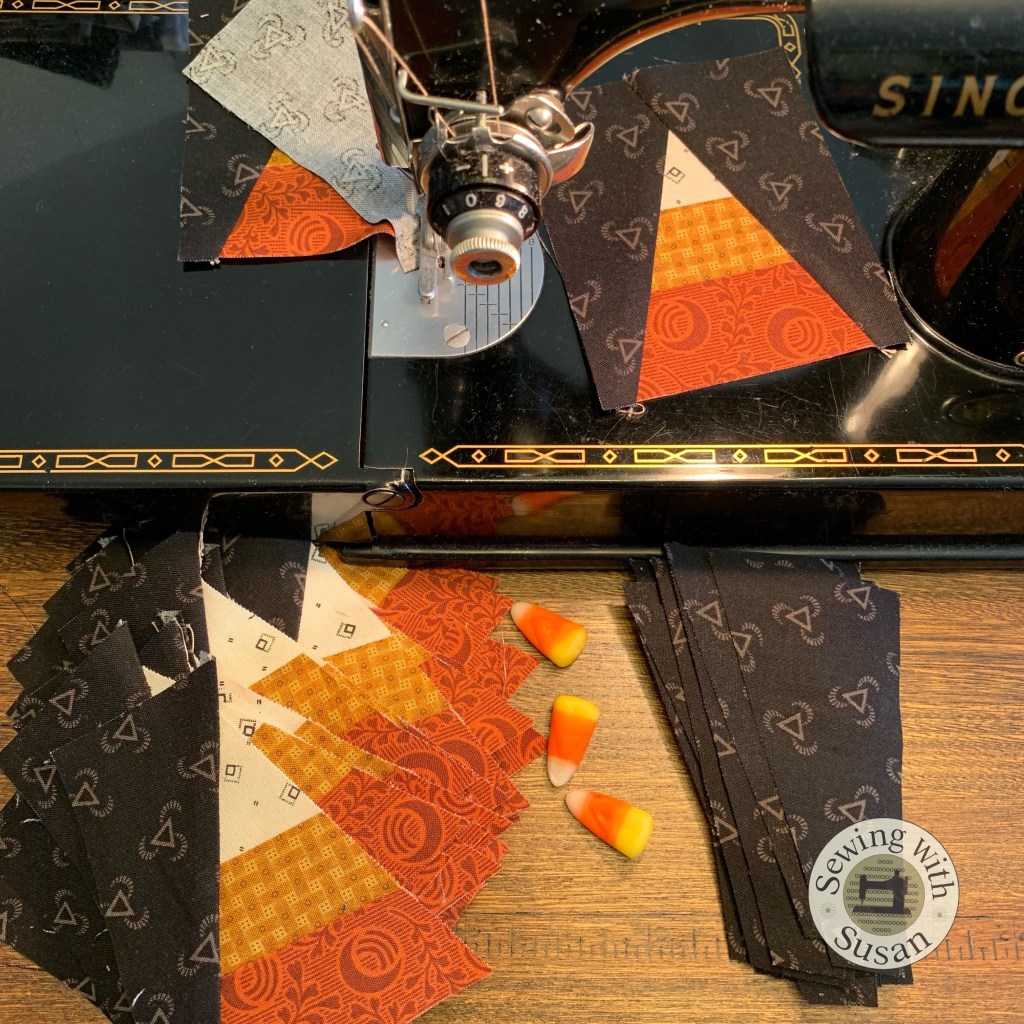
Sew the left background onto the candy corn then press.

Sew the right background onto the candy corn then press again. Don’t forget to do the little bit of trimming. These blocks should measure 3 1/2” x 4 1/4”.

Make 48. Don’t worry, they go quickly & you have 2 days to make them (just 1 per hour lol) before we move on to Step 2!

Emma says they’re a snap!

If you’re using super cute fabric who cares how long they take?

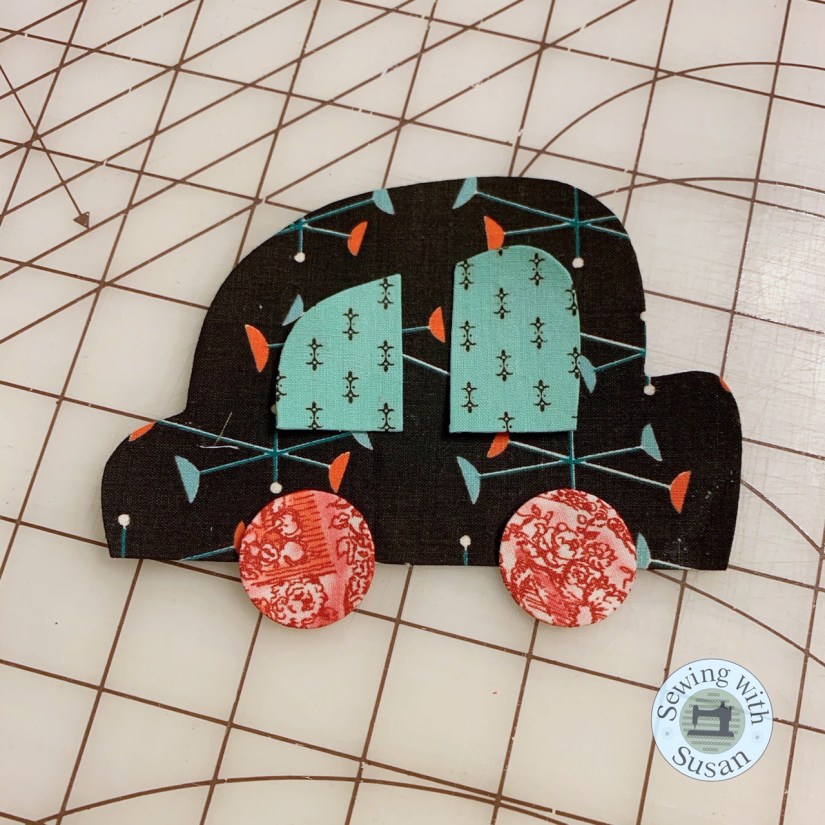
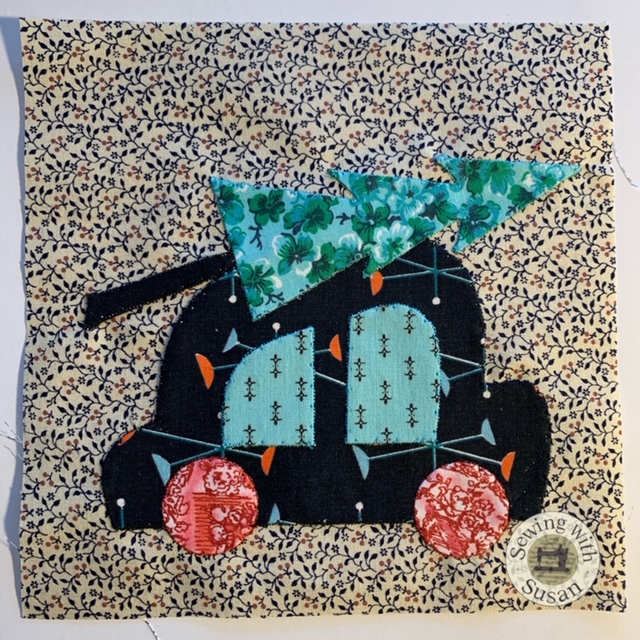
I played with one of the super cute Hootenanny rick rack stripes to make a few trees too. I’m not sure where they’ll end up.

I love the ease & accuracy of this block’s construction. ❤️ I hope you do too!

If you’re not already a member of my Sewing With Susan Facebook group, please join & share pics.

Find it by clicking here to join.

I can’t wait to see your candy corn blocks.

Just Keep Sewing…

Susan

My Life

1 More Day ‘Til The Candy Corn Sampler Quilt-Along…

Just 1 more day until we start the Candy Corn Sampler Quilt-Along.

Are your tools ready?

Sunflower Block

My best friends when making Tiny & Mini Dresden plates,

or in this case flowers, are my Apliquick tools.

Many tools are available for lovely applique,

but none that I’ve found fit my needs better than these.

They make perfect points on stars.

They make perfect circles for eyes too!

Making 6 circles makes me smile!


Mummy block

Can you say that about your current applique method???

I can!

If you need help with those, you’ve come to the right spot.

You can click here to watch me make a circle with the Apliquick Bars.

All of the tools that I use for making prefect little Dresden plates & mummies & candy corns.. are found on my notions page by clicking here.

Don’t forget, you can still purchase a kit from Needl’ Love by

clicking here.

They have backing kits available as well.

The pattern is ready for purchase in both PDF & paper form by clicking here.

Get ready to sew with us starting tomorrow, October 1st!

If you’re not already a member of my Sewing With Susan Facebook group, you should join so you can see & share pics of this & my previous quilt-alongs too. You can find it by clicking here to join.

Just Keep Sewing…

Susan

My Life

Let’s Get Ready For The Candy Corn Sampler Quilt-Along…

Just 2 more days until we start the Candy Corn Sampler Quilt-Along.

Are you ready?

There are a few things that I like to do before starting a quilt with many different fabrics and one is organizing the fabrics that I plan to use.

In case you don’t know this about me,

the more fabrics I can add to a quilt, the happier I am!

Candy Corn Sampler has 26 different fabrics!

All are designed by the talented Reneé Nanneman of Needl’ Love for Andover fabrics.

Many are Hootenanny prints, several are Acorn Harvest prints & 2 more background fabrics are also Needl’ Love prints.

You can purchase a kit with these same fabrics from Needl’ Love by

clicking here.

They have backing kits available as well.

Because I like to use lots of fabrics in my quilts, organization is key.

One way to be sure that I get a lot of variety across the quilt is to make the fabrics visible so I don’t forget to use some of them & use others too many times.

I’ve come up with an easy system that’s so cute in my sewing room.

Tiny hangers!

I hang them in my sewing room on my curtain rods.

Organization is fun!
Little fabric closet!
Tiny 4″ hanger

As you may have guessed, you can find these on my website by clicking here.

The pattern is ready for purchase in both PDF & paper form by clicking here.

Like all of my patterns, paper templates are included,

but my plastic templates make the cutting so much faster & more accurate!

Candy Corn Sampler takes advantage of 3 of my plastic templates:

Mini Dresden Plate#186
Tiny Dresden Plate #216
Tiny Tree Template Set #286.

Where are the trees in Candy corn Sampler you might ask?

Nope, there are no trees in this quilt, but you will want the Tiny Tree Template Set because there are lots of candy corns and that’s what I used to make them!

In case you don’t have experience with using plastic templates, they make your cutting so much more accurate & you can stack 8 layers of fabric to cut 8 pieces at once!

That’s why they’re great to have.

Order your pattern by clicking here.

Order 1, 2 or all 3 templates by clicking here.

Get ready to sew with us starting October 1st!

Every year you’ll have a cute quilt to hang for Halloween.
Sorry, cute baby not included! You will however probably see lots of pics of Emma along the way!

If you’re not already a member of my Sewing With Susan Facebook group, you should join so you can see & share pics of this & my previous quilt-alongs too. You can find it by clicking here to join.

Just Keep Sewing…

Susan

Valentine & heart quilts

L-O-V-E is all you need…

L-O-V-E is all you need…

and a Tiny Dresden plate doesn’t hurt!

There’s still time to make a little quilt with

a lot of love

for Valentine’s Day.

Over the weekend I made another Bitsy Hearts quilt.

This quilt fits the Ackfeld 12″ stand perfectly.

Bitsy Hearts can be found in both paper & PDF forms

on my website by clicking here.

Don’t you love it when you have the perfect way to display your little quilts?

The 12″ stands are available on my website by clicking here.


Dresden Love fits perfectly on the Ackfeld 12″ stand too.

It has a bit of fusible applique,

some half-square triangles

& just 1 Tiny Dresden plate too!

It & several other love patterns

can be found in both paper & PDF forms

on my website by clicking here.

Choose your favorites for you

& a loved one!

Share your progress with us in my FB group, Sewing With Susan:

https://www.facebook.com/groups/SewingWithSusan

Just Keep Sewing…

Susan

Mystery Quilt-Along

Another 12 Days of Christmas Mystery Quilt With Borders

It’s fun seeing the completed tops that everyone is posting in our FB group.

Thanks for sharing!

Today I was inclined to add borders to mine.

I liked the thin inner border some of you were adding

along with an outer border so I decided to do likewise.

Back to the scrap tote I went this morning.

Since these are scraps I was a bit limited on border options

because of the size of the scraps

but it was still a time consuming proposition.

I love being able to use my phone

to easily get perspective on the finished quilt.

I knew I wanted a multi-color print for the outer border for sure.

When I added a contrasting inner border

it made both the blocks & the outer border “pop.”

When I wasn’t totally sold on any of those options however,

I consulted my stash of vintage yardage.

I’ve been collecting pieces the past few years

when I find an awesome print at an estate sale or antique mall.

In the end I decided on 2 prints from the same tote

that I pulled all of the other prints from used in the top.

If you want to use my same dimensions,

inner border is cut 1 1/4″ & outer is cut 2 1/2″.

My design assistants, Gracie & Annie approve of my decisions.

(biased by the fact that now that it’s done gma’s taking us outside to play!)

Since it’s going to be nice later today

I’m going to take down the outside Christmas lights.

That will give them plenty of time to play.

Now that I’m finally feeling better

this weekend we’re going to celebrate Christmas with our kids

along with my birthday, our anniversary,

Clare’s graduation, David’s retirement…

Beyond excited!

I know I said it before,

but I love this quilt even more than I thought I would.

I hope I’ve enticed you a little more to finish (or start) yours.

When your top is complete please share it with us on my Facebook group here:

https://www.facebook.com/groups/SewingWithSusan

I hope you love your quilt as much as I love mine!

Just Keep Sewing…

Susan

Valentine & heart quilts

Valen-Time To Sew!

Over the weekend & also already this morning

I’ve been receiving orders for my valentine themed patterns.

It’s the perfect time to make a little quilt with love

just in time for Valentine’s Day.

How could anyone resist these sweet little hearts of Bitsy Pink Hearts?

More sweet little hearts, Bitsy Red Hearts

Both Bitsy Heart quilts fit perfectly on Ackfeld 12″ stands.

They’re available on my website by clicking here.

2 Hearts as One is a quick & easy

Quilt-as-you-go runner & place mat pattern

with a little bit of fusible web applique.

My personal favorite is Dresden LOVE!

Just one Tiny Dresden Plate!

Dresden Love fits perfectly on the Ackfeld 12″ stand too.

In season for Love is one of my 12-month series patterns.

Love & Dresden Kisses has a few Tiny Dresden plates,

some piecing & some fusible web applique too.

With all my Heart has a bit more piecing &

a bit of hand embroidery plus some cute Tiny Dresden plates too!

Tiny Dresden February is one part of my very popular

Tiny Dresden Seasonal Series patterns.

You can make a quilt for every month with my Tiny Dresden Seasonal Series

using my Tiny Dresden Template.

Buy just 1 Ackfeld 6″ stand & swap the quilts out each month.

They can be found by clicking here.

Many of my patterns are now available for PDF download.

Choose your favorites to make for you

& a loved one!

Just Keep Sewing…

Susan

Mystery Quilt-Along

Another 12 Days of Christmas Mystery Quilt-Along, Day 12, Epiphany


Welcome to Another 12 Days of Christmas,

Epiphany!

Thanks for spending time these past 12 days with me

& for sharing your love of quilting with the group.

It means so much to me &

I’ve enjoyed looking at everyone’s fabric choices.

Hopefully, like mine,

your scrap bag is a little less full

now that we’re ready to assemble these 33 lovely blocks.

I took a pic of my blocks in rows

to see if I needed to rearrange any for color placement.

I love this quilt even more than I thought I would!

The pics do not do it justice &

I’m typically not into scrappy quilts

but I couldn’t resist the challenge

having been trying to think of a way

to use these lovely vintage prints.

It reminds me of the “I Spy” books that my kids used to bring home from school.

Every block is unique & different.

What do you think?

I liked this arrangement so I sewed the blocks into rows.

After the decisions were made

it only took about 30 minutes to complete the top.

The final step is to sew the 3 rows together.

Click the link below to bring up the PDF of the assembly diagrams.

Another+12+Days+Assembly

When your top is complete please share it with us on my Facebook group here:

https://www.facebook.com/groups/SewingWithSusan

I hope you love your quilt as much as I love mine!

Now to contemplate quilting.

Just Keep Sewing…

Susan

Mystery Quilt-Along

Another 12 Days of Christmas Mystery Quilt-Along, Day 11


Welcome to Day 11!

For the last time we will delve into the scrap bag.

Today we will make the last 2 blocks which are Tiny Dresden plate blocks.

The instructions are the same as the last 2 times we made them,

but I’ve attached the Day 11 PDF if you need it.

Click the link below to bring up the PDF.

Another+12+Days+Day+11+Tiny+Dresden+Plate+Blocks

In case you’re not excited about your center circles,

I’ve included my circle making video again below for you to review.

If you have any questions about your Tiny Dresden results just let me know.

I’m sure I’ve seen every pitfall of making them not perfect

& can advise you about what’s wrong.

When you get your blocks made please share them with us on my Facebook group here: https://www.facebook.com/groups/SewingWithSusan

I’ll be back tomorrow with Day 12, assembly!

Just Keep Sewing…

Susan

Mystery Quilt-Along

Another 12 Days of Christmas Mystery Quilt-Along, Day 10

Welcome to Day 10!

Since I’ve been giving us so much work

& I don’t want us to start the year off creating another UFO,

today is ketchup day!

Whether you need to delve into the scrap bag,

or just run your sewing machine,

today is the day to hopefully get caught up.

If you’re not sure, let’s recap our lists together.

Need 3 car blocks… I need to make 2 more car blocks.

Need 9 Tiny House blocks… I need to make 6 more Tiny House blocks.

Need 4 Tiny Dresden Plates, check!

No photo description available.

Need 3 Big House blocks, check!

Image may contain: stripes

Need 6 pinwheel blocks, check!

Need 6 Tiny Tree blocks, check!

No need to click today unless you’re behind on your clicking too!

Share your progress with us on my Facebook group here:

https://www.facebook.com/groups/SewingWithSusan

I’ll be back tomorrow with Day 11 instructions.

Just 2 more blocks & then assembly!

Just Keep Sewing…

Susan

Mystery Quilt-Along

Another 12 Days of Christmas Mystery Quilt-Along, Day 9 Addendum- Freezer Paper Removal

Day 9 Addendum!

To finish the car blocks that we started on Day 5,

I used the tiny blind hem stitch.

This is what it looked like after I completed the stitching.

Since the freezer paper needs to be removed,

I carefully cut slits behind each of the areas with a template inside.

Notice there are 2 layers of freezer paper in some areas. This is the only reason this is a bit tricky.

Please use patience.

It’s not hard, but you need to be gentle so you don’t tear out stitches & ruin all of your nice work!

Since there are multiple layers I got the block generously wet.

Typically a little bit of water will do,

but I want the water to go through both layers of fabric & freezer paper.

Pulling on two opposite sides of the applique will pop the freezer paper out of the stitching so you can reach in and pull out the paper.

I removed the top layer of paper from behind the windows then with tiny scissors, I cut away the background fabric inside the stitching leaving about 1/4″ seam allowance.

Next I cut slits in the car (black) fabric.

I could then see the paper and carefully pull it out.

Next I did the same thing behind the wheels.

I think the rest of the paper removal is self explanatory.

I used the point of these scissors to remove the paper in the tiny tree trunk.

I pressed wet block flat with my fingers just to be sure it dries as flat as possible, not distorted.

The block is now under the ceiling fan drying!

Don’t try to iron it to dry it, you’ll distort the block.

Once it’s dry I will trim up my wicked looking seam allowances,

spray it with Mary Ellen’s Best Press & press it, then it will look like new! (I hope lol)

I’m not sure why I find this so exciting, but I do.

I can’t wait to see it finished!

That’s #1 of 3…

Let me know if you have any questions about this process.

I want you to enjoy it as I do!

When you get your blocks made please share them with us on my Facebook group here: https://www.facebook.com/groups/SewingWithSusan

I’ll be back tomorrow with Day 10 blocks.

Just Keep Sewing…

Susan