Dresden Quilt Workshop Quilt-Along

Dresden Quilt Workshop Quilt-Along Final Week, #26

Final Week, # 26

Well, this is it;

the final week of assembling the Dresden Quilt Workshop Sampler.

Thanks to those of you still posting & sending the pics

of your completed tops!

Our Facebook group, Dresden Quilt Workshop,

is seeing the lovely quilt tops being finished &

I’m honored that so many quilters wanted to make this quilt with me!


I’ve been enjoying seeing your completed tops,

so thank you for sending the pics to our group!

This last step is to add a border to your quilt.

If you remember, at the beginning of this project (August 6, 2018)

I suggested to those using the Circulus & Lollies Sweet

to cut 3″ strips of each of the 6 stripe print fabrics (plus 1 more)

so you could see all of the prints at once.
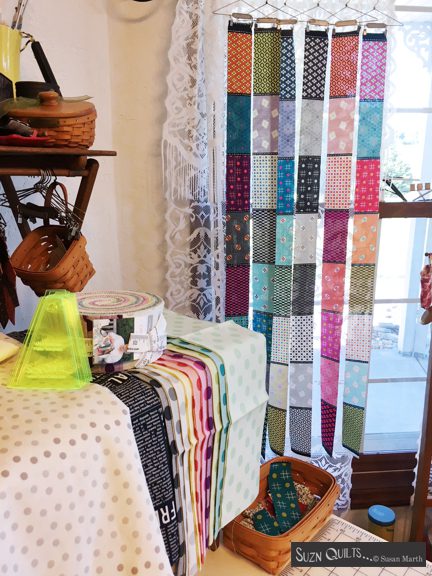
Now is the time to use those 3″ strips.

I first pieced them together & then sewed them to the sides of the quilt,

then I sewed them to the top & bottom.

If you’re not using the Circulus & Lollies Sweet collection,

you have lots of options.

By the way the top should measure 57 1/2″ x 57 1/2″.

Although 57 is not a prime number,

it’s factors are 3 & 19,

not great dimensions for border pieces.

As some of you are already figuring out,

if you want to cut rectangles and

not have cut off rectangles the math is weird!

  1. You can cut 7 strips 3″ x width of fabric of the same fabric & piece them together to make your border.
  2. You can replicate the stripes of the Lollies Sweet and cut 3″ x 5 1/2″ rectangles & make your own stripe fabric.
  3. If you want to avoid the rectangles not being symmetrical around your quilt you can add an inner border. If you bring the size of the quilt up to 60″ you have lots of options for factors of 60: 1,2,3,4,5,6,10,12,15,20,30,60. Not hard math!!!

For the inner border, cut & piece strips to make

-2 strips 2″ x 57 1/2″ (sides) &

-2 strips 2″ x 60 1/2″ (top & bottom).

Sew these to the quilt.

Next, cut 50 rectangles 3″ x 5 1/2″.

Sew them into 2 rows of 12 rectangles (sides) &

2 rows of 13 rectangles (top & bottom).

Sew these to the quilt.

& voila~~~

Now to get it quilted!

Tamara did a great job on mine.

I’m sure she would love to quilt yours too.

Contact her at their shop, Itch’n to be Stitch’n.

Thanks for quilting along with me!

When you finish yours, send pics to the group

so we can enjoy them too.

Are you going to join in the fun to make another quilt with us?

Next week we’ll be starting “A Merry Christmas To You”.

See details here.

Just Keep Sewing…

Susan

Dresden Quilt Workshop Quilt-Along

Dresden Quilt Workshop Quilt-Along Week #25

Week # 25


Thanks to those of you still posting & sending the pics

of your completed tops!

If you’re not part of my Facebook group, Dresden Quilt Workshop,

head over there & sign up so you too can share & see all the

lovely quilt tops being finished & shown.

Just one more week…

We will be sewing the 4 sections of the quilt together this week.

Here are the numbered steps.

Notice the numbers are once again carried over from the previous steps.

I was so excited when I was finally able to piece my completed sections together!

I hope you feel the same way.

I think a lot of you do, since you’re not waiting for my instructions!!!

I’m sure enjoying seeing your tops being completed,

so thanks for sending the pics to our group!

I pressed each seam to the path of least resistance here too.

Just one more week.

Week #26 we’ll add the border.

Send pics to the group!

Just Keep Sewing…

Susan

Dresden Quilt Workshop Quilt-Along

Dresden Quilt Workshop Quilt-Along Week #24

Week # 24


Thanks to those of you still posting & sending the pics of your completed sections & completed tops!

If you’re not part of my Facebook group, Dresden Quilt Workshop,

head over there & sign up so you too can share & see all the

lovely quilt tops being finished & shown.

This week (again for those of you not already finished….)

will be another section of the quilt to assemble.

This is section 4.

Here are the steps to sew it together.

Notice the numbers are once again carried over from the previous steps.

This time there are a few small vertical seams to sew together.

Then the horizontal seams will complete this section.

I hope you’re enjoying the final steps to soon complete the entire quilt top!

As mentioned earlier in the assembly instructions,

I pressed each seam to the path of least resistance.

Some seams were pressed open to alleviate bulk.

Please send pics of your progress.

Send pics to the group!

Just Keep Sewing…

Susan

Dresden Quilt Workshop Quilt-Along

Dresden Quilt Workshop Quilt-Along Week #23

Week # 23


Thank you for posting & sending the pics of your blocks.

Now that the Christmas holiday season is over, it’s time to get back to it!

If you’re not part of my Facebook group, Dresden Quilt Workshop,

head over there & sign up so you too can share & see all the

lovely quilt tops being finished & shown.

This week (again for those of you not already finished….)

will be another section of the quilt to assemble.

This is section 3.

It’s the bottom of the quilt.

The seam numbers continue from Sections 1 & 2.

There are a few small horizontal seams to sew

then the vertical seams will complete this section.

As mentioned earlier in the assembly instructions,

I pressed each seam to the path of least resistance.

Some seams were pressed open to alleviate bulk.

This is probably the hardest part of making this quilt.

Don’t get overwhelmed.

Just sew a bit at a time and set it aside if it gets overwhelming.

This is why I wrote the assembly into so many steps,

as to not overwhelm anyone.

You’ve come too far to get overwhelmed now!

I can’t wait to see more pics of your progress.

Send pics to the group!

Just Keep Sewing…

Susan

Dresden Quilt Workshop Quilt-Along

Dresden Quilt Workshop Quilt-Along Week #22

Week # 22


Thank you for posting & sending the pics of your blocks

& now completed quilt tops too!

& during the Christmas holiday season when I know you’re very busy.

If you’re not part of my Facebook group, Dresden Quilt Workshop,

head over there & sign up so you too can share & see all the

lovely quilt tops being shown complete, weeks early!

This week (for those of you not already finished….)

will be another section of the quilt to assemble.

This is section 2.

I’ve numbered the seams as I sewed them.

Note: seam #16 is a partial seam.

This means that I started to sew the seam as indicated by arrow,

but then stopped a few inches later.

The seam will be completed later as more of the section is assembled.

You’ll see farther along…

Seam #18 is also a partial seam.

After you sew seams #19-21,

go back & finish the partial seams #16 & #18.

I can’t wait to see more pics of your progress.

Send pics to the group!

Just Keep Sewing…

Susan

Dresden Quilt Workshop Quilt-Along

Dresden Quilt Workshop Quilt-Along Week #21

Week # 21

Thank you for posting & sending the pics of your blocks & now completed quilt tops too!

If you’re not part of my Facebook group, Dresden Quilt Workshop,

head over there & sign up so you too can share & see all the progress.

I can’t believe how many of you have already posted pics of your completed top!

You are quilters after my own heart!!!!

Thanks for sewing & thanks for sharing too.

I don’t ever open my Christmas gifts early,

but I’ve never understood how a quilter could make just 1 block of a quilt a week

& not want to keep sewing on it!

For those of you who have not finished this step…

This week starts assembly of the quilt.

This is section 1.

This is the order number that I sewed the blocks together to complete the section.

I assessed each seam individually to determine which way to press it.

I went with the path of least resistance for each seam.

Some were pressed open to reduce bulk.

Sew these blocks into horizontal rows,

then sew these rows together to complete Section 1.

I can’t wait to see the pics of your progress taking shape now.

Send pics to the group!

Just Keep Sewing…

Susan

Dresden Quilt Workshop Quilt-Along

Dresden Quilt Workshop Quilt-Along Week #20

Week # 20


Thank you for posting & sending the pics of your blocks!

If you’re not part of my Facebook group, Dresden Quilt Workshop,

head over there & sign up so you too can share & see all the progress.

This is the last week that we will be making blocks!

We will again refer to

All Roads Lead to Dresden page 80.

This week there will be 2 final Tiny Dresden plates to make

& then you’ll sew them into Dresden Puzzle blocks.

#1

#2

After that there are 5 more flying geese

that will hold them together.

And that’s it!

Hopefully between the Christmas shopping, parties & other prep work

you’ll be able to fit a bit of little Dresden sewing in.

No stress however, you’ll have plenty of time after the family has gone

to get back on track after Christmas & the new year.

Just Keep Sewing…

Susan

Dresden Quilt Workshop Quilt-Along

Dresden Quilt Workshop Quilt-Along Week #19

Week # 19

Thank you for posting & sending the pics of your blocks!

If you’re not part of my Facebook group, Dresden Quilt Workshop,

head over there & sign up so you too can share & see all the progress.

This week we will again refer to

All Roads Lead to Dresden page 80.

So, the Tiny Dresden plates that you made last week?

You’ll be making a home for them!

Quilt love!

I know, I already told you last week how much I love this block.

It makes me smile every time I see it.

Less than 2 weeks until Christmas, so if you’re running short on time, we understand.

I hope this awesome block makes you work a bit harder to get to your sewing machine!

Just Keep Sewing…

Susan

Dresden Quilt Workshop Quilt-Along

Dresden Quilt Workshop Quilt-Along Week #18

Week # 18

Please keep posting & sending me pics of your blocks!

If you’re not part of my Facebook group, Dresden Quilt Workshop,

head over there & sign up so you too can share & see all the progress.

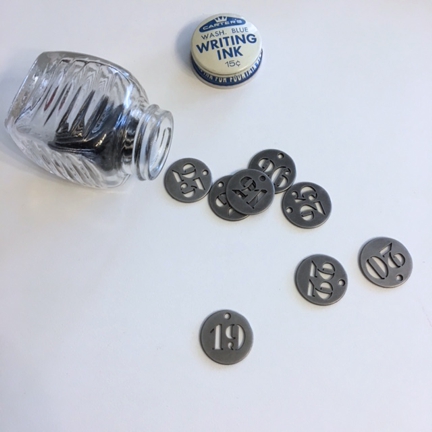
Wow, look how few numbers are left outside the bottle this week!

This week we will again refer to

All Roads Lead to Dresden page 80.

We will start my very favorite portion

of the Dresden Quilt Workshop Sampler Quilt.

(Don’t tell anyone, but this is actually where I

started with my Dresden Quilt Workshop Sampler!)

I did start the fabric selection with the “Quilts” block,

but then I started choosing fabrics & actually sewing this portion first.

I absolutely love this big block or portion of the quilt.

It has SO MUCH MOTION, that it’s hard for me to stop looking at it!

If you look closely,

you’ll notice that I used nearly every fabric from the collection is this block!

OK, not really, but yes, really!

Each pair of large flying geese points is a different pink or green fabric.

You have to look close because the green background prints have both the gray and black “warped circles” & the opposite “pink” pairs of points are either the hot pink print or the salmon.

Not the same fabrics as they initially appear.

FUN (for me anyway!)

The smaller flying geese “teal” background print is actually more than one fabric

& the black/gray fabric is really 4 different fabrics.

Necessity is the mother of invention… as they say.

It’s not like I set out to add so many fabrics,

but when I started this quilt I was going to use just 1/2 yard of each stripe print.

There wasn’t enough of 1 pink or 1 green to make all 4 points of the huge flying geese,

so I improvised with what I thought would work well.

As I got further into the quilt I decided I would need to use a whole yard.

This quilt is bigger than it seems and uses a lot of fabrics, yay!

Anyway, I’m so glad that I started out that way.

If I hadn’t, this quilt wouldn’t have nearly as much movement or character.

Fate?

I think so!

It was really fun to design the initial “All Roads Lead To Dresden” Quilt,

& even more fun to redesign it in the Circulus & Lollies Sweet collection!

BTW, I still have a few

kits available with the Circulus & Lollies Sweet collection on my website.

So, back to this week’s task…

We’ll just be making 4 Tiny Dresden plates

& 1 Mini Dresden plate.

That’s it!

No need to even applique them to their backgrounds until next week.

When I was setting up the schedule for this quilt-along

I knew we’d be busy with the holidays

& didn’t want anyone to get overwhelmed with something that should be fun!

Suzanne…

Don’t stress over this too!

I hope you can enjoy a sidebar to your sewing machine

& play with some fabric in between the shopping,

partying & caroling or whatever you do to get into the holiday spirit.

Just Keep Sewing…

Susan

Dresden Quilt Workshop Quilt-Along

Dresden Quilt Workshop Quilt-Along Week #17

Week # 17

Please keep posting & sending me pics of your blocks!

If you’re not part of my Facebook group, Dresden Quilt Workshop,

head over there & sign up so you too can share & see all the progress.

This week we will refer to

 All Roads Lead to Dresden page 80.

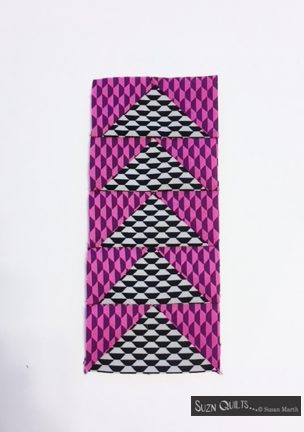
This week we will be making a bunch of flying geese filler blocks.

And look, just one more area of the quilt to make after this week!

Since some of these flying geese segments run into each other,

I’ve given each segment a number.

Then, below I tell you how many flying geese to make for that segment.

For segment 1, you will need to make 6 flying geese.

Segment 2 make 6.

Segment 3 make 10.

Segment 4 make 11.

Segment 5 make 7.

Segment 6 make 10.

That’s it!

No Dresden plates this week.

How is your Christmas shopping & decorating going?

I’ve started my Christmas shopping

& we’re mid-Christmas decorating…

Since I’m still photographing one of my new quilt pattern samples,

my living room is a bit chaotic;

semi-Christmas, semi-photo shoot…

Soon I’ll be done with the photography

& eventually I’ll also have the Christmas decorating finished.

Shopping… I’ll be done by Christmas Eve, for sure.

Thanks for quilting along with me!

Just Keep Sewing…

Susan