Dresden Quilt Workshop Quilt-Along

Dresden Quilt Workshop Quilt-Along Week #25

Week # 25


Thanks to those of you still posting & sending the pics

of your completed tops!

If you’re not part of my Facebook group, Dresden Quilt Workshop,

head over there & sign up so you too can share & see all the

lovely quilt tops being finished & shown.

Just one more week…

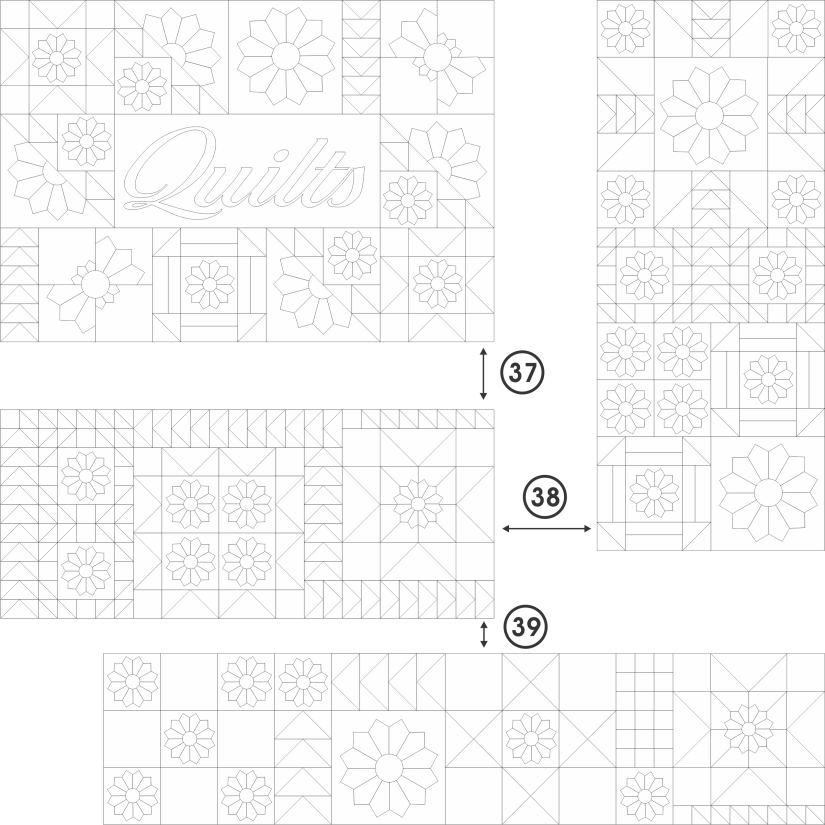
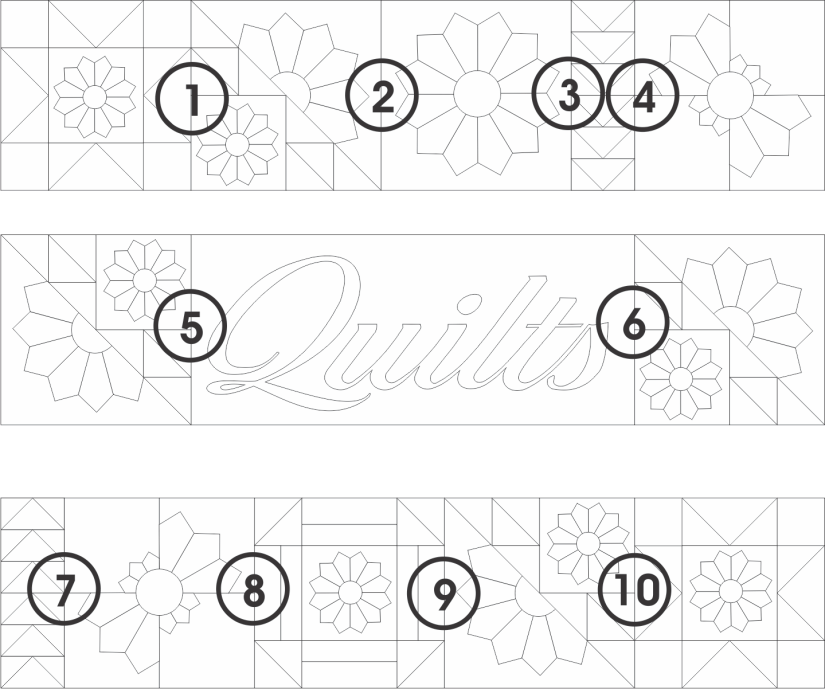
We will be sewing the 4 sections of the quilt together this week.

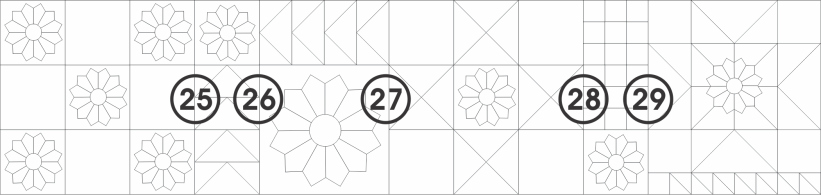
Here are the numbered steps.

Notice the numbers are once again carried over from the previous steps.

I was so excited when I was finally able to piece my completed sections together!

I hope you feel the same way.

I think a lot of you do, since you’re not waiting for my instructions!!!

I’m sure enjoying seeing your tops being completed,

so thanks for sending the pics to our group!

I pressed each seam to the path of least resistance here too.

Just one more week.

Week #26 we’ll add the border.

Send pics to the group!

Just Keep Sewing…

Susan

Dresden Quilt Workshop Quilt-Along

Dresden Quilt Workshop Quilt-Along Week #24

Week # 24


Thanks to those of you still posting & sending the pics of your completed sections & completed tops!

If you’re not part of my Facebook group, Dresden Quilt Workshop,

head over there & sign up so you too can share & see all the

lovely quilt tops being finished & shown.

This week (again for those of you not already finished….)

will be another section of the quilt to assemble.

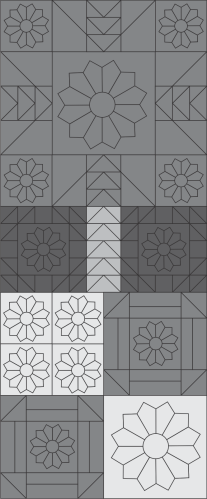
This is section 4.

Here are the steps to sew it together.

Notice the numbers are once again carried over from the previous steps.

This time there are a few small vertical seams to sew together.

Then the horizontal seams will complete this section.

I hope you’re enjoying the final steps to soon complete the entire quilt top!

As mentioned earlier in the assembly instructions,

I pressed each seam to the path of least resistance.

Some seams were pressed open to alleviate bulk.

Please send pics of your progress.

Send pics to the group!

Just Keep Sewing…

Susan

A Giveaway!, New Quilt Book

And The Strip Quilt Secrets Winner Is…

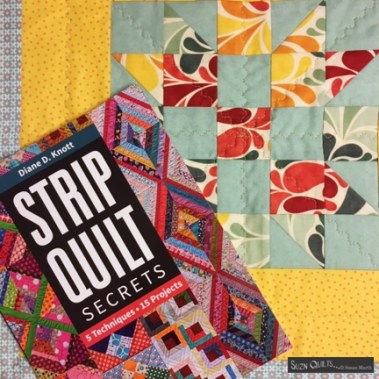
Thanks for all the kind comment about Strip Quilt Secrets!

It was fun drawing a #.

Our winner is:

#58 Susan S 

“I’m glad you are feeling better about scrap quilts!

I have so many scraps I could use on Diane’s quilts!”

I hope you do make some quilts with all of those scraps.

Now you’ll have no excuse not to.

I hope all of you who didn’t win will visit Diane’s website

or your favorite quilt shop to get a copy

then make your own scrappy quilts.

Just Keep Sewing…

Susan

A Giveaway!, Blog hop

Strip Quilt Secrets – My Blog Day

Hello,

Strip Quilt Secrets

Blog Hoppers!

Welcome to my blog!

I hope you’ve been enjoying seeing what

Strip Quilt Secrets is all about.

I love it when I pick up a quilting book and learn something new.

Since I’m not a scrappy quilter I learned a LOT about buying fabric, cutting strips & even the best ways to store your fabrics for scrap quilting.

I never even gave thought to these things before now.

No wonder her scrappy quilts are so beautiful & precise!

In reading her book cover to cover

(can’t tell you the last time, if ever, I’ve done that.)

I was fascinated by Diane’s instructions to cut triangles from

2 1/2″ (jelly roll) strips

to make half-square triangles that measure 2 1/2″ (unfinished)!

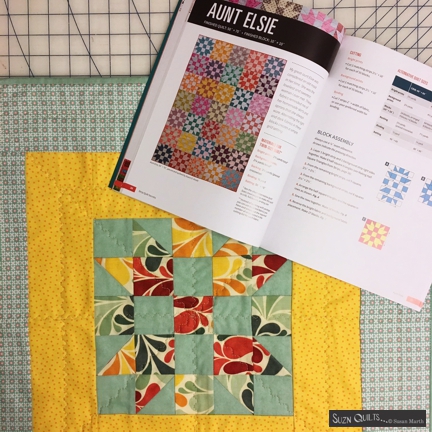
I rather like her Aunt Elsie Quilt.

And although I don’t have an Aunt Elsie,

my husband’s dear grandmother was named Elsie.

I decided to try out Diane’s “Triangles from Strips” technique

& make an Elsie block.

I was amazed that the pressed half-square triangle was exactly 2 1/2″!Pretty awesome!
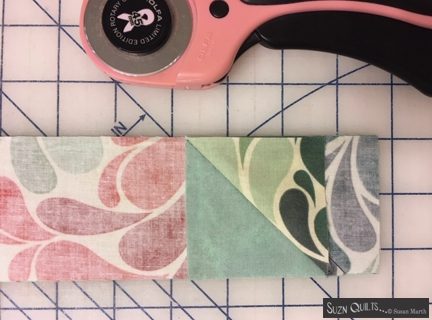
Diane also suggests the best way to press the hst’s to get them the flattest they can be.
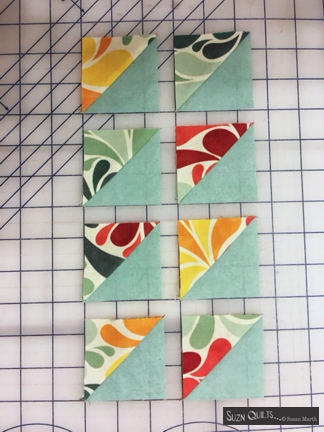
I quickly made the 8 hst’s

& cut a few 2 1/2″ squares from the same 2 1/2″ strips for the block.

Before I sewed the squares together I decided to audition the block both ways…
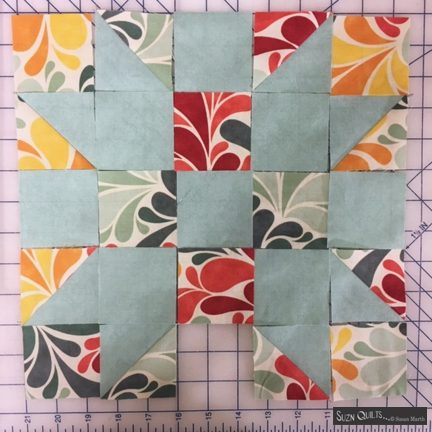
Just one more 2 1/2″ square could change the whole look of the block.

I decided to sew it as first imagined.
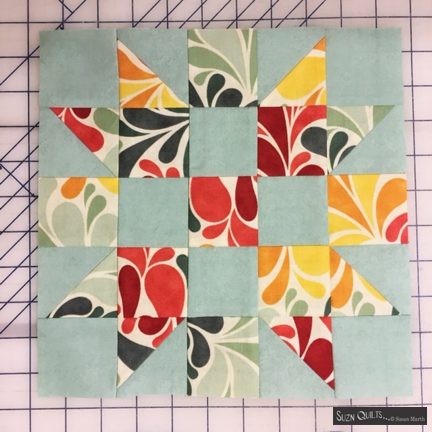
But if you know me…
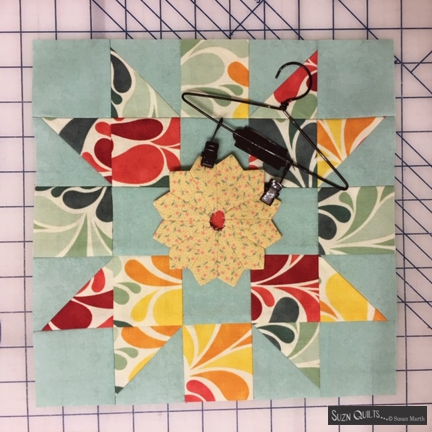
You know that I literally cannot imagine sewing something without little Dresden plates!!!

Instead I belabored a couple of border fabrics

then completed a preemie quilt top.

Once again I contemplated including a Tiny Dresden plate in the center…

These things can literally go just about ANYWHERE!

But alas I quilted & bound it without the Dresden addition.

How cute is just one little Aunt Elsie block?
I have to say, these tips have changed the way I think about scrappy quilts!

They’re not scary at all anymore.

Thanks, Diane!

Would you like a chance to win a copy of Strip Quilt Secrets?

(Sorry but the drawing is closed.)

Go to the

TOP

of this blog post & leave me a comment

to be entered into a drawing for your own copy of Strip Quilt Secrets.

I’ll draw Sunday by 6 p.m.

Just Keep Sewing…

Susan


Dresden Quilt Workshop Quilt-Along

Dresden Quilt Workshop Quilt-Along Week #23

Week # 23


Thank you for posting & sending the pics of your blocks.

Now that the Christmas holiday season is over, it’s time to get back to it!

If you’re not part of my Facebook group, Dresden Quilt Workshop,

head over there & sign up so you too can share & see all the

lovely quilt tops being finished & shown.

This week (again for those of you not already finished….)

will be another section of the quilt to assemble.

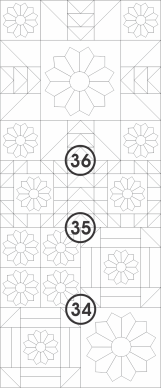
This is section 3.

It’s the bottom of the quilt.

The seam numbers continue from Sections 1 & 2.

There are a few small horizontal seams to sew

then the vertical seams will complete this section.

As mentioned earlier in the assembly instructions,

I pressed each seam to the path of least resistance.

Some seams were pressed open to alleviate bulk.

This is probably the hardest part of making this quilt.

Don’t get overwhelmed.

Just sew a bit at a time and set it aside if it gets overwhelming.

This is why I wrote the assembly into so many steps,

as to not overwhelm anyone.

You’ve come too far to get overwhelmed now!

I can’t wait to see more pics of your progress.

Send pics to the group!

Just Keep Sewing…

Susan

A Giveaway!, Blog hop

Strip Quilt Secrets Blog Hop Begins…

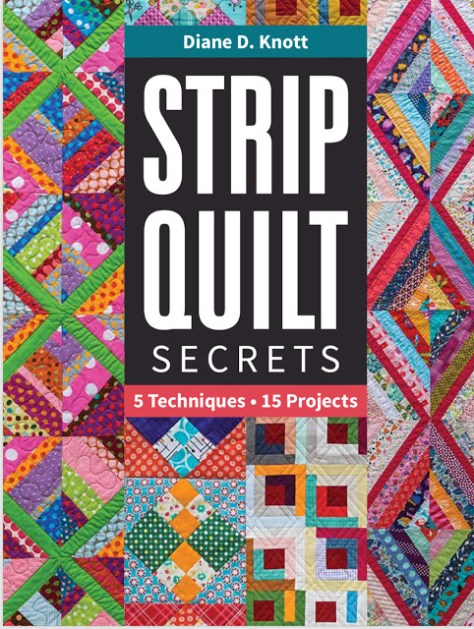
I’m excited to announce the start of

Diane D. Knott’s new book,

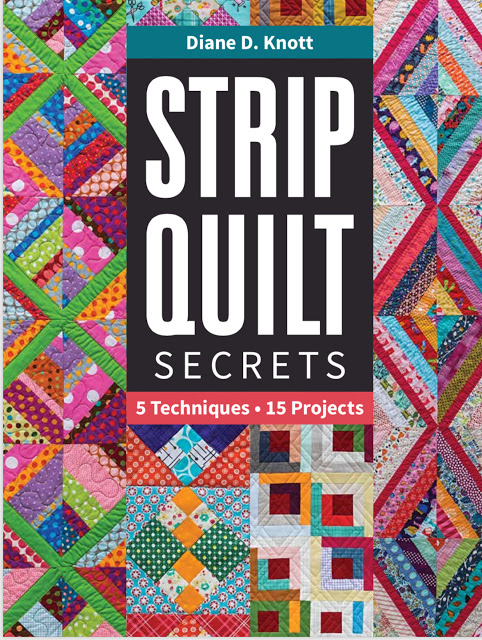
Strip Quilt Secrets,

blog hop kickoff!

Here’s the schedule for the blog hop:
Friday January 4 – C&T
Saturday January 5 – Tanya
Sunday January 6 – Val
Monday January 7 – Lori
Tuesday January 8 – Heather
Wednesday January 9 – Audrey
Thursday January 10 – Me, Susan R. Marth
Visit each stop along the blog hop for a chance to win a signed copy of the book!
The winners will be announced on Monday January 14.
I’m a day behind…
(I just got my computer back from getting a huge update of storage space & clean-out.)
Get over to the C&T blog to start seeing all the beautiful strip quilts.
Then hurry to Tanya’s blog for today’s stop.
Good luck winning a signed copy of your very own!
Jut Keep Sewing…
Susan
Dresden Quilt Workshop Quilt-Along

Dresden Quilt Workshop Quilt-Along Week #22

Week # 22


Thank you for posting & sending the pics of your blocks

& now completed quilt tops too!

& during the Christmas holiday season when I know you’re very busy.

If you’re not part of my Facebook group, Dresden Quilt Workshop,

head over there & sign up so you too can share & see all the

lovely quilt tops being shown complete, weeks early!

This week (for those of you not already finished….)

will be another section of the quilt to assemble.

This is section 2.

I’ve numbered the seams as I sewed them.

Note: seam #16 is a partial seam.

This means that I started to sew the seam as indicated by arrow,

but then stopped a few inches later.

The seam will be completed later as more of the section is assembled.

You’ll see farther along…

Seam #18 is also a partial seam.

After you sew seams #19-21,

go back & finish the partial seams #16 & #18.

I can’t wait to see more pics of your progress.

Send pics to the group!

Just Keep Sewing…

Susan

My Life

Happy New Sewing Year 2019!

Happy New To You!

I hope the new year brings you good health, prosperity

& lots of sewing time too!

Not yet this year,

but the past two days

I’ve been catching up on some very delinquent sewing of Robin’s Wreaths:

I have the applique of the 2 blocks from the November issue done.

I have the applique of the 2 blocks from the January issue done too.

My Apliquick Bars are a true blessing!

There are lots of videos online if you need to learn how to use them the way they’re intended.

Since I use them often on the circles of my Dresden plates,

I sometimes have to look at a video to remind myself

how easy it is to do a corner the proper way!

I know, it sounds dumb that I remember it’s easy,

but don’t remember how to do it the easy way!

I no longer hate, despise or abhor freezer paper applique

& I think I do a pretty nice job too!

Wondering a bit why I’m punishing myself by making a tiny version…

(I chose to not enlarge the design,

but instead using it at the scale printed in the AG magazine)

& LOVING the results.

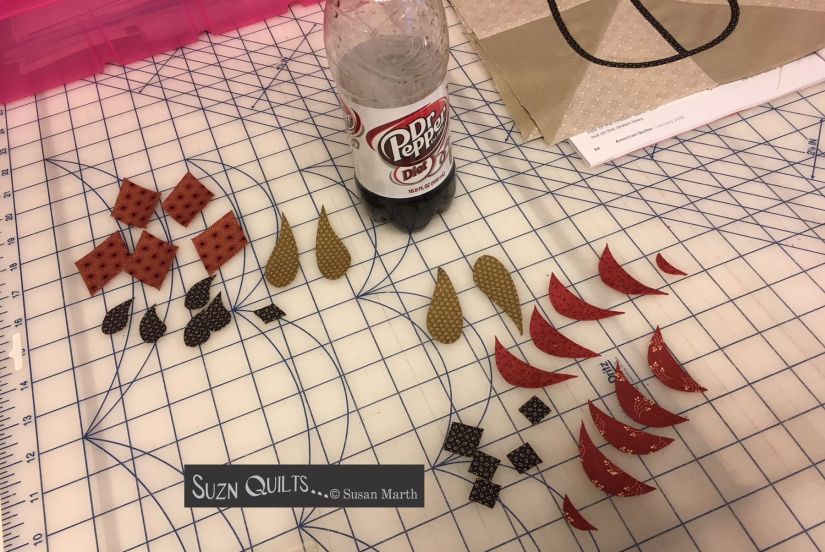
I’d also like to thank Diet Dr. Pepper…

I hope you’re able to squeeze in some happy sewing time!

Best Wishes for 2019!

Thanks for sewing with me & supporting Suzn Quilts!

Just Keep Sewing…

Susan

Dresden Quilt Workshop Quilt-Along

Dresden Quilt Workshop Quilt-Along Week #21

Week # 21

Thank you for posting & sending the pics of your blocks & now completed quilt tops too!

If you’re not part of my Facebook group, Dresden Quilt Workshop,

head over there & sign up so you too can share & see all the progress.

I can’t believe how many of you have already posted pics of your completed top!

You are quilters after my own heart!!!!

Thanks for sewing & thanks for sharing too.

I don’t ever open my Christmas gifts early,

but I’ve never understood how a quilter could make just 1 block of a quilt a week

& not want to keep sewing on it!

For those of you who have not finished this step…

This week starts assembly of the quilt.

This is section 1.

This is the order number that I sewed the blocks together to complete the section.

I assessed each seam individually to determine which way to press it.

I went with the path of least resistance for each seam.

Some were pressed open to reduce bulk.

Sew these blocks into horizontal rows,

then sew these rows together to complete Section 1.

I can’t wait to see the pics of your progress taking shape now.

Send pics to the group!

Just Keep Sewing…

Susan